EasyManua.ls Logo

Yamaha Ro8-D - User Manual

Yamaha Ro8-D
24 pages
Print Icon
To Next Page IconTo Next Page
Loading...
EnglishDeutschFrançaisEspañolPortuguêsItalianoРусскийЁ᭛日本語
Owner’s Manual
Bedienungsanleitung
Mode d’emploi
Manual de instrucciones
Manual do Proprietário
Manuale di istruzioni
Руководство пользователя
Փ⫼䇈ᯢкՓ⫼䇈ᯢк
取扱説明書
JA
ZH
RU
IT
PT
ES
FR
DE
EN

Questions and Answers

  • M
    Michelle WallsJul 29, 2025
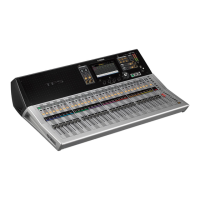
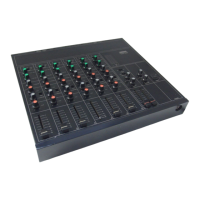
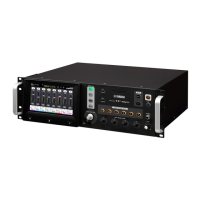
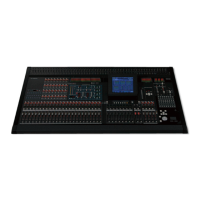
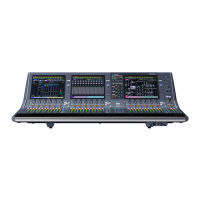
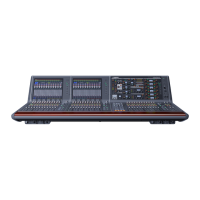
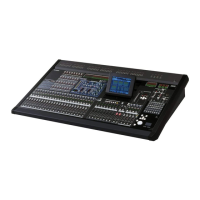
    What to do if no sound is heard from Yamaha Music Mixer?
    • R
      Roberta WhiteJul 29, 2025
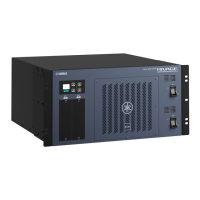
      If no sound is coming from your Yamaha Music Mixer, first, ensure all cables are properly connected. If you are using Ro8-D devices, confirm that the Ro8-D-native device has been started, especially if the DIP switches are set to REFRESH. Also, check that the output on the Ro8-D-native device is not muted and unmute it if it is.
  • W
    williamguerreroAug 3, 2025
    What to do if Yamaha Ro8-D is not receiving an input signal?
    • L
      Lisa MillerAug 3, 2025
      If your Yamaha Music Mixer is not receiving an input signal, ensure that the input cables are correctly connected. Also, verify that the source device is outputting a signal and that the SIG indicators on the appropriate channels light up. Check that the internal head amplifier gain is set to an appropriate level. If you're using DIP switches set to REFRESH, make sure the Ri8-D-native device has started up to send the setting to the Ri8-D.
  • D
    danielcruzAug 7, 2025
    How to troubleshoot Yamaha Music Mixer when the power won’t turn on?
    • M
      Madison SantiagoAug 7, 2025
      If the power indicator on your Yamaha Music Mixer doesn't light up and the power won’t turn on, first, make sure the power cable is properly connected. Then, check that the [POWER] switch is turned ON. If it still doesn't turn on, consult your Yamaha dealer.
  • M
    Michael MooreAug 11, 2025
    What to do if the input level is too low on Yamaha Ro8-D?
    • T
      Timothy CraigAug 11, 2025
      If the input level on your Yamaha Music Mixer is too low, and you're using a condenser microphone, turn the [+48V MASTER] switch ON. Additionally, ensure phantom power for the corresponding channel(s) is ON from the Ri8-D-native device. Verify that the internal head amplifier gain is set to an appropriate level.
  • E
    Emma WolfAug 16, 2025
    Why adjusting head amp gain doesn't change audio level on Yamaha Ro8-D Music Mixer?
    • F
      Frank VillaAug 16, 2025
      If adjusting the internal head amp gain on your Yamaha Music Mixer does not change the audio level, the Gain Compensation function might be turned on. If you are not using the Gain Compensation function, turn it off.
  • C
    Curtis HowellAug 20, 2025
    What to do if the head amp cannot be controlled on Yamaha Music Mixer?
    • S
      Sarah MackAug 20, 2025
      If the head amp cannot be controlled on your Yamaha Music Mixer, ensure that the Ri8-D is mounted on the RACK of the Ri8-D-native device.
  • M
    michelle89Aug 25, 2025
    What to do if adjustment of UNIT ID rotary switch is ineffective on Yamaha Music Mixer?
    • M
      Michael MyersAug 25, 2025
      If adjustments to the [UNIT ID] rotary switch or DIP switch settings on your Yamaha Music Mixer seem ineffective, you may have adjusted the setting while the power was ON. Turn the power OFF, then change the setting.

Summary

Explanation of Graphical Symbols

IMPORTANT SAFETY INSTRUCTIONS

FCC INFORMATION (U.S.A.)

Important Notice: Do Not Modify This Unit

Warning against unauthorized modifications to the unit.

Important Connection Advice

Use high-quality shielded cables and follow installation instructions.

FCC Compliance Statement

Product tested and complies with FCC Part 15 regulations.

Compliance Information Statement

Important Notice for the United Kingdom

Connecting the Plug and Cord

Instructions for wiring the mains lead, emphasizing earthing.

PRECAUTIONS

Power Supply and Cord Safety

Safety guidelines for power cord connection, handling, and voltage.

Device Handling and Environmental Safety

Instructions on preventing damage from water, dust, heat, and improper placement.

Fire Safety and Abnormality Handling

Precautions against fire hazards and steps to take in case of device abnormality.

Maintenance and Connection Procedures

Guidelines for cleaning, connecting devices, and performing maintenance.

Information for Users on Collection and Disposal of Old Equipment

Introduction

Features

Overview of key product features like Dante network capability and compact chassis.

Firmware Updates

Information on updating unit and Dante module firmware for improved performance.

Precautions for Rack Mounting

Guidelines for ensuring proper ventilation and preventing overheating in rack installations.

About Dante

Controls and Functions

Front Panel Overview

Details of buttons, indicators, and connectors on the front panel.

SYNC Indicators and DIP Switches

Configuration of Dante synchronization indicators and startup behavior via DIP switches.

Power Switches and Startup Modes

Operation of power switches, indicators, and startup mode selection.

Rear Panel

AC Power Connector

Instructions for connecting the AC power cord with a special latching mechanism.

Dante Network Connectors

Details on RJ45 connectors for Dante network connections and redundant setup.

Network Status Indicators

Explanation of indicators showing network communication status and Gigabit Ethernet connection.

Chassis Grounding

Information on the grounding screw for chassis connection and noise prevention.

About Connections

Daisy Chain Network

Wiring scheme where devices connect sequentially without a network switch.

Star Network

Network topology connecting devices to a central switch for large-scale setup.

About Redundant Networks

Using primary and secondary circuits for increased communication stability.

About Dante Controller

Head Amp Control

Control from an Ri8-D-native Device

How to control head amplifiers from compatible Yamaha digital mixing consoles.

Control from Non-Native Devices

Configuration for controlling Ri8-D as AD8HR units from non-native devices.

Head Amplifier Parameters

List of parameters for head amplifiers that can be monitored and controlled.

Setting the DIP Switches

Specific DIP switch settings for controlling the unit as AD8HR.

Troubleshooting

Troubleshooting Common Issues

Table listing symptoms, causes, and possible solutions for common operational issues.

Indicator and Message Interpretation

Interpretation of warning, error, and information indicators and their meanings.

Specifications

General Product Specifications

Technical details including sampling frequency, signal delay, frequency response, and power requirements.

Analog Input Specifications

Technical specifications for the analog input channels of the Ri8-D unit.

Analog Output Specifications

Technical specifications for the analog output channels of the Ro8-D unit.

Digital Input;Output Specifications

Specifications for digital input and output interfaces, including Dante.

Dimensions

Important Notice: Guarantee Information

Yamaha Ro8-D Specifications

General IconGeneral
BrandYamaha
ModelRo8-D
CategoryMusic Mixer
LanguageEnglish

Related product manuals