Periodic maintenance and adjustment
6-37
1
2
3
4
5
6
7
8
9
10
11
12
13
14
3. Remove the burnt-out bulb by
pushing it in and turning it counter-
clockwise.
4. Insert a new bulb into the socket,
push it in, and then turn it clock-
wise until it stops.
5. Install the socket (together with the
bulb) by pushing it in and turning it
clockwise until it stops.
6. Install the headlight unit by install-
ing the screws.
EAU24135
Replacing the tail/brake light
bulb
1. Remove the tail/brake light lens by
removing the screws.
2. Remove the burnt-out bulb by
pushing it in and turning it counter-
clockwise.
3. Insert a new bulb into the socket,
push it in, and then turn it clock-
wise until it stops.
4. Install the lens by installing the
screws. NOTICE: Do not over-
tighten the screws, otherwise
the lens may break.
[ECA10682]
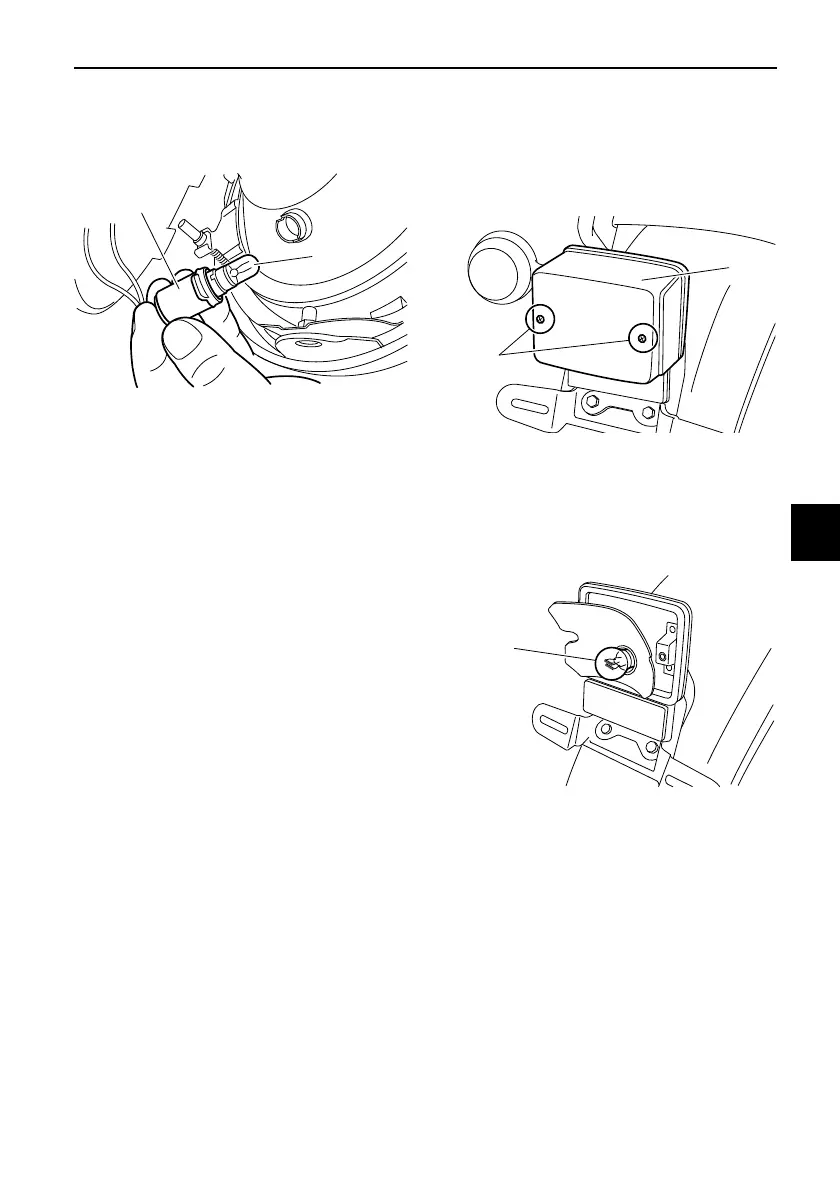
1. Auxiliary light bulb socket
2. Auxiliary light bulb
1. Screw
2. Tail/brake light lens
1. Tail/brake light bulb
2RD-28199-E1.book 37 ページ 2015年9月3日 木曜日 午後3時42分