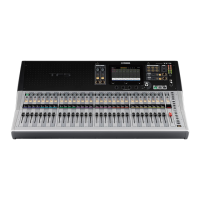
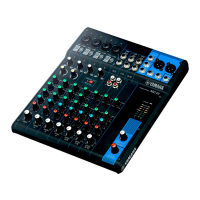
TF5/TF3/TF1
46
1. Side Pad R Assembly, Side Pad L
Assembly
(Time required: About 1 minute each)
1-1 Side Pad R Assembly :
1-1-1 Remove the two (2) screws marked [80A]. The side
pad R assembly can then be removed. (Fig. 1)
1-2 Side Pad L Assembly :
1-2-1 Remove the two (2) screws marked [80B]. The side
pad L assembly can then be removed. (Fig. 1)
* Remove the side pad R assembly and side pad L
assembly in the direction of the arrow in Fig. 1.
2. Control Panel Assembly 24
(Time required: About 5 minutes)
2-1 Remove the side pad R assembly and side pad L
assembly. (See Procedure 1)
2-2 Remove the seven (7) screws marked [30], seven (7)
screws marked [40] and twelve (12) screws marked
[50]. (Fig. 1)
2-3 Open the control panel assembly 24 in the direction
of the arrow in Fig. 2, and fi x it with the panel stay.
(Fig. 2)
* When opening the control panel assembly 24,
check that there are no screws or tools in area A of
Photo 3. Loose items may damage the exterior.
* When you open the control panel assembly 24,
connector or connector assembly to prevent
damage, to be careful not too open the control
panel assembly 24.
2-4 Remove the control panel assembly 24 in the
direction of the arrow in Fig. 3.
*
When installing control panel assembly 24, see Fig. 4.
Be careful not to tuck connector cables inside.
* When installing the control panel assembly 24,
tighten the screws in the order [30]
→
[40]
→
[50].
In each case, tighten screw
a
before tightening
other screws. (Fig. 1)
Precaution in handling the control panel assembly 24.
When placing the assembly with its panel face facing
down, be careful so that the control knobs do not contact
the fl oor.
1. サイドパッド R アッセンブリ、サイドパッ
ド L アッセンブリ
(所要時間:各約 1 分)
1-1 サイドパッド R アッセンブリ:
1-1-1 [80A] のネジ 2 本を外して、サイドパッド R アッ
センブリを外します。(図 1)
1-2 サイドパッドLアッセンブリ:
1-2-1 [80B] のネジ 2 本を外して、サイドパッド L アッ
センブリを外します。(図 1)
※ サイドパッド R アッセンブリとサイドパッドLアッセ
ンブリを取り外す際は、図 1 で示す矢印の方向へ外し
ます。
2. コンパネ Ass'y24
(所要時間:約 5 分)
2-1 サイドパッドRアッセンブリとサイドパッドL
アッセンブリを外します。(1 項参照)
2-2 [30] のネジ 7 本と [40] のネジ 7 本と [50] のネジ
12 本を外します。(図 1)
2-3 図 2 の矢印の方向にコンパネ Ass'y24 を開き、
パネルステーで固定します。(図 2)
※ コンパネ Ass'y24 を開く時は、写真3のAの箇所に、
ネジや工具などが置かれていないことを確認してくだ
さい。外装が傷つく可能性があります。
※ コンパネ Ass'y24 を開く時は、束線やコネクタが破損
しないように、コンパネ Ass'y24 を開きすぎないよう
に注意してください。
2-4 コンパネ Ass'y24 を取り外す際は、図 3 で示す
矢印の方向へ外します。
※ コンパネ Ass'y24 を取り付ける時は、図 4 を参照して
ください。また束線を挟み込まないように注意してく
ださい。
※ コンパネ Ass'y24 を取り付ける時は、[30] → [40] → [50]
の順にネジを締めてください。
各ネジはそれぞれ、
a
のネジを先に締めてから他のネ
ジを締めてください。(図 1)
●
コンパネ Ass'y24 の設置注意
パネル面を下にして置く時は、ノブ等が床に当たり、
変形したり傷が付かないように置いてください。