CRANKSHAFT
5-41
EAM30491
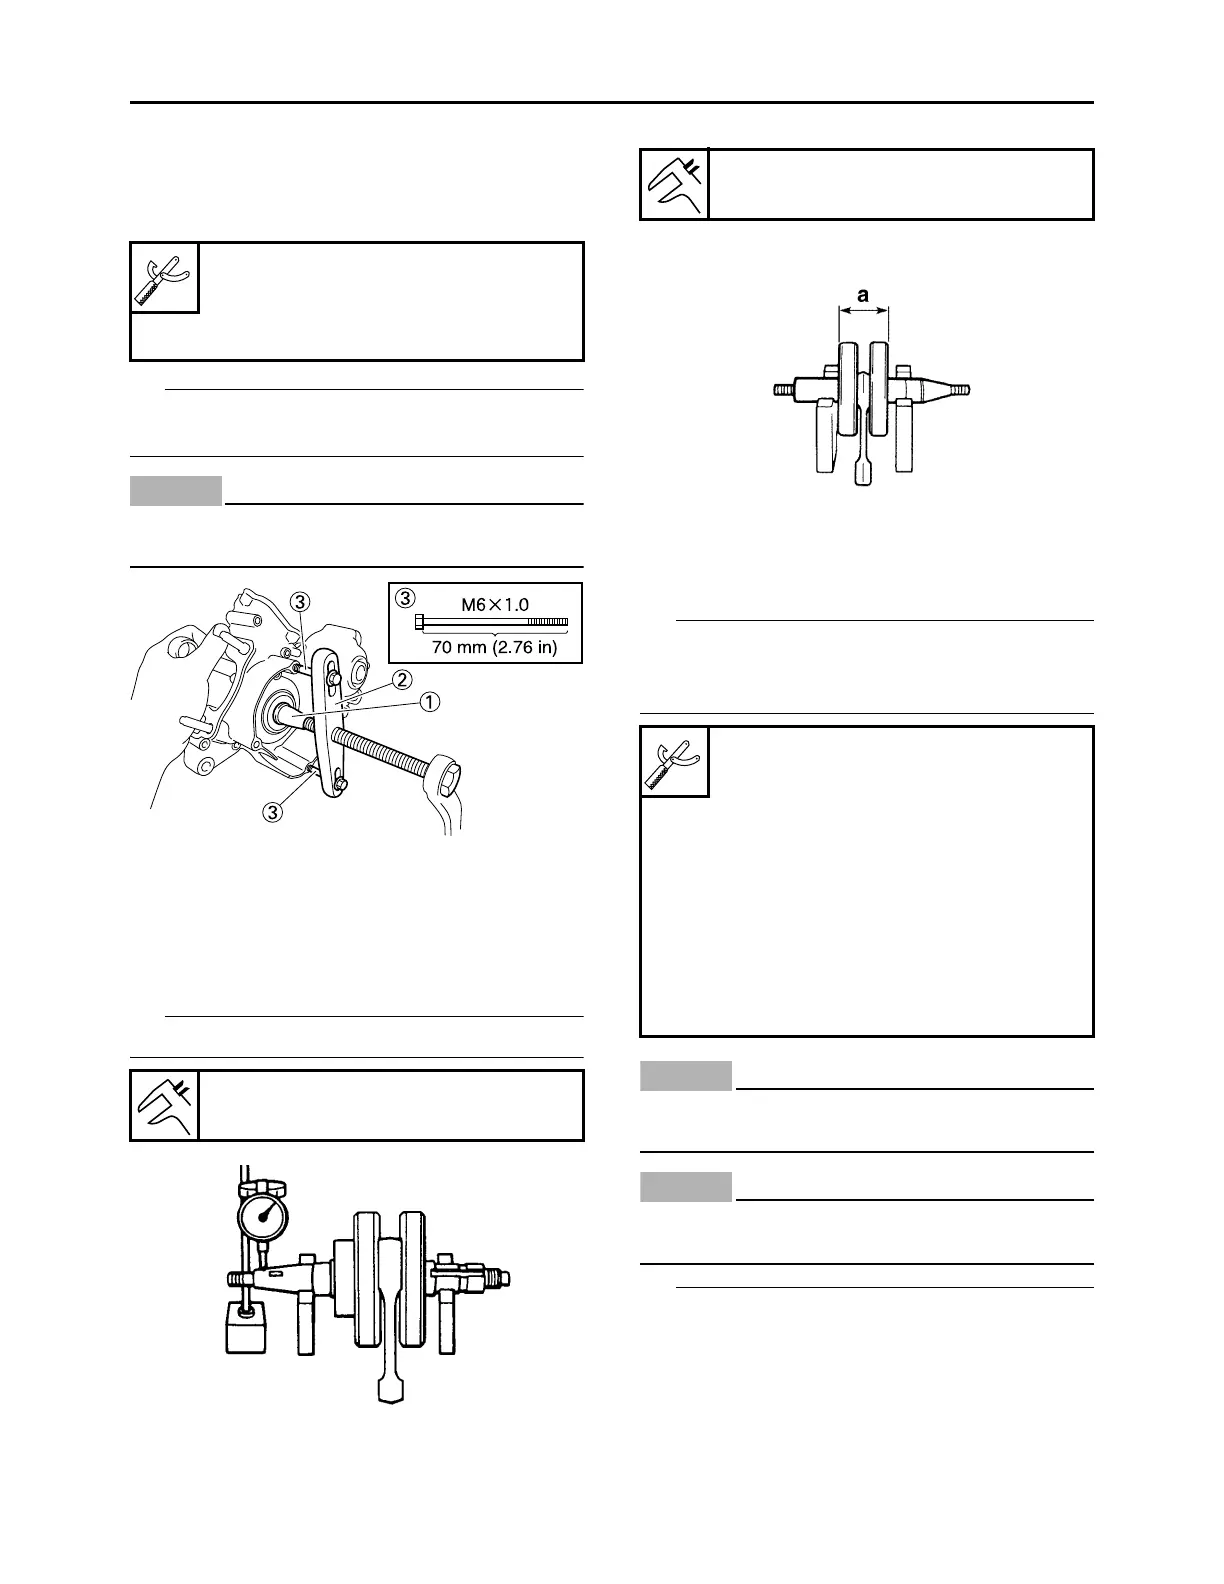
REMOVING THE CRANKSHAFT
1. Remove:
• Crankshaft “1”
(with the crankcase separating tool “2”)
Make appropriate bolts “3” as shown available
by yourself and attach the tool with them.
ECA22290
Do not use a hammer to drive out the crank-
shaft.
EAM30492
CHECKING THE CRANKSHAFT
1. Measure:
• Crankshaft runout
Out of specification Replace the crank-
shaft, bearing or both.
Turn the crankshaft slowly.
2. Measure:
• Crank assembly width “a”
Out of specification Replace the crank-
shaft.
EAM30493
INSTALLING THE CRANKSHAFT
1. Install:
• Crankshaft assembly “1”
Install the crankshaft assembly with the crank-
shaft installer pot “2”, crankshaft installer bolt “3”,
and adapter (M12) “4”.
ECA26470
In order to prevent the crankshaft seizure,
apply molybdenum disulfide grease.
ECA23810
Do not use a hammer to drive in the crank-
shaft.
• Hold the connecting rod at top dead center
(TDC) with one hand while turning the nut of
the crankshaft installer bolt with the other. Turn
the crankshaft installer bolt until the crankshaft
assembly bottoms against the bearing.
• Before installing the crankshaft, clean the con-
tacting surface of crankcase.
• Apply the lithium soap base grease on the oil
Crankcase separating tool
90890-01135
Crankcase separator
YU-01135-B
Runout limit
0.050 mm (0.0020 in)
Crank assembly width
55.90–55.95 mm (2.201–2.203 in)
Crankshaft installer pot
90890-01274
Installing pot
YU-90058
Crankshaft installer bolt
90890-01275
Bolt
YU-90060
Adapter (M12)
90890-01278
Adapter #3
YU-90063




 To Next Page