38
Operating
the
tactor
41 Attaching procedures
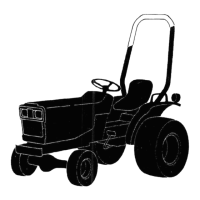
UDwr
link
hinae
-
To avoid bodily injury or machine damage when-
ever 3-point hitch or other implements are at-
tached to tractor, check
full
range of operation
for interference, PTO separation or binding.
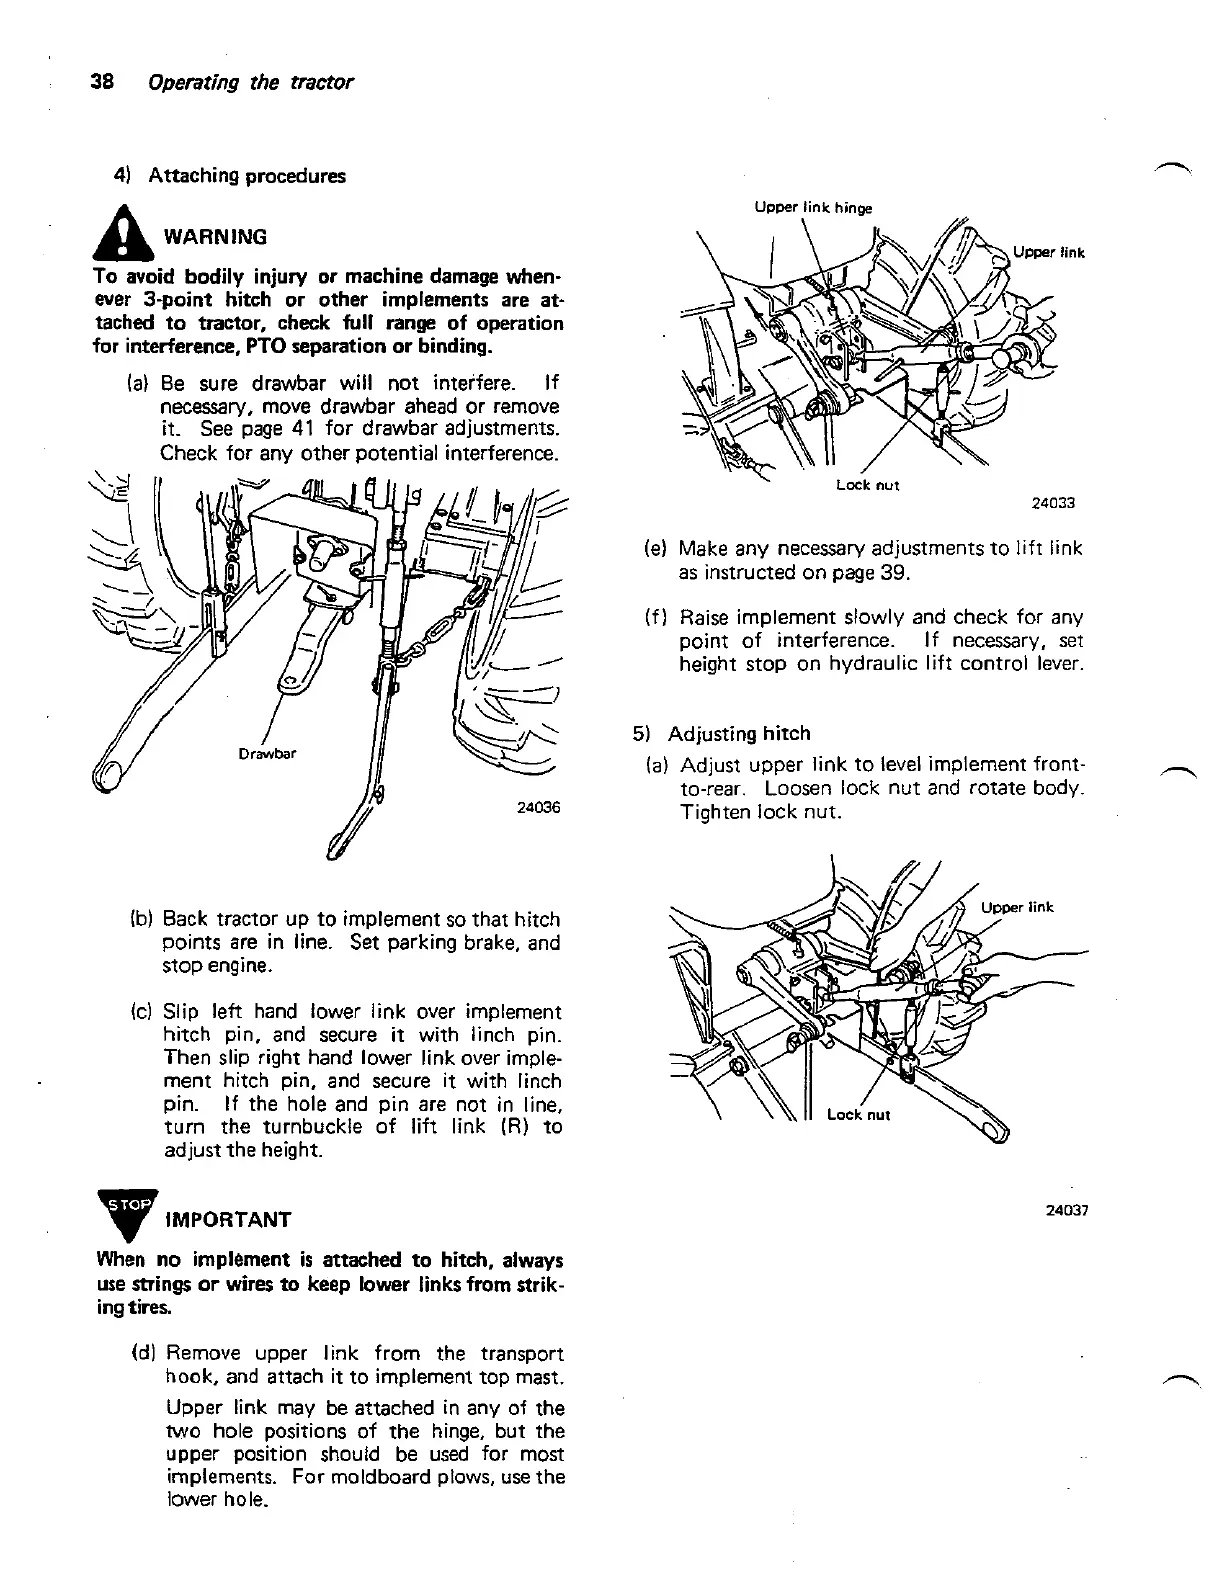
la) Be sure drawbar will not interfere. If
necessary, move
drawbar ahead or remove
it. See page
41
for drawbar adjustments.
Check for any other potential interference.
lb) Back tractor up to implement so that hitch
points are in line. Set parking brake, and
stop engine.
Icl Slip left hand lower link over implement
hitch pin, and secure
it
with linch pin.
Then slip right hand lower link over imple-
ment hitch pin, and secure it with linch
pin. If the hole and pin are not in line,
turn the turnbuckle of lift link
(R)
to
adjust the height
IMPORTANT
When
no
implement
is
attached to hitch, always
use
swings
or
wires to keep lower links
from
strik-
ing tires.
(dl Remove upper link from the transport
hook, and attach it to implement top mast.
Lock
nut
24033
(e) Make any necessary adjustments to lift link
as instructed on page
39.
(f) Raise implement slowly and check for any
point of interference. If necessary, set
height stop on hydraulic lift control lever.
5)
Adjusting hitch
(a)
Adjust upper link to level implement front-
to-rear. Loosen lock nut and rotate body.
Tighten lock nut.
Upper link may be attached in any of the
two hole positions of the hinge, but the
upper position should be used for most
implements. For moldboard plows, use the
lower hole.