34 support@yardistrystructures.com
0
-
#
8
x
1
”
H
e
x
R
o
o
ÿ
n
g
S
c
r
e
w
x
8
(
2
a
s
s
e
m
b
l
i
e
s
)
-
Y
0
1
0
3
6
-
2
9
2
-
o
n
g
P
a
n
e
l
R
i
g
h
t
Y
0
1
0
3
6
-
2
9
5
-
L
o
n
g
P
a
n
e
l
L
e
f
t
4- #8 x 1 Roofng Screw
2- Long Panel Left
2- Long Panel Right
2- Short Panel Left
2- Short Panel Right
Hardware
#8 x 1”
Roong
Screws
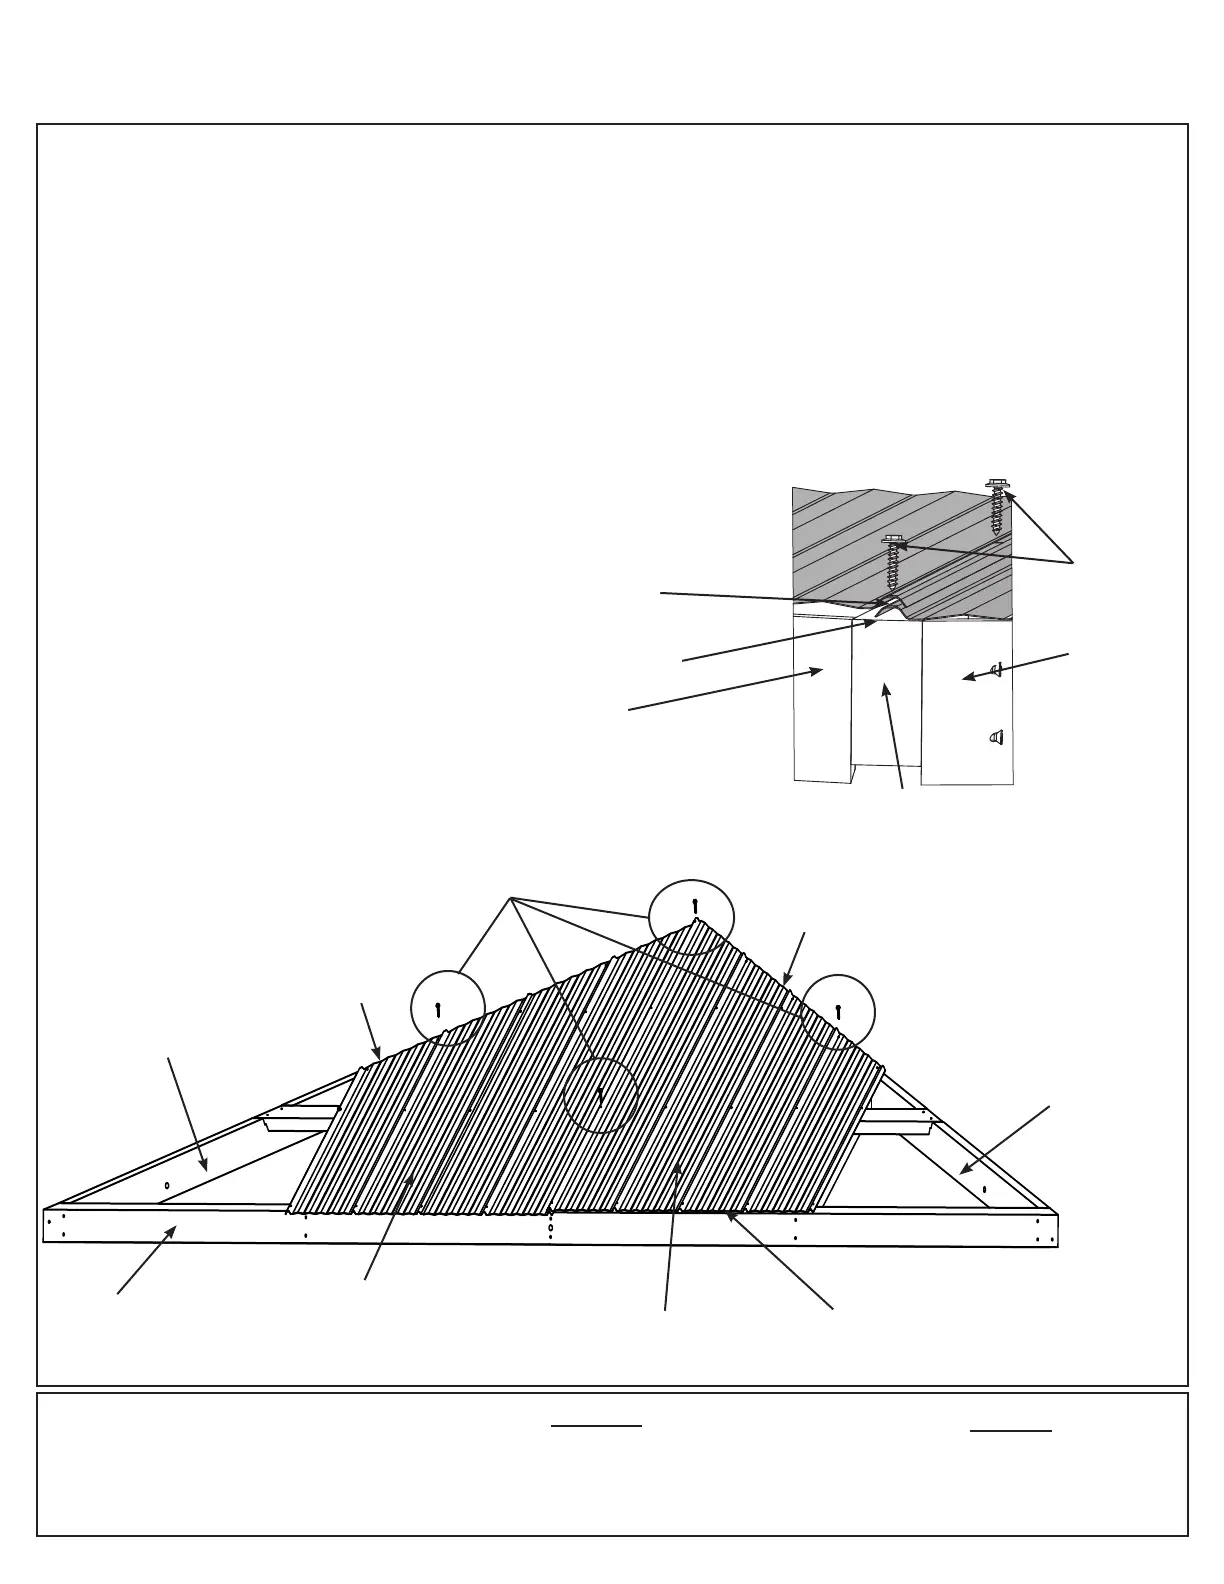
Step 12: Attach Roof Panels - Small Roof
Part 1
A: Place one Long Panel Left on the front of one Small Roof Rafter Assembly so it is ush to the side of (1080)
LT Corner Rafter and a slight overhang at the bottom of the Fascia Beam Assembly. Holes should line up with
(1088) Rafter. (F12.1 and F12.2)
B: Place one Long Panel Right on Small Roof Rafter Assembly so it overlaps the Long Panel Left and it is
ush to the side of (1081) RT Corner Rafter and a slight overhang at the bottom of the Fascia Beam Assembly.
(F12.1 and F12.2)
C: Attach both Left and Right Long Panels to Small Roof Rafter Assembly with four #8 x 1” Roong Screws in
locations shown in F12.1. Be sure not to overtighten screws.
D: Repeat Steps A - C for both Small Roof Rafter Assemblies.
F12.1
F12.2
8 x #8 x 1” Roong Screw
Roof Parts
2 x Long Panel Left
2 x Long Panel Right
Front View
Top, Side View
Panels overlap
at the seams
(1088)
Rafter
DO NOT overtighten
screws, could cause
damage to roong
material
Lower 3 screws may have
to be removed in next step
to properly place Left and
Right Short Panels
Flush
(1080) LT
Corner Rafter
(1081) RT
Corner Rafter
(1080) LT
Corner Rafter
(1081) RT
Corner Rafter
Fascia Beam
Assembly
#8 x 1”
Roong
Screws
Long Panel
Left
Long Panel
Right
Flush
Flush
Slight overhang