58 support@yardistrystructures.com
x 4
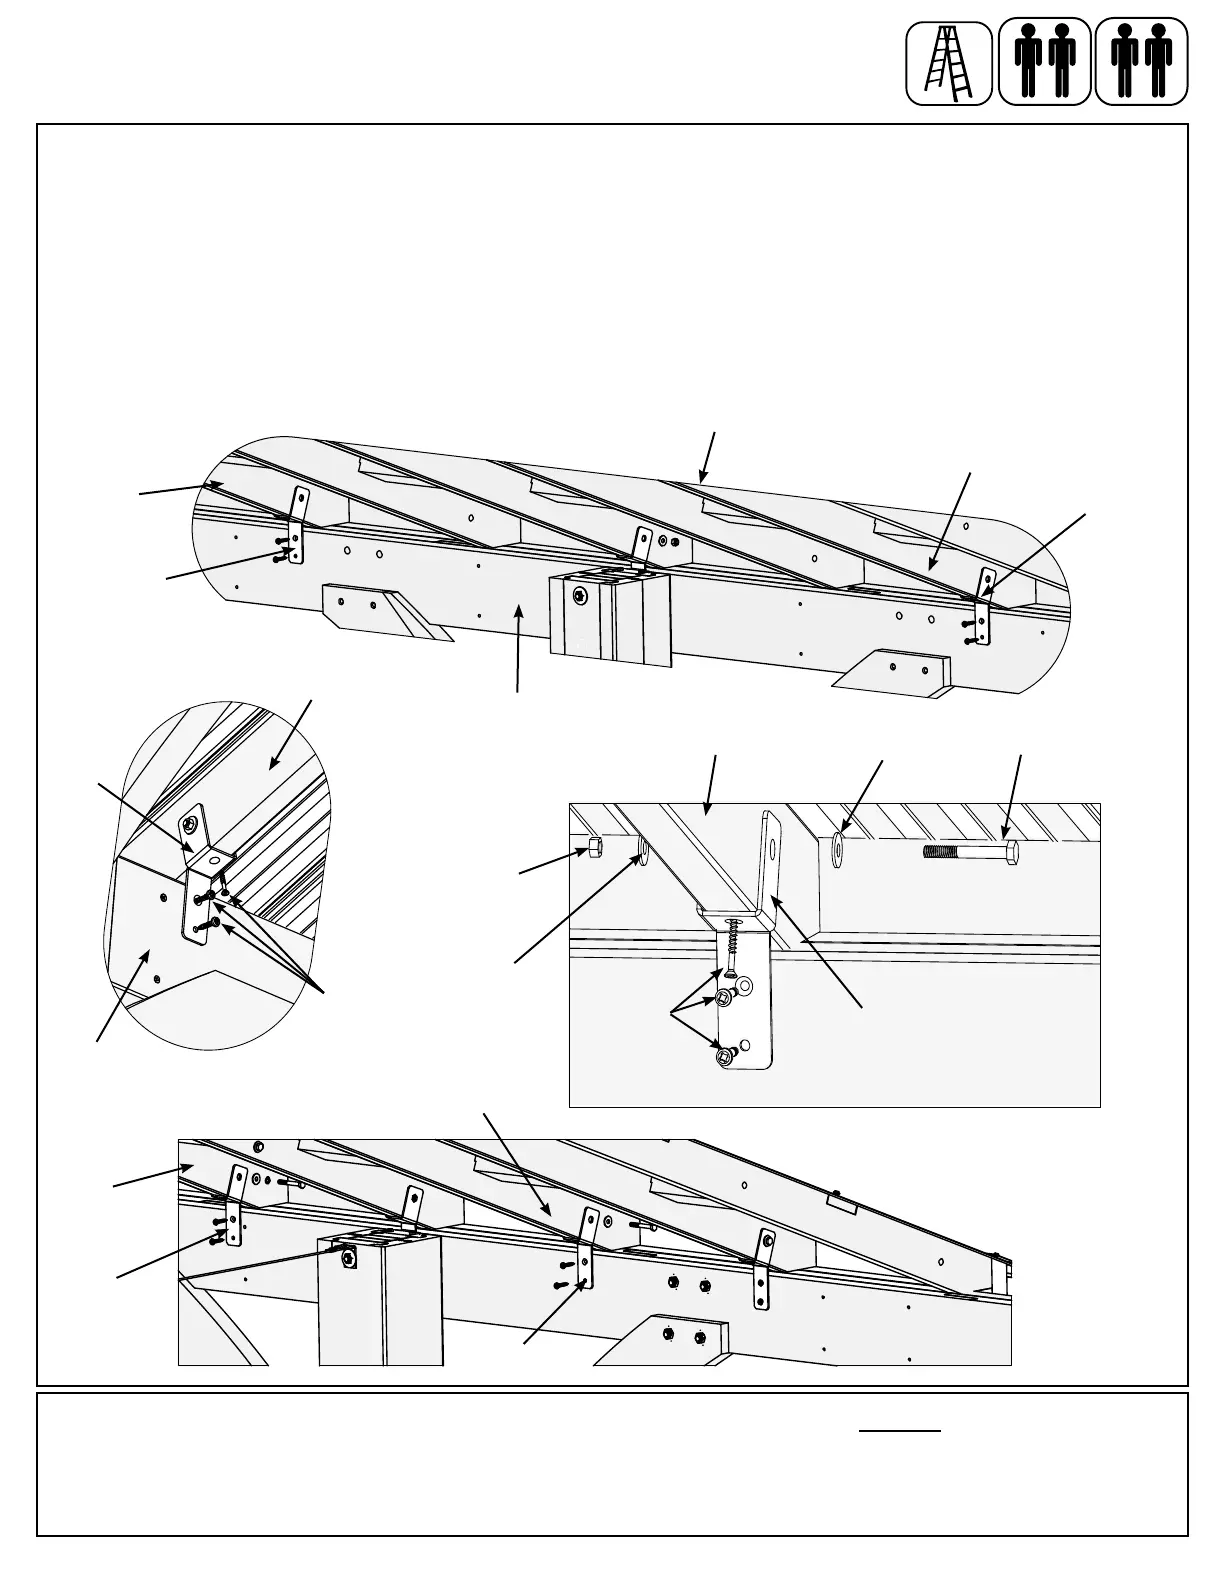
D: From the outside of the assembly have one person push one Large Roof Assembly in so (689) Soft ts tight to
the Long Beam Assembly and two people pushing up at the peak. One person fastens each Roof to Beam Bracket
to beam and then rafters with three #12 x 1-1/2” Pan Screws. Install top screw into (633) Centre Rafter rst then
other two into the beam. Repeat this process for the second Large Roof Assembly. (F23.5 and F23.6)
E: Attach one Roof to Beam Bracket to the remaining (633) Centre Rafters on each Large Roof Assembly with one
1/4 x 2” Hex Bolt (with two 1/4-5/16” large washers and one 1/4” lock nut) and three #12 x 1-1/2” Pan Screws, per
bracket. (F23.7 and F23.8)
F: Tighten all Bracket bolts in the Large Roof Assemblies.
Step 23: Attach Large Roof Assemblies to Frame
Part 2
F23.5
Large Roof Assembly
Long Beam
Assembly
Long Beam
Assembly
Hardware
1/4-5/16”
Large Washer
1/4 x 2” Hex Bolt
Roof to
Beam
Bracket
24 x #12 x 1-1/2” Pan Screw
4 x 1/4 x 2” Hex Bolt
(1/4-5/16” large washer x 2, 1/4” lock nut)
4 x Roof to Beam Bracket
1/4”
Lock
Nut
1/4-5/16”
Large Washer
F23.6
(633)
Centre
Rafter
(633) Centre Rafter
Roof to
Beam
Bracket
(633) Centre Rafter
(633) Centre Rafter
(633)
Centre
Rafter
(633) Centre Rafter
Roof to
Beam
Bracket
Roof to
Beam
Bracket
#12 x 1-1/2”
Pan Screw
#12 x 1-1/2”
Pan Screw
F23.7
F23.8
Roof to Beam
Bracket
Roof to
Beam
Bracket