66 support@yardistrystructures.com
Push roof in so that soffit is tight
to beam from outside, while
fastening.#10 x 1-1/4" Pan Screw
#8 x 1-1/2" Wood Screw#8 x 1-3/4"
Wood Screw1/4 x 2" hex bolt Roof to
Beam Bracket Y004XX-108
Hardware
Roof to Beam
Bracket
F29.1
F29.2
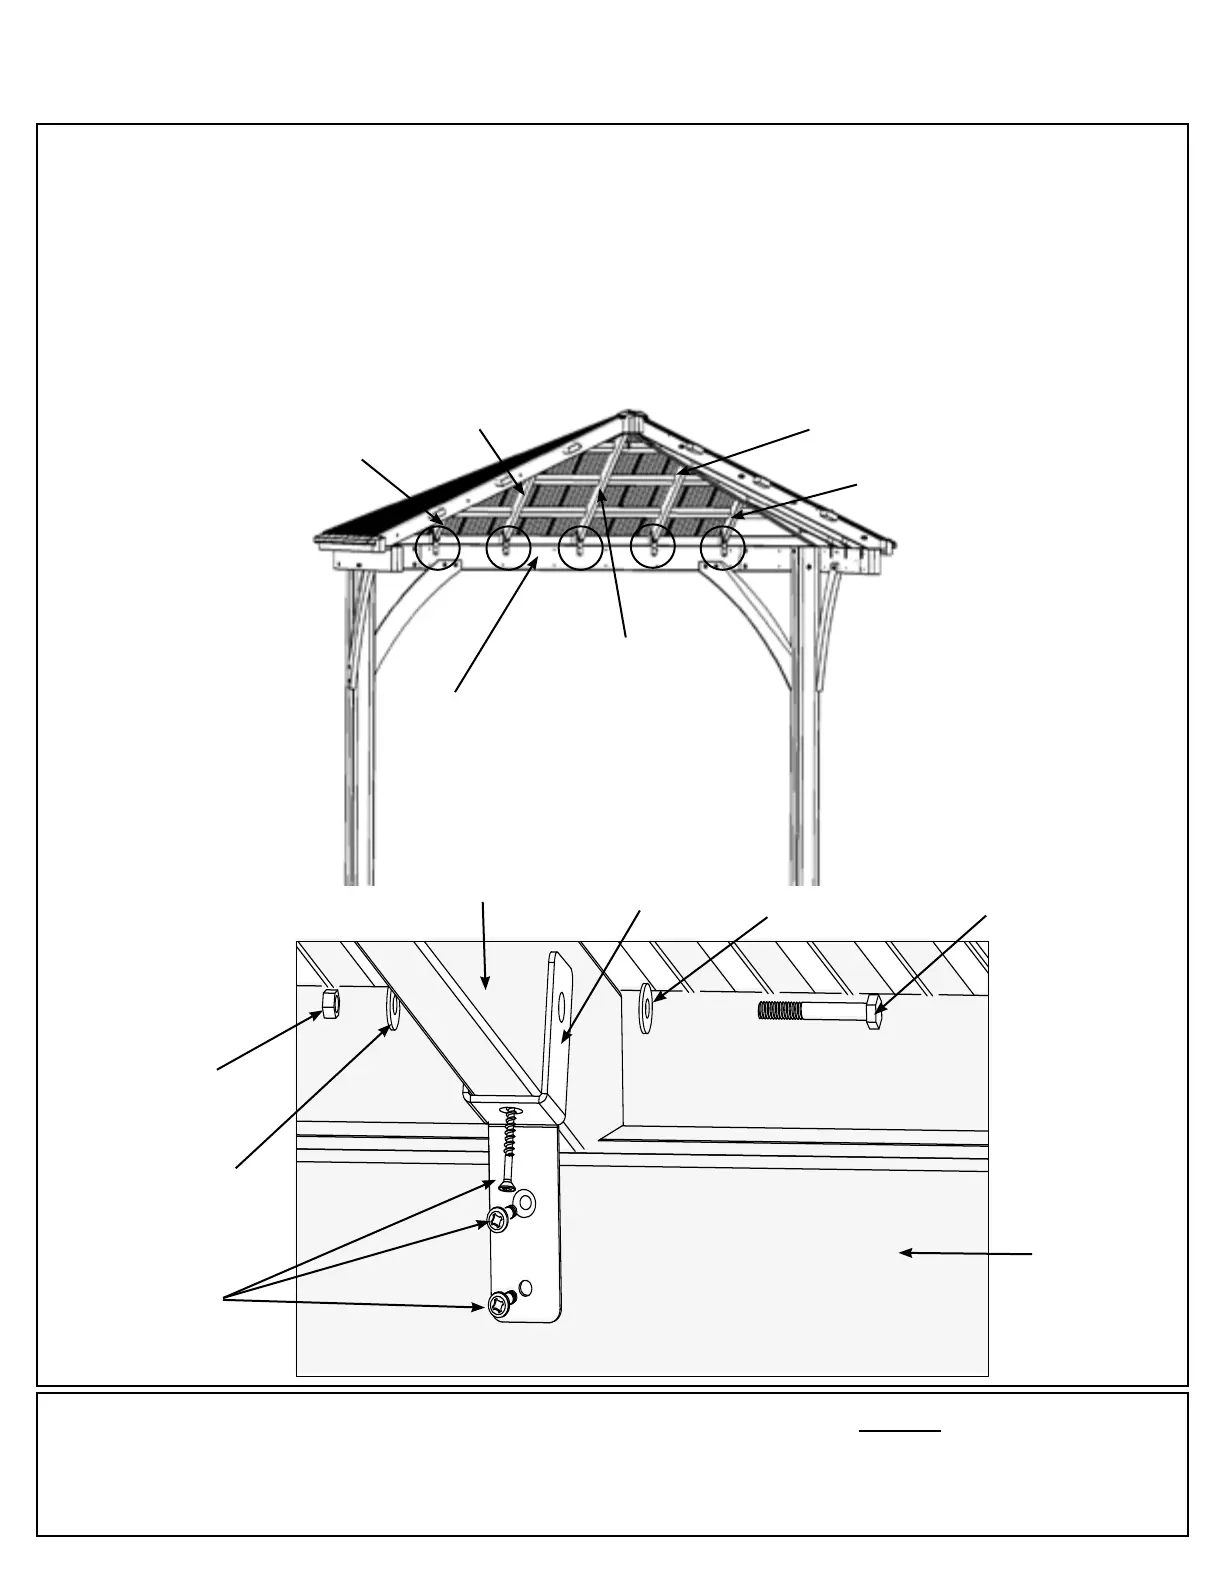
A: On each Small Roof Assembly, through the bolt hole at the bottom of the board, loosely attach one Roof to
Beam Bracket to each rafter with one 1/4 x 2” Hex Bolt (with two 1/4-5/16” large washers and one1/4” lock nut) per
bracket. (F29.1 and F29.2)
B: Push panels up from the outside and inside top to make sure each (648) Soft is tight to the Short Beam
Assemblies then fasten each Roof to Beam Bracket with three #12 x 1-1/2” Pan Screws per bracket. Install top
screw into the rafter rst then install the other two into the beam. Slight gaps are normal. (F29.1 and F29.2)
C: Tighten all Roof to Beam Bracket bolts in both Small Roof Assemblies.
Step 29: Attach Roof to Beam Brackets -
Small Roof Assembly
(629) Rafter
Short RT
(630) Rafter
Short LT
Short Beam
Assembly
10 x 1/4 x 2” Hex Bolt
(1/4-5/16” large washer x 2, 1/4” lock nut)
10 x Roof to Beam Bracket
30 x #12 x 1-1/2” Pan Screw
1/4”
Lock
Nut
1/4-5/16”
Large Washer
1/4 x 2”
Hex Bolt
Inside View
Inside View
Rafter
(634)
Rafter
(632) Rafter
Centre RT
(631) Rafter
Centre LT
#12 x 1-1/2”
Pan Screw
Short Beam
Assembly
1/4-5/16”
Large Washer
Parts removed
for clarity