Regular maintenance and lubrication will help keep your machine
in perfect working condition and ensure years of trouble free use.
Turn off engine and disengage all levers. Engine must be cool.
Inspect the general condition of the unit. Check for loose screws,
misalignment or binding of moving parts, cracked or broken parts,
and any other condition that may affect its safe operation.
Remove all debris and other materials that may have accumulated
to the brush. Clean after each use. Then use a premium quality
lightweight machine oil to lubricate all moving parts.
PREVENTIVE MAINTENANCE
ADJUSTING HEIGHT OF ADJUSTABLE HEIGHT
SUPPORT WHEELS AND BRUSH
MAINTENANCE
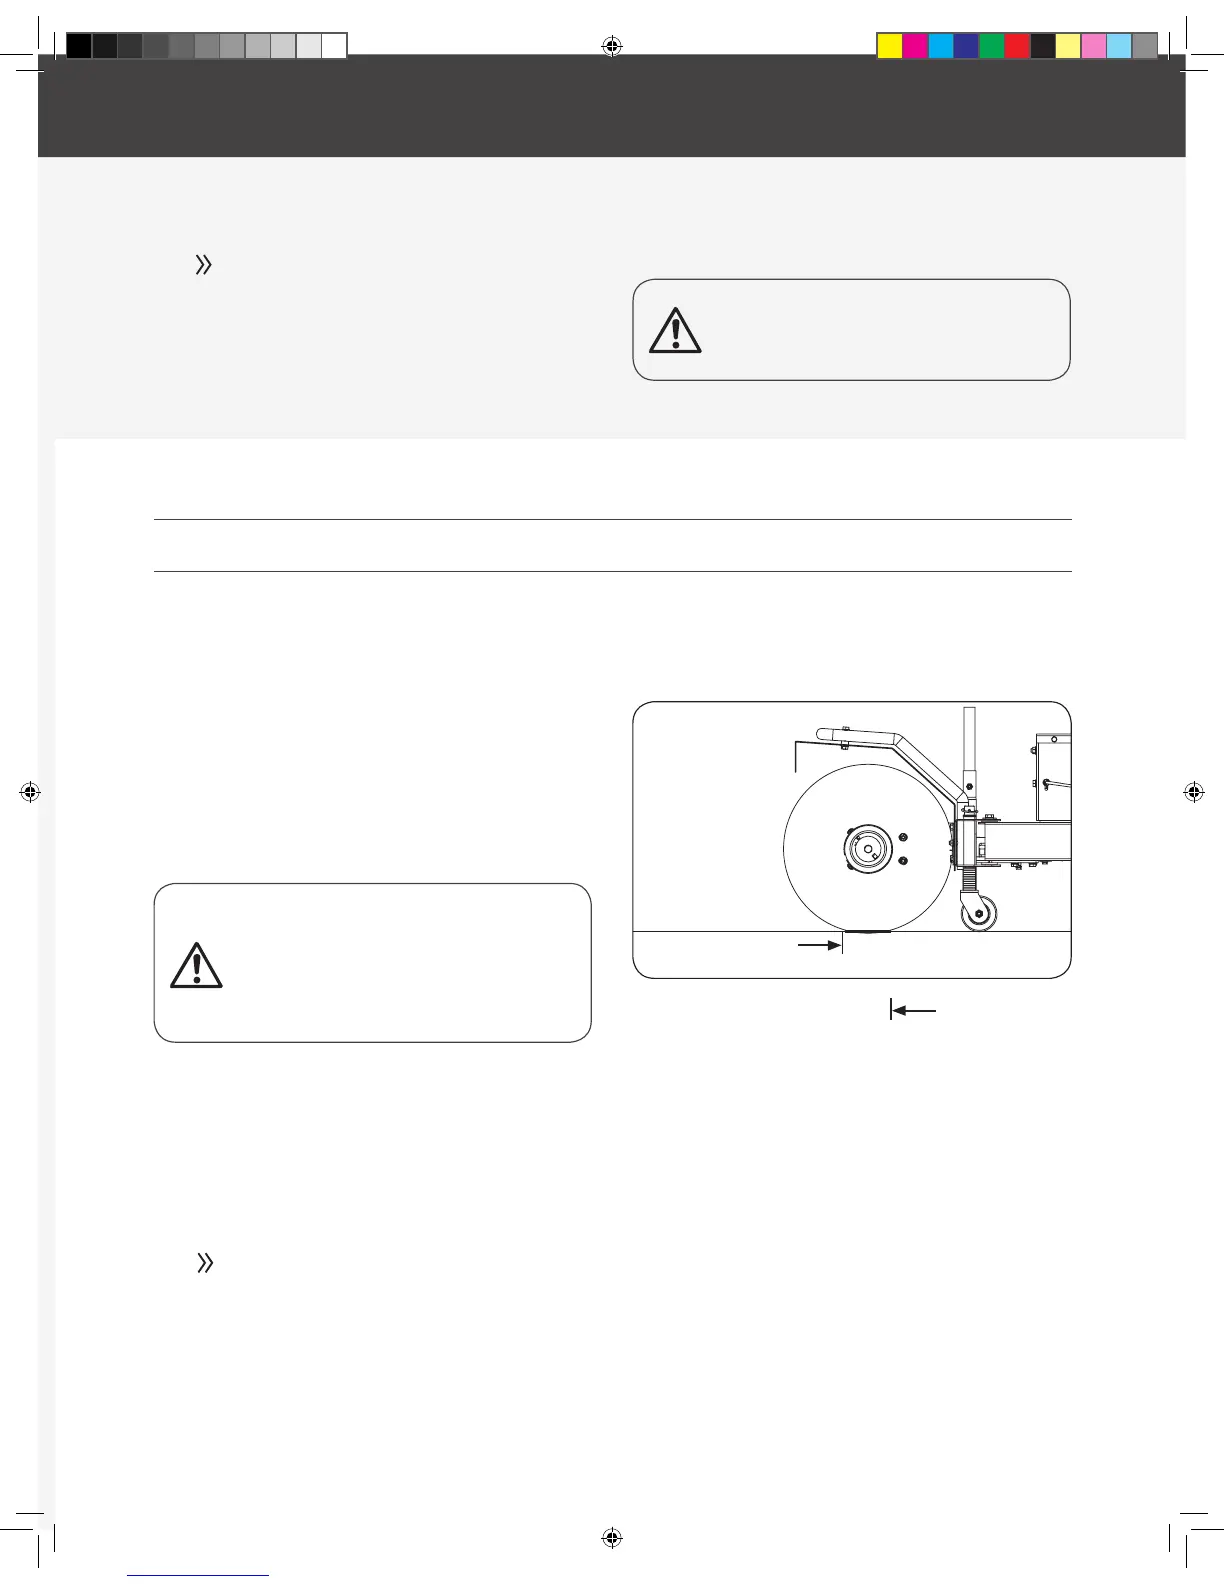
Once the brush gets worn it is necessary to adjust the
height of the brush .i.e. how close it is to the surface
to sweep. This adjustment takes place by adjustment
of adjustable height support wheels. The brush has
two adjustable height support wheels. The vertical
adjustment of the adjustable height support wheels
is done by the placement of a series of plastic rings
above or below the mounting tube. The suggested
adjustment for the adjustable height support wheels is
the point at which the brush sweeps 2 to 4 inches (5cm
– 10cm) of surface area when the machine is parked.
The number of top and lower plastic rings is to be the
same for both sides.
Never use a “pressure washer” to clean your unit.
Water can penetrate tight areas of the machine and
its transmission case and cause damage to spindles,
gears, bearings, or the engine. The use of pressure
washers will result in shortened life and reduce
serviceability.
2" - 4" (5 cm - 10 cm)
To stop the engine in an emergency, simply turn the
engine switch to the OFF position. Under normal
conditions, use the following procedure.
3. Turn the engine switch to the OFF position.
4. Turn the fuel valve lever to the OFF position.
1. Move the throttle lever to the SLOW position.
2. Let engine idle for one or two minutes.
STOPPING ENGINE
With the machine and brush both supported remove
the pin at the top of the caster wheel rod.
Pull the supportwheel out from the bottom of the
machine.
Remove enough ring spacers to reach the desired
level of the brush to rest.
Slide the supportwheel back into position from the
bottom of the machine.
Slide the previously removed ring spacers on the top
side of the wheel rod, replace the locking pin.
Repeat on the other side so that the brush is level.
2.
3.
4.
5.
6.
1.
16
Power Sweeper
»
Operator’s Manual
Operation & Maintenance
|
Do not move choke lever to the CLOSE position to stop
engine. Backre or engine damage may occur.
32530US25M100.indd 16 2016/9/23 14:48:51