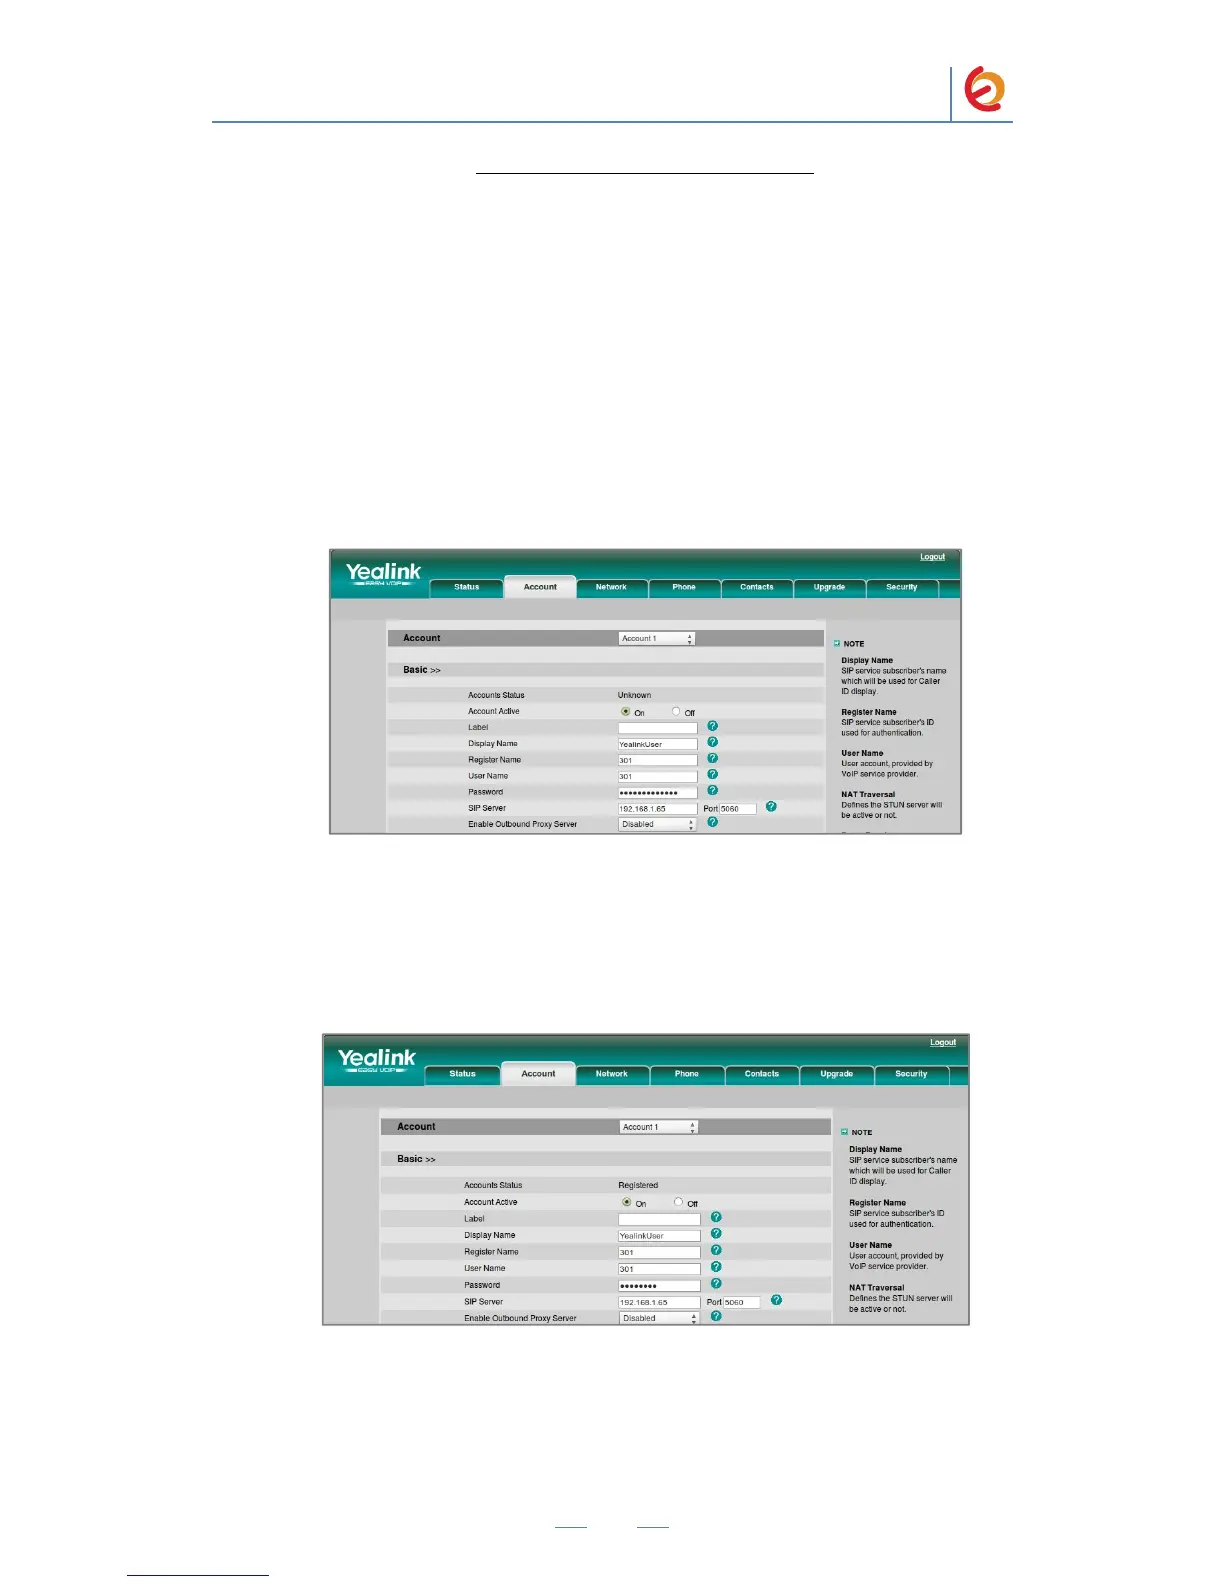
MANUAL CONFIGURATION
1. Use the information from the Add SIP Extension page (Figure 4-4) to enter the
following necessary information on “Account => Account 1” section of the Yealink
Phone WebUI:
Account Active: ON
Display Name: YealinkUser
Register Name: 301 in this example
User Name: 301 in this example
Password: ‘h7Dka3Rf9si0t’ in this example
SIP Server: Elastix Server’s IP Address (192.168.1.65 in this example)
Figure 4-9. Account
2. Once you have entered the required information, click on “Confirm” button located at
the end of the page. The phone should be registered now. To check this, refresh the
current page and see the Register Status of the account. If the phone is not registered,
make sure you’ve entered the correct information (Figure 4.10).
Figure 4.10. Register Status
3. Configure the other IP (SIP) Phone with the correct parameters.
4. To test the Yealink SIP-T26P, pick up the previously configured IP (SIP) Phone and
call the SIP-T26P’s extension number (301 in this example). When the call is
 Loading...