After the IP phone is connected to network and supplied with power, it
automatically begins the initialization process. After startup, the phone is
ready for use. You can configure the phone via web user interface or phone
user interface
.
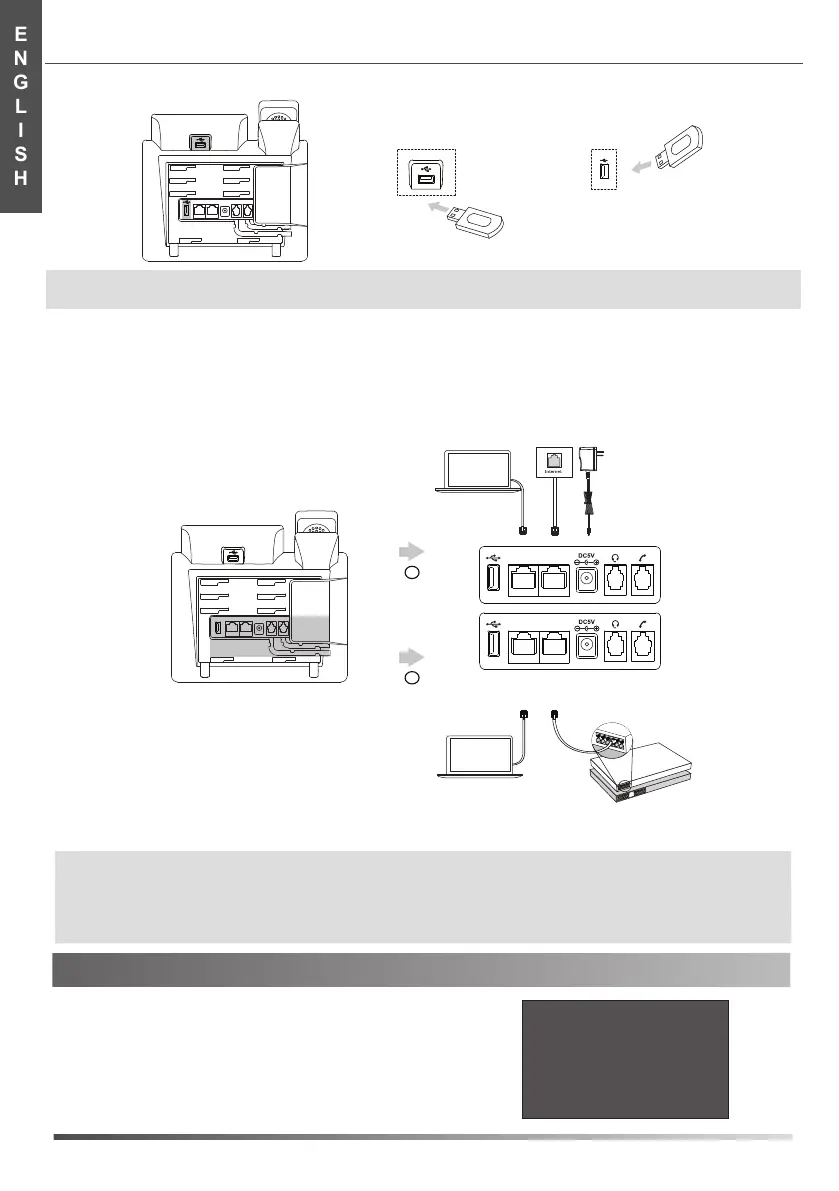
4. Connect the network and power, as shown below:
You have two options for network and power connections. Your system administrator will advise you which one to use.
Startup
Welcome
Initializing...please wait
ENGLISH
2
Power Adapter
(DC 5V)
IEEE 802.3af compliant
PoE Hub/Switch
PC Connection
(Optional)
A
B
AC Power Option
PoE ( Power over
Ethernet ) Option
PC Connection
(Optional)
PC
PC
Note: The IP phone should be used with Yealink original power adapter (5V/1.2A) only. The use of the third-party power adapter may
cause the damage to the phone. If you are connecting a PC to your phone, we recommend that you use the Ethernet cable
provided by Yealink.
If inline power (PoE) is provided, you don’t need to connect the power adapter. Make sure the hub/switch is PoE-compliant.
3. Connect the USB flash drive, as shown below:
Startup
Note: The USB ports can also be used to connect other USB devices, such as USB headset and so on.
Yealink recommends that you connect Bluetooth USB dongle or Wi-Fi USB dongle to the upper USB port.
a. Upper USB Port
b. Lower USB Port
PC
Internet
PC
Internet
 Loading...