Do you have a question about the Yealink SIP-T46U and is the answer not in the manual?
Place a call on private hold using the hold button.
Transfer a call without speaking to the recipient first.
Transfer calls directly to voicemail for a specific extension.
Transfer calls to another extension via intercom mode.
This user guide describes the features and usage of a Yealink IP phone, designed for SimpleFiber's internet and voice services. The guide, titled "PHONE FEATURES USER GUIDE," aims to simplify the use of the phone's basic and common functions for both multinational corporations and local small businesses. SimpleFiber prides itself on providing an integrated voice platform with a wide range of features.
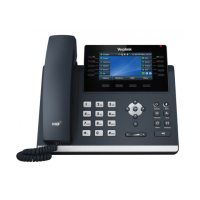
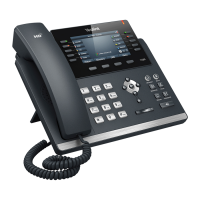
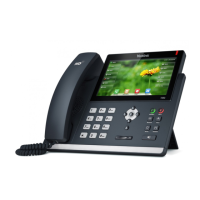
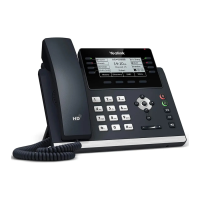
The Yealink IP phone is a communication device that facilitates voice calls over an internet connection. It integrates with SimpleFiber's voice platform, offering a comprehensive suite of features for efficient business communication. The phone supports various call handling functions, including receiving, placing, holding, and transferring calls, as well as more advanced features like voicemail, call forwarding, conference calls, paging, and intercom. The device is designed to be user-friendly, with a clear display and tactile buttons for easy navigation and operation.
When a call comes in, users have three options to answer:
Making a call is as straightforward as using a cell phone. Users simply dial the desired number or extension, including the area code. To connect the call, they can choose from:
The system offers two types of call holds: private and public (referred to as parking).
To retrieve a parked call, simply press the same park line button that was used to park the call. This can be done from any phone in the office, regardless of where the call was originally parked.
The phone supports various call transfer methods:
Blind Transfer (Unannounced):
Attended Transfer (Announced/Supervised):
Transfer Directly to Voicemail:
Transfer to Intercom:
The default voicemail PIN is 1234.
Checking Voicemail and Changing Settings:
Checking Voicemail Remotely:
Checking Voicemail from Web Portal:
Voicemail to Email:
Activating Call Forwarding:
Canceling Call Forwarding:
This feature allows connecting two or more callers with the user for a group conversation.
Paging allows users to broadcast a message via the speakerphone to every active extension within the local office.
The intercom enables two-way communication between two active extensions.
The user guide primarily focuses on operational features rather than device maintenance. However, the availability of an online portal for call logs, recordings, and voicemail, along with dedicated support channels, implies a system designed for minimal user-level maintenance. Issues beyond basic operation are directed to SimpleFiber Support, suggesting that technical maintenance is handled by the service provider. The recommendation for voicemail to email with attachment and trash movement is a form of digital maintenance, preventing the phone's internal voicemail storage from becoming full.
For more complicated features or advanced configuration, users are directed to contact SimpleFiber Support via phone (888-455-0151) or email (phonehelp@simplefiber.com), or to visit the support website (www.simplefiber.com/support). The online portal at https://talk.simplefiber.com also serves as a central hub for managing call logs, recordings, and voicemail, which can be considered a form of user-managed data maintenance. The guide emphasizes that SimpleFiber offers an advanced suite of features, and for advanced configuration, manager permissions are required for portal access.
| Handset type | Wireless handset |
|---|---|
| Product type | IP Phone |
| Product color | Gray |
| USB 2.0 ports quantity | USB 2.0 ports have a data transmission speed of 480 Mbps, and are backwards compatible with USB 1.1 ports. You can connect all kinds of peripheral devices to them. |
| Expansion module support | Yes |
| Ethernet LAN (RJ-45) ports | 2 |
| Security algorithms | AES, HTTPS, SRTP, TLS |
| Ethernet LAN data rates | 10, 100, 1000 Mbit/s |
| Ethernet LAN interface type | Gigabit Ethernet |
| Front camera | - |
| AC adapter input voltage | 100 - 240 V |
| Display diagonal | 4.3 \ |
| Display resolution | 480 x 272 pixels |
| Lines quantity | - lines |
| Phonebook capacity | 1000 entries |
| Number of VoIP accounts | 16 |
| Operating temperature (T-T) | 0 - 40 °C |
| Operating relative humidity (H-H) | 10 - 95 % |
| Voice codecs | AGC, AJB, AMR-WB, CNG, G.711, G.722, G.723.1, G.726, G.729ab, VAD, iLBC |
| Number of handles included | 1 pc(s) |
| Harmonized System (HS) code | 85171800 |
| Depth | 213 mm |
|---|---|
| Width | 244 mm |
| Height | 185 mm |