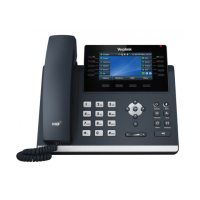
Yealink BYOD Guide - CAP
One North Wacker Dr., Suite 2500, Chicago, IL 60606
+1 (866) 629-8200, Option 4
info@inteliquent.com
Inteliquent, We empower communications
f) Write down the numbers as shown in the
IPv4
: row __________________
3) Log into the device.
a) Using a computer on the same local network, use a web browser to navigate to the IPv4 address you noted above in
step 2 using https.
i) EX: Enter
https://192.168.0.2
in your browser’s address bar.
b) On the login screen, enter the default username (admin) and password (admin).
4) Configuring Provisioning Server Information.
a) On the SIP-T33G, do the following:
i) On the top menu bar, click on the
Settings
menu.
ii) On the left menu bar, click
Auto Provision
.
iii) In the Auto Provision settings, set
PNP Active
to Off and set
DHCP Active
to Off.
iv) In the
Server URL
field, enter
https://prov.anpi.com/yealink
, then scroll to the bottom and click
Confirm
.
v) On the top menu bar, click
Security
.
vi) On the left menu bar, click
Trusted Certificates
.
vii) In the settings in the
Module
section, change
Only Accept Trusted Certificates
to
Disabled
.
viii) Click
Confirm
.
b) On the other phones, do the following:
i) On the left menu bar, click on the
Settings
menu. The menu will expand.
ii) Click
Auto Provision
from the list.
iii) In the Auto Provision settings, set
PNP Active
to Off and set
DHCP Active
to Off.
iv) In the
Server URL
field, enter
https://prov.anpi.com/yealink
and click
Confirm
.
v) On the left menu bar, scroll down and click
Security
. The menu will expand.
vi) Click
Trusted Certificates
from the list.
vii) In the settings in the
Module
section, change
Only Accept Trusted Certificates
to
Disabled
.
viii) Click
Confirm
.
ix) Click
OK
.
5) Reboot the device. If it did not reboot on its own, do the following:
a) Unplug power from the back of the device.
i) The device maybe PoE (Power over Ethernet) if a standard AC power adaptor is not used. In this case, unplug
the Ethernet cable (plugged into the LAN port on the back of the device).
b) Either plug in the AC adaptor again or plug the Ethernet cable back into the LAN port.
c) Allow the device to power up.
d) The device may go through one or two reboots.
e) If the device says it is installing firmware,
do not reboot or unplug the device
.
f) Once this is complete, the device should automatically call the Activation Server when lifting the handset.
6) Activate the device.
a) Lift the handset or press the speakerphone key.
b) When prompted by the IVR system, enter the activation code (received via email when the service was ordered).
c) The phone may take a few minutes to update, and then be ready for use.
View a complete user guide at
https://support.yealink.com

 Loading...


