EasyManuals Logo

Yealink SIP-T53 Getting Started

Yealink SIP-T53
17 pages
To Next Page IconTo Next Page
To Previous Page IconTo Previous Page
Page #5 background imageLoading...
Page #5 background image
Recovery Mode on Yealink IP phones
5
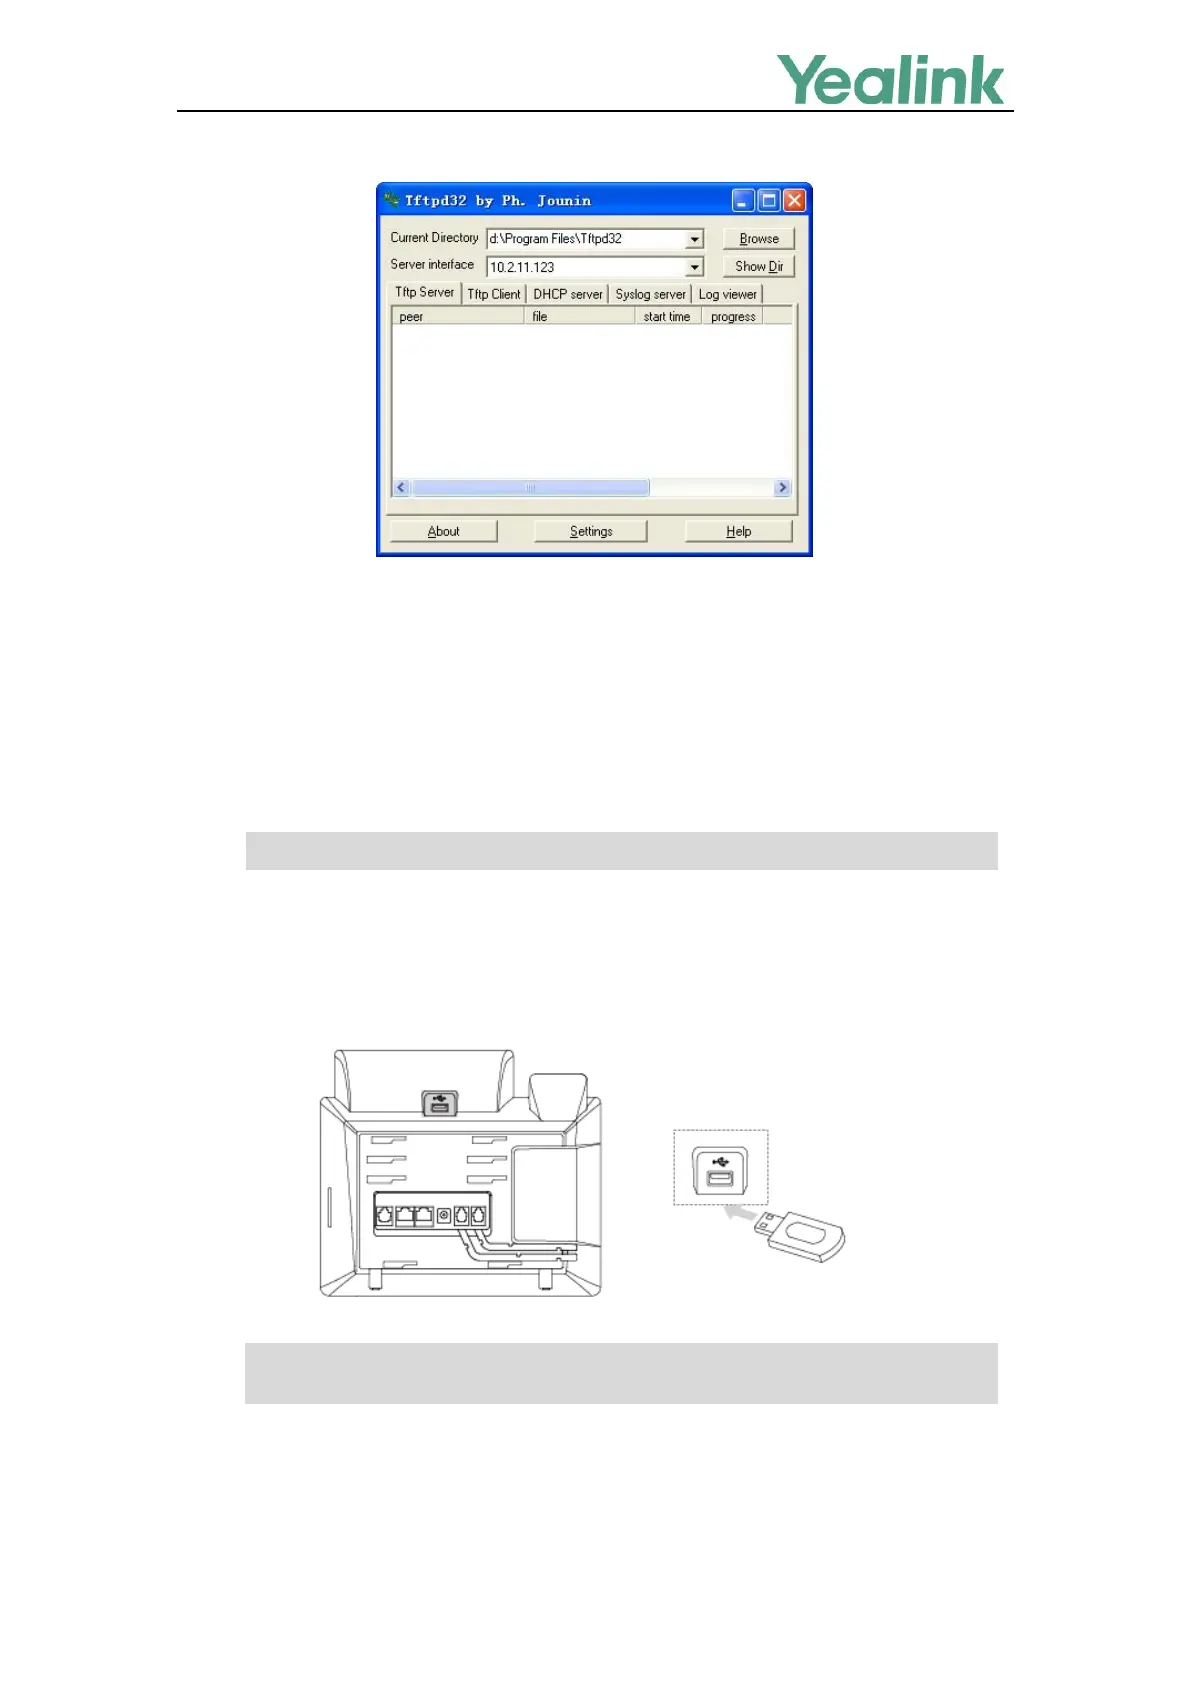
Take a note of the server IP address (e.g., 10.2.11.123) which is used at the later stage.
Connecting the USB Flash Drive to the IP Phone
This section shows how to connect the USB flash drive to the IP phone. The USB flash drive should be
purchased separately.
This method is only applicable to MP54/MP56/MP58/VP59/SIP-T58A/T57W/T54W/T53W
/T53/T48U/T48S/T46U/T46S/T43U/T42U/T42S/T41S/CP920/CP960 IP phones.
Note
Procedures
1. Place resource files to the USB flash drive.
2. Connect the USB flash drive to the IP phone.
Note
After successfully connecting the USB flash drive, LCD screen prompts “USB device has been
connected successfully!”.
On the CP960 IP phone, you can only connect to the USB port next to the micro USB port to use
the recovery mode.
The file system of the USB flash drive should be FAT32.

Other manuals for Yealink SIP-T53

Questions and Answers:

Question and Answer IconNeed help?

Do you have a question about the Yealink SIP-T53 and is the answer not in the manual?

Yealink SIP-T53 Specifications

General IconGeneral
NetworkDual-port Gigabit Ethernet
SIP Accounts12
Lines12
Stand IncludedYes
PoEYes (IEEE 802.3af)
USB Port1 x USB 2.0
Headset SupportRJ9 and USB
Audio FeaturesHD Voice
Expansion Module SupportYes, up to 3
Voice CodecsG.722, G.711
Network FeaturesIPv4/IPv6, VLAN, QoS
Local Phonebook1000 entries
MountingDesk mount, Wall mount
Power SupplyOptional
Weight1.1 kg
Resolution360 x 160

Related product manuals