18. 19.
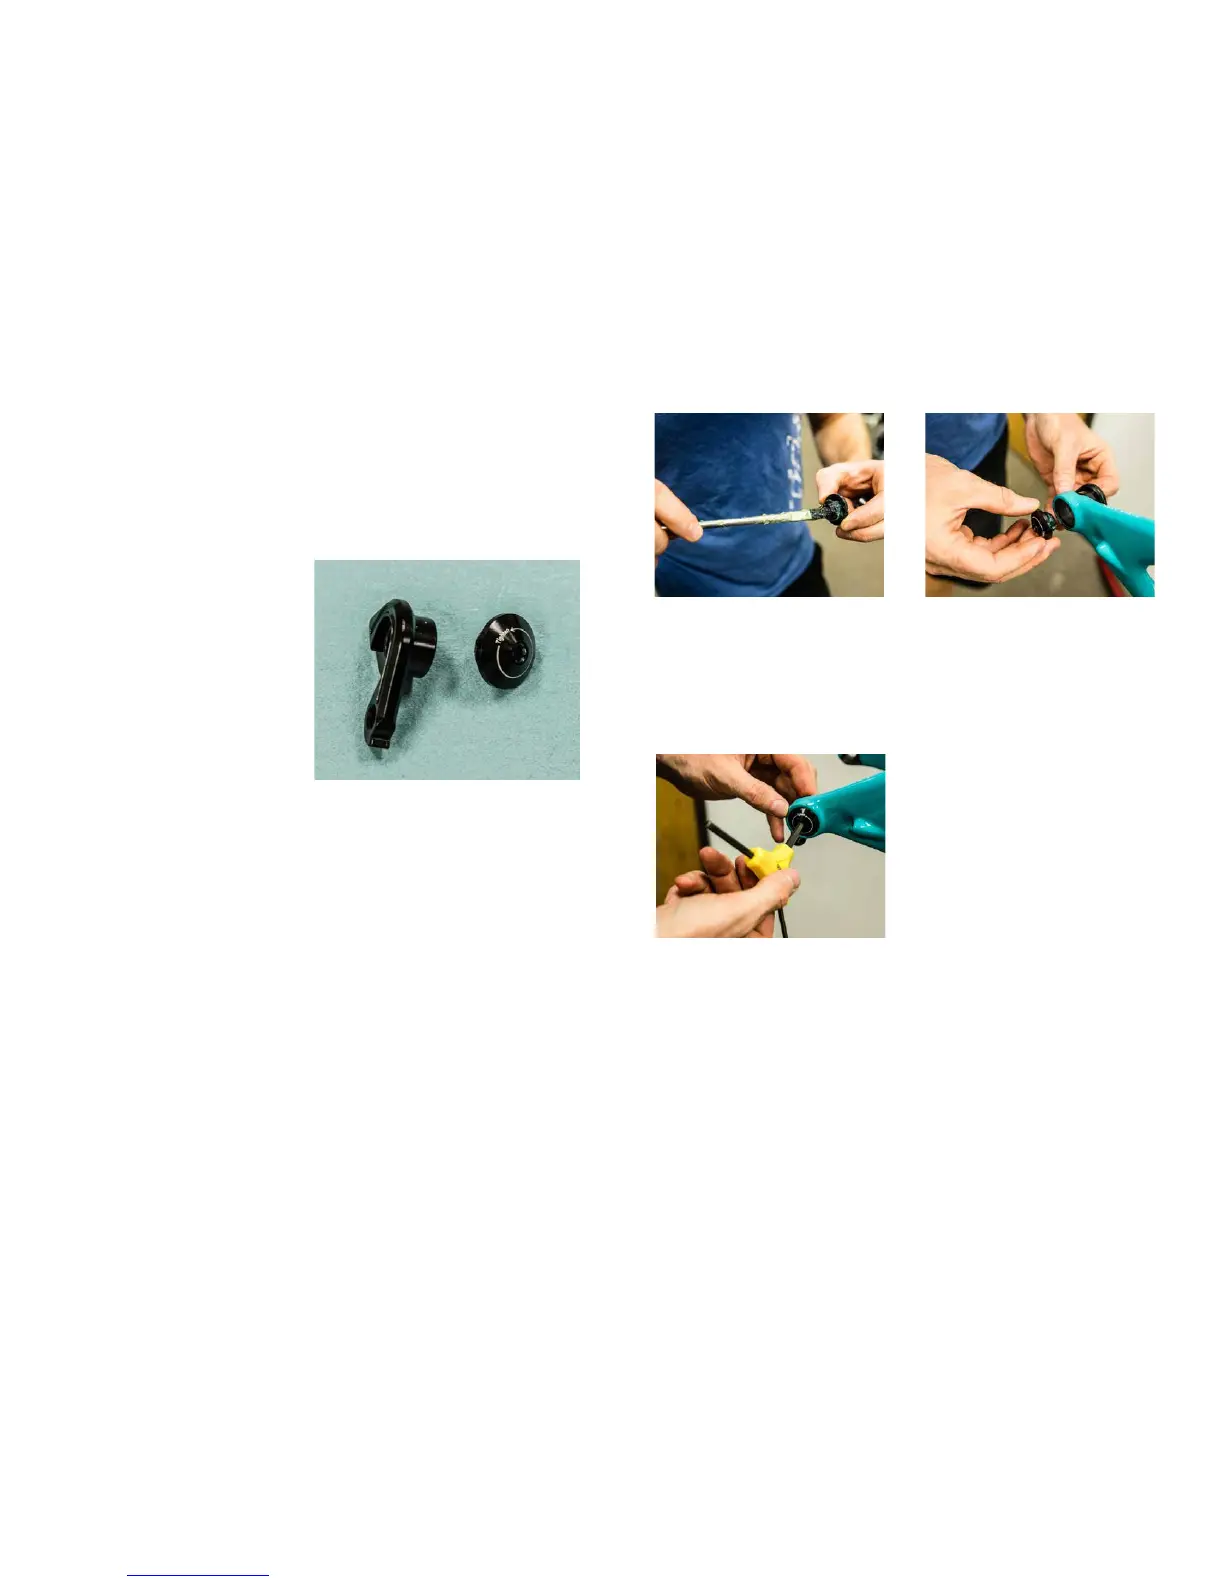
01. HANGER PREP 02. HANGER CAP SEAT
Lightly grease the threads and outside surface of
the hanger and cap where it interfaces with the
frame. The hanger will t into its space on the
inside of the swing arm and should press easily
into the frame.
Place the hanger into the recess on the inside of
the swing arm. Thread the hanger cap into the
hanger. The hanger cap REVERSE threads into
the hanger from the outside of the swing arm.
Start threading the cap by hand.
03. TIGHTENING
Using a 6mm allen key, tighten the hanger cap
into the hanger. REMEMBER, it is REVERSE
THREADED. Follow the “Tighten” arrow on the
cap. Finish tightening with a torque wrench if
available.
*Torque to 80 in/lbs (9Nm)
NOTE: The hanger cap is REVERSE
THREADED. Be careful not to strip out the
Hanger tool faces. The cap is marked with a
tighten direction arrow.
Inspect the frame around the hanger seat
for any suspicious damage to the carbon
any time you replace a derailleur hanger,
especially if you are replacing the hanger due
to damage to the hanger.
YETI TIPS TOOLS NEEDED
• 6mm Allen key
• Grease
DERAILLEUR HANGER INSTALL
4)0$,4&561
CLICK TO VIEW SETUP GUIDE