8
BURNING-IN THE GRILL
01. COOKING CHAMBER
02. grates & shelves
03. POSITIONING THE GRILL
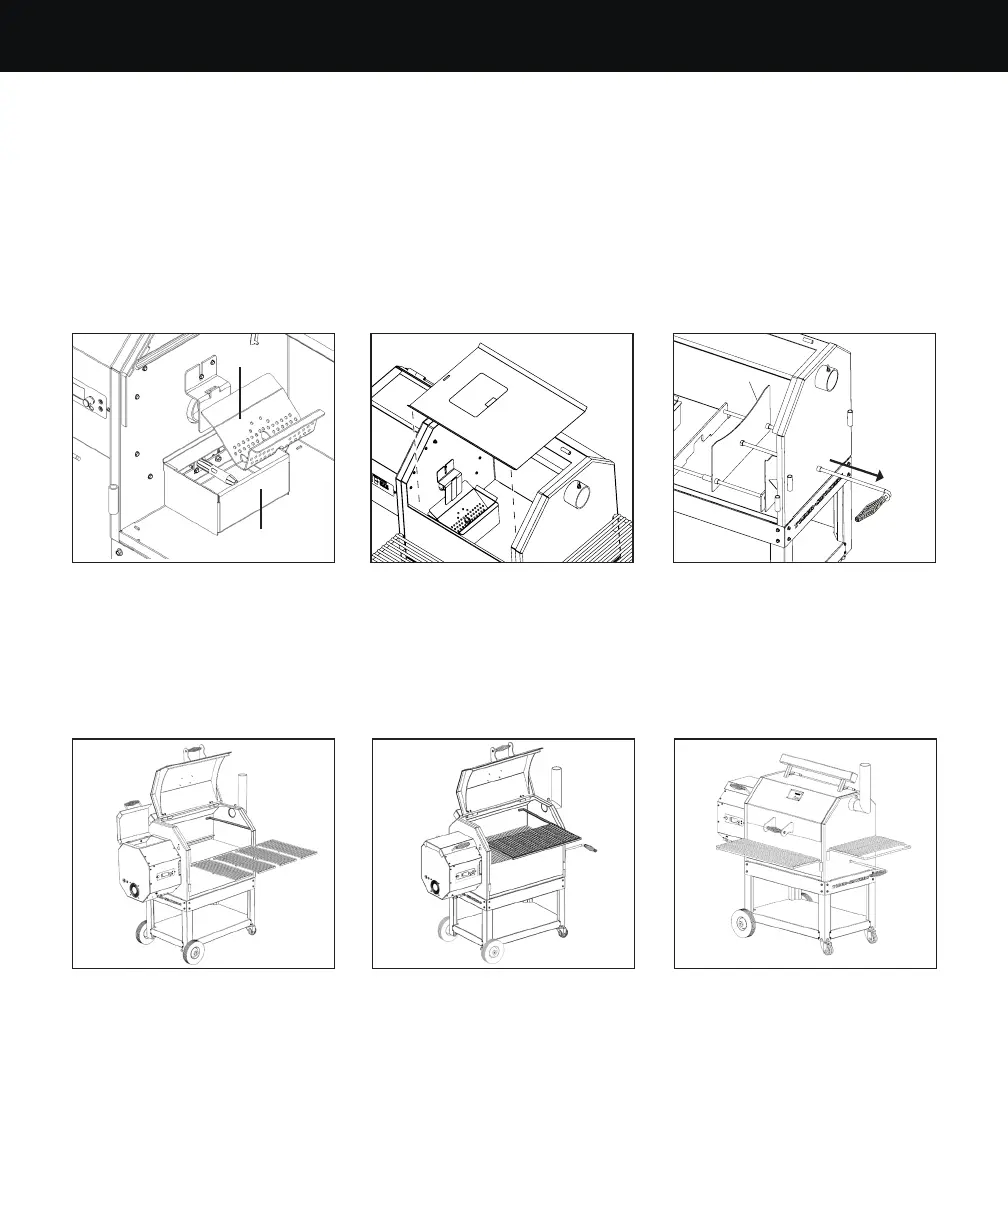
Install the burn grate inside the firebox (FIG 1) making sure it rests securely against the back wall with the
igniter tube passing through the grate. Next, install the heat diuser plate (FIG 2) into the cook chamber. Pull
the variable displacement damper (FIG 3) all the way out. Finally, secure the smokestack with the thumb screw.
Place the cooking grates inside the cooking chamber (FIG 4), then slide the second (upper) cooking shelf into
place (FIG 5). The welded brackets on the second cooking shelf should slide onto the rail first. Next, attach the
exterior front and side shelves onto the cooker (FIG 6).
Using the side shelf to assist in moving, position the cooker a minimum of 18 inches away from walls, deck rails,
or any other combustible surface. Ensure the cooker is level from front to back. However, the cooker does not
have to be perfectly level from left to right as long as the end with the drip bucket (opposite the hopper) is
the lowest point — otherwise problems with grease running towards the burn pot could result in a grease fire.
FIG 1 FIG 2 FIG 3
FIRE BOX
VARIABLE DISPLACEMENT
DAMPER
BURN GRATE
FIG 4 FIG 5 FIG 6
BURNING-IN THE GRILL
 Loading...