EasyManua.ls Logo

York Aspire 51110 - User Manual

York Aspire 51110
20 pages
Print Icon
To Next Page IconTo Next Page
Loading...
26Feb2012
Owner’s Manual
www.yorkfitness.com
Aspire Treadmill
51110

Questions and Answers

Summary

Safety Information

Safety Standards

Details the safety standards the equipment meets and relevant certifications.

Customer Support

Contacting York Fitness

Provides contact details and information required for customer assistance and warranty.

Assembly Instructions

Preparation and Unpacking

Instructions for preparing the work area and safely unpacking the treadmill components.

Parts Identification

Visual guide to identify all included parts and hardware for assembly.

Step 1: Attaching Uprights

Detailed steps for connecting the main frame to the upright support tubes.

Step 2: Connecting Console

Procedure for attaching the console to the handle post assembly.

Step 3: Cable Management

Instructions for connecting and securing internal wiring between the console and base.

Step 4: Securing Console Components

Final steps to secure the console and related components using provided screws.

Operational Instructions

Initial Setup and Power Up

Steps for final checks, powering on the treadmill, and initial run-in.

Folding and Moving the Treadmill

Guidance on how to fold, unfold, and safely move the treadmill using its transport wheels.

Safety Key Operation

Explanation of the safety key's function and proper usage during workouts.

Console Displays Explained

Overview of the treadmill's console display and the information it provides.

Understanding Function Keys

Description of the major keys on the console and their functions during operation.

Pre-set Exercise Programs

Details on the different pre-programmed workout routines available on the treadmill.

Quick Start Guide

Instructions for starting a basic workout session quickly.

Workout Modes Explained

Explanation of Manual Mode, Program Mode, and Body Fat Mode operations.

Care & Maintenance

Home Placement Guidelines

Recommendations for optimal placement of the treadmill in a home environment.

Routine Cleaning and Inspection

Procedures for cleaning the treadmill and regularly inspecting its components for wear.

Initial Run-In Procedure

Steps to follow for the initial operation of the treadmill to ensure proper belt and motor conditioning.

Treadmill Belt Lubrication

Guidance on how and when to lubricate the running belt for optimal performance and longevity.

Adjusting Belt Tension

Instructions on how to adjust the running belt tension if it becomes loose.

Adjusting Belt Alignment

Procedure for correcting the running belt if it drifts to one side of the deck.

Troubleshooting

Common Treadmill Issues

Table detailing common problems, their causes, and solutions for treadmill operation.

Console Error Code Guide

Explanation of specific error codes displayed on the console and corrective actions.

Fitness Guide

Workout Procedures

Guidance on how to start and finish a workout session safely and effectively.

Proper Running Technique

Tips for maintaining correct posture and form while running on the treadmill.

Stretching Exercises

Illustrations and instructions for basic stretches to perform before and after exercise.

Exercise Duration and Intensity

Advice on how long to exercise and at what intensity based on fitness goals.

Heart Rate Training Principles

Explanation of how to use heart rate for different fitness objectives like health, weight loss, and endurance.

Calculating Target Heart Rate

Method for calculating personal target heart rate zones based on age and fitness goals.

Exploded Drawing

Part List

Overview

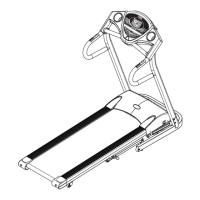
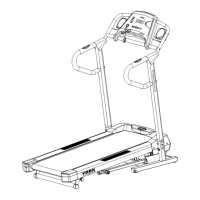
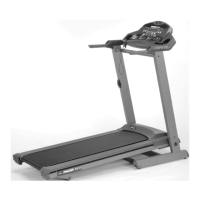
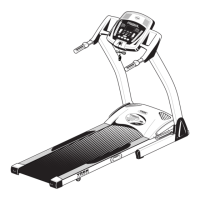
The York Aspire Treadmill, model 51110, is a high-quality, safe, and innovative piece of exercise equipment designed for home use. It is engineered to provide an effective training partner to help users achieve their personal fitness goals. The treadmill is designed for ease of assembly, operation, and maintenance, ensuring a user-friendly experience.

Function Description:

The York Aspire Treadmill is a motorized fitness machine that allows users to walk, jog, or run in place. It features a running mat that moves continuously, simulating outdoor movement. The treadmill includes a console with various controls and displays to monitor and adjust workout parameters such as speed, incline, time, distance, calories burned, and pulse. It offers multiple exercise programs, including manual mode, pre-set programs (P1-P6), and a body fat program, catering to different fitness levels and goals.

Important Technical Specifications:

  • Maximum User Weight: 100 kg
  • Electrical Information: 220-240V/50Hz/1500W
  • Speed Range: 1.0 - 16.0 KM/H
  • Incline Range: 0 - 15 levels
  • Time Display Range: 0:00 - 99:59 (minutes:seconds)
  • Distance Display Range: 0.0 - 99.9 KM
  • Calories Display Range: 0 - 999
  • Pulse Display Range: 40 - 199 BPM
  • Safety Standards: EN957 1&6-CLASS HC / BSEN60335-1
  • Compliance: EU's EMC and Low Voltage directives

Usage Features:

  • Assembly: The treadmill requires assembly, with clear instructions provided to minimize injury risk. It is recommended to assemble the product in a clean, uncluttered space with the assistance of a friend due to the weight of some components.
  • Power Up: After assembly, the treadmill is powered by plugging it into a suitable AC outlet (220-240 volt, 50Hz) and switching it on. The safety key must be attached to the console for operation.
  • Safety Key: A crucial safety feature, the treadmill will only operate when the safety key is inserted. In an emergency, pulling the safety key from the treadmill will cause it to decelerate and stop. Users should attach the safety key to their clothing during workouts. When not in use, the safety key should be removed and stored out of reach of children.
  • Console Operation: The console provides an intuitive interface for controlling the treadmill.
    • START/PAUSE: Initiates or pauses the treadmill.
    • STOP: Stops the treadmill.
    • PROG. (PROGRAM): Selects exercise programs (P1-P6), Body Fat Program, or P0 (Manual Mode).
    • MODE: In Manual Mode, selects countdown modes (Time, Distance, Calorie).
    • SPEED +/-: Increases or decreases speed by 1 KM/H in exercise mode, or adjusts setting values in setting mode. Quick Speed hot keys (3, 6, 9 KPH) allow direct jumps to specific speeds.
    • INCLINE +/-: Increases or decreases incline by 1% in exercise mode. Quick Incline hot keys (3, 6, 9%) allow direct jumps to specific incline levels.
  • Quick Start Mode: Allows immediate workout initiation by pressing "START / PAUSE" after power-up. The treadmill performs a 5-second countdown before starting the running mat slowly.
  • Manual Mode: Users can start a workout directly or select P0 using the PROG. button. The MODE button allows setting countdown targets for time, distance, or calories.
  • Program Mode: Offers pre-set programs (P1-P6) with automatic changes in speed and incline. Users can adjust workout time and modify speed/incline during the program, though settings revert to program values at the next segment. Each program has 10 levels, with each level running for 1/10 of the total workout time.
  • Body Fat Mode: Calculates the user's body fat ratio. Users input gender, age, height, and weight via the console. After placing hands on the handlebars, the body fat rate is displayed.
  • Folding and Unfolding: The treadmill can be folded for storage by lifting the deck until it clicks, after ensuring it's on the lowest incline, turned off, and unplugged. To unfold, pull the release handle and lower the deck.
  • Transportation: The treadmill is designed for easy movement. After folding, users can hold both handlebars and tilt the treadmill to utilize its transportation wheels.
  • Workout Guidance: The manual provides guidance on starting and finishing workouts, correct running form (e.g., running in the center, head erect, square shoulders, erect torso, feet pointed straight ahead), and suggested stretches (Hamstring, Calf/Achilles, Quadriceps, Inner Thigh Stretch).
  • Heart Rate Training: Emphasizes the importance of exercising at the right effort level by monitoring heart rate. It provides formulas for calculating target heart rates for different goals (good health, weight loss, improving fitness levels) and advises consulting a doctor before starting a new exercise regime.

Maintenance Features:

  • Placement: Should be placed in a dry environment, indoors, away from extreme temperature variations. Placing a mat underneath is recommended to protect flooring.
  • Cleaning: Use a warm, damp cloth to clean the product. Avoid wet cleaning of electrical components and unplug the treadmill before any cleaning or maintenance.
  • Regular Inspection: The equipment's safety level can only be maintained through regular examination for damage and wear. It is recommended to inspect the product at least once a week, checking ropes, pulleys, nuts, bolts, moving parts, bushes, chains, wheels, bearings, and connection points.
  • Component Replacement: Damaged or worn components should be replaced immediately with original manufacturer parts.
  • Fixings: Ensure all fixings are tight before use and after any adjustments.
  • Lubrication: Crucial for prolonging treadmill life. The running deck requires lubrication, with frequency depending on usage (light use: every 8 months; medium use: every 4 months; heavy use: every 2 months). Users can check lubrication levels by feeling under the mat; if dry, more lubricant is needed. A bottle of lubrication oil is supplied, and additional Lube-N-Walk Treadmill Lubrication Kits can be obtained from York distributors.
  • Running Mat Tension Adjustment: The mat tension is pre-set but can loosen with use, causing slipping. To tighten, run the treadmill at 3km/h, locate the adjustment screws at the end, and turn both screws 1/2 turn clockwise using the provided allen key. If too tight, turn anti-clockwise. Re-check tension, aiming for the mat edge to lift 5-7 cm when power is off.
  • Running Mat Alignment Adjustment: The mat's alignment can shift due to running style or uneven surfaces. If the mat tracks to one side, run the treadmill at 3km/h. If mat is over to the left (small gap left, large gap right), locate the right adjustment bolt and turn it 1 turn anti-clockwise. If mat is over to the right (large gap left, small gap right), locate the left adjustment bolt and turn it 1 turn anti-clockwise. Once central, turn the respective allen key 1/2 turn clockwise to hold position and monitor.
  • Troubleshooting Guide: A table is provided to help diagnose and resolve common issues, including treadmill not starting, belt slipping, noisy operation, and error codes (E01, E07). It lists potential causes and corrective actions, such as checking safety key, resetting circuit breaker, tightening walking belt, lubricating deck, verifying wire connections, and contacting customer support if issues persist.

York Aspire 51110 Specifications

General IconGeneral
BrandYork
ModelAspire 51110
CategoryTreadmill
LanguageEnglish

Related product manuals