8
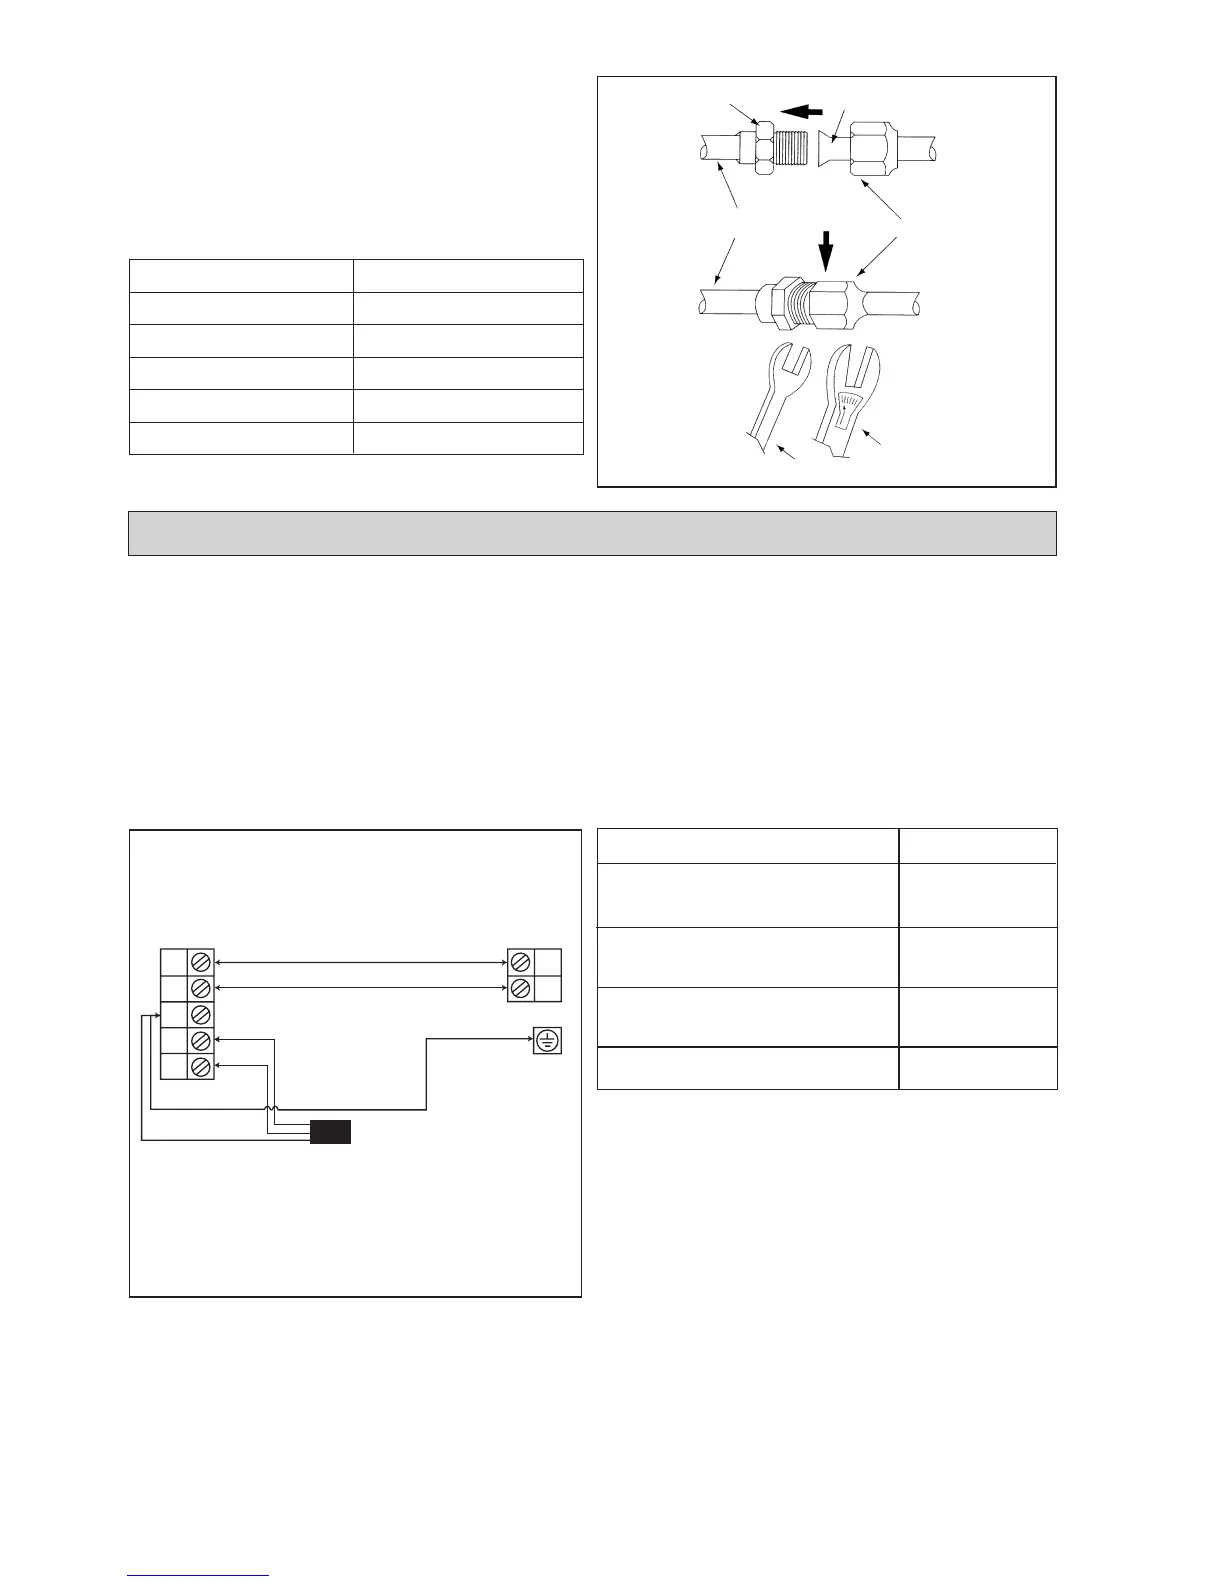
Piping Connection To The Units
• Align the center of the piping and tighten the
flare nut sufficiently with fingers.
• Finally, tighten the flare nut with the torque
wrench until the wrench clicks.
Pipe Size mm / (in) Torque Nm / (ft - lb)
6.35 (1/4) 18 (13.3)
9.53 (3/8) 42 (31.0)
12.7 (1/2) 55 (40.6)
15.88 (5/8) 65 (48.0)
19.05 (3/4) 78 (57.6)
Torque wrench
Spanar
Flared tubeFlare joint
Flare nut
Indoor piping
ELECTRICAL WIRING CONNECTION
IMPORTANT: * The figures shown in the table are for information purpose only. They should
be checked and selected to comply with the local/national codes of
regulations. This is also subject to the type of installation and conductors
used.
** The appropriate voltage range should be checked with label data on the unit.
COMP
N2
COMP
N
N1
L
E
Outdoor
Unit
Terminal
Block
Indoor
Unit
Terminal
Block
There must be a double pole switch
with a minimum 3mm contact gap and
fuse/circuit breaker as recommended
in the fixed installation circuit.
!
Power Supply Cable
Cooling Unit (single phase)
Model WM10/15J
Voltage range** 220V-240V / 1Ph
/ 50Hz + !
Power supply cable size* mm
2
1.5
Number of wire 3
Interconnection cable size* mm
2
1.5
Number of wire 3
Recommended fuse A 15

 Loading...