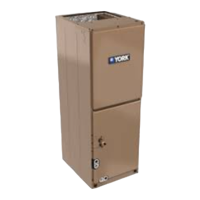
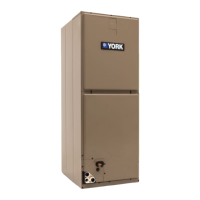
Air handler configuration
These air handler units are supplied ready to install in an upflow or
horizontal left position. See Figure 4. If the unit requires either downflow or
horizontal right airflow configurations, the unit must have the coil assembly
repositioned. See
Downflow or horizontal right conversion
.
Downflow or horizontal right conversion
1. Remove the coil access panel.
2. Slide the coil and drain pan assembly out of the air handler.
3. Turn the air handler cabinet upside down (downflow position).
4. If installing the unit in a horizontal right position, the following models
require installation of a horizontal baffle plate shipped with the unit:
C48G and C60H. The horizontal baffle plate must be secured to the
coil delta plates. See Installing a horizontal baffle plate.
5. Slide the coil back into the cabinet.
6. Install the coil access panel. Conversion is now complete.
Installing a horizontal baffle plate
1. With the coil removed from the air handling unit and laying on its hor-
izontal drain pan, locate the pre-drilled holes in the front and rear coil
delta plates.
2. Insert the horizontal baffle plate into the end of the coil. Insert one end of
the horizontal baffle plate into the top side of the primary drain pan as
shown in Figure 5 in the
Installation Manual
.
3. Secure the
horizontal baffle plate
in place with two screws, one in the
front delta plate and one in the rear delta plate.
Horizontal left applications (all models)
Air handling units are supplied ready to install in a horizontal left position.
A horizontal drain pan is factory installed. Refer to the Installation Manual
for further installation instructions.
Positioning the unit in horizontal applications
Set the unit so that it is sloped 1/4 in. towards the drain line connection.
Horizontal suspension
These air handlers may be suspended in horizontal applications. Use
angle steel support brackets with minimum 3/8 in. threaded rods,
supporting the unit from the bottom. Attach the threaded rods at the
locations shown in Figure 5, leaving enough clearance between the door
and the rod so that doors can be removed for service.
Figure 4: Typical installation
NOTICE
Convert the air handler to the desired orientation prior to installation.
Conversion must be made before brazing the refrigerant connections
to the coil.
NOTICE
These models are shipped with a horizontal baffle plate. Remove and
retain this plate for horizontal right application. Discard for all other
applications.
A1701-001
Upflow Downflow Horizontal right
Horizontal left
Heat kit
Heat kit
Heat kit
Heat kit
CAUTION
Do not lift the air handler by the cabinet brace. The cabinet brace is
held in place by the coil channel. The cabinet brace could become
disengaged from the cabinet causing the air handler to fall, potentially
causing injury or damaging property. Refer to Figure 1 in the Installa-
tion Manual for the location of the cabinet braces.
NOTICE
When assembling the support structure, size to provide clearance for
access door removal.
Figure 5: Suspension support locations
Table 6: Horizontal suspension dimensions
Air handler cabinet size X (in.) H (in.)
B18B 21 3/4 47
B24C/B36D 21 3/4 49 5/8
C36D 21 3/4 51
C42F/D42F 21 3/4 57
C48G/D48G/D60J 21 3/4 61 1/4
C60H/D60H 21 3/4 63
!
A1695-001
2 in. 1 1/2 in.
H
1 1/2 in. 1 1/2 in.
H
X
X
Minimum 1 1/2 in. x 1 1/2 in.
(Angle recommended length 26
in. minimum with 2 in. clearance
on both sides of the air handler)
Minimum 3/8 in.
threaded rod
Minimum 1 1/2 in. x 1 1/2 in.
(Angle recommended length 26
in. minimum with 2 in. clearance
on both sides of the air handler)
Minimum 3/8 in.
threaded rod
This document does not replace the Installation Manual, which must be referred to for detailed information.
Notes:
• The controls may require correct polarity on the power supply and a adequate ground.
• These units are rated for use with single and three phase 208 V or 230 V supply power.
• Use flexible duct connectors.
• Supply air ductwork must remain the size of the supply opening for the first 12 in. before transition to the correct duct size.
• The return and supply duct may be fastened to the bottom or sides of the air handler using screws no longer than 1/2 in..
• Line voltage electrical knockouts are available on the left top and left casing side. Refer to the Installation Manual for information on correct sizing
of overcurrent protection and supply wire sizes.
• Low voltage electrical knockouts are available on the right top and right casing side.
• Seal electrical openings and duct connections to prevent air infiltration.
• If installing the air handler above a finished ceiling, use a secondary drain pan.
• It is necessary to trap condensate drain pans and slope them toward the drain.
• At start up, measure the external duct static and adjust the blower speed accordingly.
A1694-001
Blower compartment
Coil compartment
C
15 in.
1 1/2 in.
Filter access
B
20 1/2 in.
21 7/16 in.
Drain connections for upflow applications
Refrigerant connections
G
F
A
Service
disconnect panel
Top outlet
dimensions
E
12 3/16 in.
18 5/8 in.
D
Bottom inlet
dimensions
Figure 1: Dimensions
Table 1: Dimensions
1
Models
Dimensions
Wiring knockouts
2
Refrigerant
connections line size
A B C D E F G
Height (in.) Width (in.) Opening widths (in.) Power (in.) Control (in.) Liquid (in.) Vapor (in.)
JHVTB18B 47 17 1/2 7 1/2 16 1/2 16 1/2
7/8 (1/2)
1 3/8 (1)
1 23/32 (1 1/4)
7/8 (1/2) 3/8
3/4
JHVTB24C 49 5/8 17 1/2 10 16 1/2 16 1/2
JHVTB36D 49 5/8 17 1/2 10 16 1/2 16 1/2
JHVTC36D 51 21 11 1/2 20 20
JHVTC42F 56 3/4 21 17 1/2 20 20
JHVTD42F 57 24 1/2 17 1/4 23 1/2 23 1/2
7/8
JHVTC48G 61 1/4 21 21 3/4 20 20
JHVTD48G 61 1/4 24 1/2 21 3/4 23 1/2 23 1/2
JHVTC60H 63 21 23 1/2 20 20
JHVTD60H 63 24 1/2 23 1/2 23 1/2 23 1/2
JHVTD60J 61 1/4 24 1/2 21 3/4 23 1/2 23 1/2
1. All dimensions are in inches.
2. Actual size (conduit size)
Subject to change without notice. Published in U.S.A. 6135660-URG-A-0222
Copyright © 2022 by Johnson Controls, Inc. All rights reserved. Supersedes: None
York International Corp.
5005 York Drive
Norman, OK 73069
Quick Reference Guide
Variable Speed ECM Single Piece Multi-position
Residential Air Handlers