Do you have a question about the Zanussi ZCG562 and is the answer not in the manual?
Fundamental safety measures and precautions for everyday use.
Instructions and requirements for the correct installation of the cooker.
Specific safety advice to protect children from appliance hazards.
Identification and labeling of the appliance's main parts.
Explanation of control knobs, buttons, and their operational uses.
Locating the rating plate and performing initial preparation steps.
Advice on managing steam and selecting appropriate cookware.
Step-by-step guide for lighting, using, and turning off hob burners.
Procedure for lighting and operating the grill burner.
General advice and suggestions for cooking and appliance use.
Explanation of different temperature zones within the oven.
Recommendations and importance of preheating the oven.
Procedure for lighting and operating the main oven burner.
A detailed table of food types, gas marks, positions, and cooking times.
Guidance on suitable and unsuitable cleaning agents.
Methods for cleaning the exterior surfaces of the cooker.
Specific instructions for cleaning the hob and its components.
Mandatory safety regulations and standards for installation.
Requirements for adequate ventilation in the installation area.
Instructions on how to safely move the appliance.
Installing and verifying the appliance's battery.
Testing the gas supply pressure after connection.
Verifying the correct operation of grill and hob burners.
Terms and conditions covered by the manufacturer's guarantee.
Information on service calls, exclusions, and obtaining spare parts.
This document is a user manual for a Zanussi cooker, models ZCG562 and ZCG561. It provides comprehensive instructions for safe operation, cooking, and maintenance of the appliance.
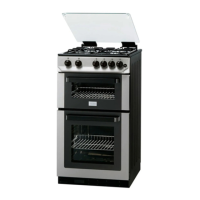
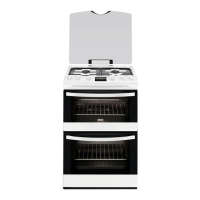
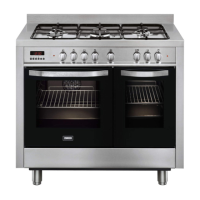
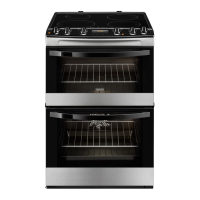
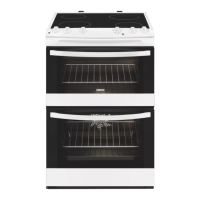
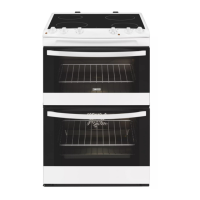
The cooker is designed for domestic use to cook edible foodstuffs and features a gas hob, a grill, and a main oven. The appliance is equipped with pan supports, a control panel, a grill door, a main oven door, a grill pan grid, a grill pan, a shelf, and levelling feet. The control panel includes knobs for the top oven/grill, main oven, small burner, left medium burner, right medium burner, large burner, and an ignition button.
The gas hob has different burner sizes to accommodate various types of cooking. For optimal efficiency, flat-based pots and pans appropriate to the burner size should be used. To light a hob burner, lift the lid, push and hold the corresponding control knob, turn it to the large flame symbol (highest setting), and immediately press the ignition button. The control knob should be kept depressed for up to 5 seconds, but no longer than 10 seconds. After this period, release the controls, and the flame should remain lit. If the burner does not light within 10 seconds, stop operating the appliance, wait at least 1 minute, and then attempt ignition again. Once lit, the setting can be adjusted. To turn off a burner, rotate the control knob clockwise to the off position (indicated by a dot). Safety precautions for hob use include ensuring pan supports are correctly fitted, avoiding immediate ignition button press after turning the knob to prevent gas buildup, using appropriate pan sizes (Rapid Burner: 22-26 cm, Medium Burner: 14-22 cm, Auxiliary Burner: 12-18 cm), not overfilling pans, avoiding pans with heavy handles that cause tipping, placing pans centrally on burners, and not sliding pans across the hob. Accidental spillages should be wiped up, and parts washed and dried once cool. A flat-based wok will stand stable on pan supports; if using a round wok with a collar support, it must be the open wirework type. A Gas Flame Safety Device (FSD) is included to cut off gas if the flame is accidentally extinguished.
The grill is operated with the grill door fully open. To light the grill, push and hold the control knob, turn it to the large flame symbol (highest setting), and immediately press the ignition button. Keep the control knob depressed for up to 5 seconds, but no longer than 10 seconds. Release the controls, and the flame should remain lit. If it doesn't light within 10 seconds, wait 1 minute before re-attempting. To turn off the grill, rotate the control knob to the off position (dot symbol). For grilling, food should be placed on the grid in the grill pan to allow air circulation. The grid and grill pan runner position can be adjusted for different food thicknesses. Food should be thoroughly dried before grilling to minimize splashing. Lean meats and fish can be lightly brushed with oil or melted butter. Accompaniments like tomatoes and mushrooms can be placed under the grid. For toasting bread, use shelf position 1 with the grid in the high position. The grill should be preheated on full setting for a few minutes before sealing steaks or toasting. The heat setting and shelf position should be adjusted as needed, and food should be turned over during cooking. Never cover the grill pan or grid with foil, as this can lead to grill fires.
The main oven features heat zones, with the middle being the chosen gas mark, the top slightly hotter, and the lower shelf slightly cooler, while the base is considerably cooler. These zones can be utilized for cooking foods requiring different temperatures simultaneously. For preheating, it is recommended to run the oven for 20 minutes, especially for recipes needing high temperatures or for cooking frozen/chilled ready meals. To light the main oven, fully open the door, push and hold the control knob, turn it to gas mark 9, and immediately press the ignition button. Keep the control knob depressed for up to 5 seconds, but no longer than 10 seconds. Release the controls, and the flame should remain lit. If it doesn't light within 10 seconds, wait 1 minute before re-attempting. To turn off the main oven, rotate the control knob to the off position (dot symbol). The oven also includes a "Slow Cook" function. For this, food should be cooked at Gas mark 6 for 30 minutes before turning the oven down to "Slow Cook" to ensure the food reaches a sufficient central temperature. Shelves should be arranged in the desired positions before switching on the oven, counting from the bottom upwards. Food should be placed centrally on the shelf with sufficient room for air circulation. Baking trays should not be pushed too far back to avoid burning food. Using suitably sized baking trays on the shelf prevents spillage onto the oven base. The material and finish of baking trays affect base browning (enamelware, dark, heavy, or non-stick increase browning; shiny aluminum or polished steel reflect heat away). When cooking multiple dishes, place them centrally on different shelves rather than clustering them. Baking trays should not be placed directly on the oven base.
The appliance should be kept clean at all times to prevent fat or foodstuff buildup, which could lead to fires, especially in the grill pan. Always allow the appliance to cool before cleaning or maintenance. Only use cleaning materials recommended by the manufacturer and avoid bleach, harsh abrasives, or sharp metal scrapers on oven door glass.
The control panel, knobs, handles, doors, and sides should be regularly wiped with a soft cloth and hot soapy water, then finished with a soft cloth to prevent streaking. Abrasive cream cleaners, wire wool pads, or scourers should not be used on painted or printed finishes. Stainless steel cream cleaners are abrasive and should be avoided; any spillage on stainless steel finishes must be wiped off immediately. Do not attempt to remove control knobs.
The hob can be cleaned with a mild abrasive. Care should be taken not to damage the spark electrodes. Pan supports, burner caps, and burner crowns can be removed for cleaning by soaking them in hot soapy water. Stubborn stains on pan supports from aluminum saucepans can be removed with a soap-impregnated steel wool pad. After cleaning, all parts should be thoroughly dried before reassembly.
All removable parts, except the grill pan handle, can be washed in the dishwasher. The grill pan, grill pan grid, and oven shelves can be cleaned with a soap-impregnated steel wool pad, with soaking in hot soapy water making cleaning easier.
The vitreous enamel grill compartment can be cleaned with normal oven cleaners, following manufacturer instructions and rinsing well. Aerosol cleaners should not contact elements, the door seal, or painted finishes.
The vitreous enamel main oven compartment can be cleaned with normal oven cleaners, following manufacturer instructions and rinsing well. Aerosol cleaners should not contact elements, the door seal, or painted finishes.
The outer and inner glass can be cleaned with hot soapy water or hob cleaner. Hob cleaner should not be used on Stainless Steel or painted finishes. If the door glass panel is chipped or deeply scratched, it must be replaced to prevent shattering. The oven should not be used without the glass in place. Inner glasses can be removed for cleaning by pushing them towards direction 1 to release from the location bracket, then pulling them out towards direction 2. After cleaning, push the glass towards and under the cover (direction 3) and place it under the location bracket (direction 4). For triple glass doors, the third glass can be removed similarly.
| Type | Freestanding |
|---|---|
| Fuel Type | Gas |
| Hob Type | Gas |
| Number of Burners | 4 |
| Oven Type | Gas |
| Width | 50 cm |
| Color | White |
| Ignition Type | Manual |
| Gas Type | LPG |