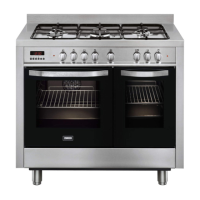
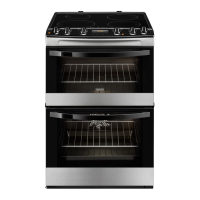
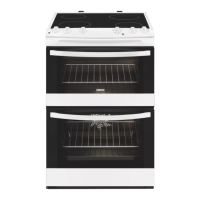
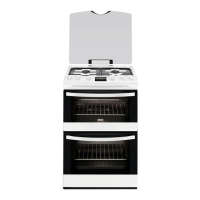
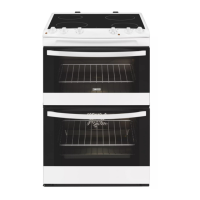
This document is a user and installation manual for a Zanussi cooker, specifically models ZCK18307XA and ZCK98307XA.
Function Description
The Zanussi cooker is designed for domestic cooking. It features a gas hob and two ovens with different volumes. The left oven is larger and offers natural or forced convection with an electric grill, supporting various cooking types. The right oven is smaller and provides natural convection with an electric grill.
The gas hob includes burners of different sizes (Ultrarapid, Rapid, Semi-rapid, Auxiliary) to accommodate various cooking needs. Each burner is equipped with automatic electric ignition. The ovens offer multiple cooking functions:
- Left Oven (Multifunction):
- Defrosting at room temperature: Activates the fan for mild air circulation to slowly defrost food, suitable for fruit and cakes.
- Traditional cooking: Uses both top and bottom heating units for even heat distribution, ideal for meats, fish, bread, pizzas, and cakes.
- Combined traditional + fan cooking: Combines top and bottom heating with fan ventilation for rapid cooking and multi-level use.
- Defrosting + warm up by hot air: Activates the bottom heating unit with fan distribution, recommended for defrosting and warming ready-made meals.
- Fan forced cooking: Activates the rear heating unit with fan distribution for fast and even cooking on multiple levels.
- Conventional grill cooking: Uses the top central heating element for direct heat, ideal for grilling, browning, or toasting. Automatically activates the spit if present.
- Fan grill cooking: Combines the top central heating element with fan distribution for milder, even grilling, suitable for whole fish and poultry with a crispy finish.
- Right Oven (Conventional):
- Traditional cooking: Uses both top and bottom heating elements for general baking of meats, fish, bread, pizza, and cakes.
- Grill cooking: Uses the top heating element for direct grilling, browning, or toasting. Automatically activates the spit if present.
The cooker also features an electronic programmer with functions for:
- Minute counter
- Cooking time/Clock
- End of cooking/Clock
- Manual operation mode
- Setting time backwards/forwards
Important Technical Specifications
Outside Cooker Dimensions:
- 100 x 60 cm model: Height 1 (min) 910 ÷ 920 mm, Height 2 (max) 970 ÷ 980 mm, Width 3 1000 mm, Depth 4 600 mm.
- 90 x 60 cm model: Height 1 (min) 885 ÷ 920 mm, Height 2 (max) 945 ÷ 980 mm, Width 3 900 mm, Depth 4 600 mm.
Burner Technical Data (Hob):
| N. |
Denomination |
Operating pressure gas |
Rate (g/h) |
Diameter injector Sabaf (1/100 mm) |
Heat input Min (W) |
Heat input Max (W) |
By-pass (1/100 mm) |
| 1 |
Ultrarapid |
GPL 30 / Natural gas 20 |
276 |
98 / 135-K |
1600 |
3800 |
62 |
| 2 |
Rapid |
GPL 30 / Natural gas 20 |
218 |
88 / 117-Y |
800 |
3000 |
44 |
| 3 |
Semi-rapide |
GPL 30 / Natural gas 20 |
131 |
68 / 98-Z |
600 |
1800 |
34 |
| 4 |
Auxiliary |
GPL 30 / Natural gas 20 |
73 |
51 / 75-X |
400 |
1000 |
28 |
Electric Components Nominal Data:
- Fan of the rear heating element: 25-29 W
- Oven lamp: 2 x 15 W - E 14 - T 300
- Power cable: H05 RR-F 3 x 1.5 mm²
- Cooling fan motor: 12 W
- Left cavity (Top heating element): 1800+800 W
- Left cavity (Lower heating element): 1400 W
- Left cavity (Rear circular heating element): 2000 W
- Right cavity (Top heating element): 475+1150 W
- Right cavity (Lower heating element): 950 W
Gas Connection:
- RC 1/2 (1/2” B.S.P.) female threaded connector, located just below the hotplate level on the rear right-hand side.
- Recommended flexible hose length: 4 feet x 3/8 inch bore, complying with BS.669 Current Edition.
Electrical Connection:
- Requires a suitable earth system.
- Power cable must be laid to avoid temperatures exceeding 75°C.
- Standardized plug suitable for the load indicated on the data label.
- Wiring: L (phase) = brown wire, N (neutral) = blue wire, (earth) = green/yellow wire.
- For direct mains connection, a multipolar switch with a minimum opening between contacts of 3 mm is required.
Usage Features
Hob Operation:
- Automatic electric ignition: Press and turn the knob counterclockwise to "Full on" position, hold for 1 second after ignition.
- Optimum use of burners: Adjust flame to needs, use appropriately sized pans with lids, reduce flame to "Reduced rate position" when contents boil.
Oven Operation:
- Always pre-heat the oven if recommended by the recipe, waiting for the yellow warning light to turn off.
- Use oven gloves for inserting/removing containers.
- Place a little water in the grill pan during grilling to prevent grease from burning and reduce smoke/smells.
- Avoid covering the oven base or grill with aluminum foil.
- Do not use the oven as a larder or saucepan cupboard.
Electronic Programmer:
- Setting the time: After power connection, press buttons 2 and 3 simultaneously, then 5 or 6 to set current time.
- Minute counter: Press button 1, then 5 or 6 to set time.
- Semi-automatic operation (cooking time): Press button 2, then 5 or 6 to set cooking time.
- Semi-automatic operation (end of cooking time): Press button 3, then 6 to set end of cooking time.
- Automatic operation (delayed start): First set cooking time, then end of cooking time.
- Manual operation: Press button 4 to set programmer to manual.
- Buzzer sounds for approximately 7 minutes at the end of a program or minute counter function, can be stopped by pressing any function button.
Safety Features:
- Anti-tipping chains: Two chains must be screwed to the back of the cooker and fixed to the wall with hooks to prevent accidental tipping.
- Safety temperature device: Automatically turns on if the main thermostat fails, temporarily interrupting electricity.
- Flame safeguard on each burner (for marine craft, caravans, mobile homes).
- Hot surface warning: Oven door glass and accessible parts become hot during use; keep children away.
- Packaging materials are environmentally-friendly and recyclable.
Maintenance Features
General Cleaning:
- Clean hob surfaces and components (grill, enamelled covers, burner heads, flame diffusers) with warm soapy water after each use. Rinse and dry thoroughly.
- Avoid leaving acidic substances (vinegar, coffee, milk, salty water, lemon/tomato juice) on enamelled surfaces.
- Clean oven cavity after each use to remove residuals, grease, or sugar.
- Clean enamelled parts with warm soapy water, rinse, and dry thoroughly.
- Do not use harsh abrasive cleaners or sharp metal scrapers on oven glass.
- Do not use steam cleaners.
Specific Maintenance:
- Inner oven door glass: Can be easily removed for cleaning. Open the oven door, remove the support securing the glass. Reassemble in reverse order.
- Oven side-guide rails: Can be extracted for easier cleaning by pushing on the last slot to release, then lifting upwards.
- Self-cleaning panels: Oven walls are coated with grease-proof, microporous enamel. For heavy grease, dry with a damp sponge, heat oven at maximum temperature for 2 hours, then clean again.
- Replacing the oven lamp: Ensure appliance is switched off. New lamps must be 15 W - 230 V~ - 50 Hz - E 14, resistant to 300°C. Remove glass protection cap and replace bulb.
- Replacing the flexible gas hose: Recommended to change on the date printed on it.
- Replacing the injectors: Remove burner cup and head, use a 7 mm Ø socket spanner to replace injectors. Adjust burner after replacement.
- Replacing the taps: Disconnect gas/electricity. Remove pan supports, burner heads, knobs. Unscrew fixing screws for front panel and hob. Unscrew nuts of gas aluminum pipes and thermocouple quick connectors. Unscrew screws locking crosspieces and bridles of taps. Replace seal each time a tap is replaced. Reassemble in reverse order.
- Replacing electrical components: Rear protection must be removed. Keep earth wire longer than phase wires.
- Spark generator, spark electrodes, lamp holder: Worktop must be removed as indicated in "Replacing the taps" section.
- Programming accessory, thermostat, commutators, switches, microswitches: Front panel must be removed as indicated in "Replacing the taps" section.