This document describes a Zanussi cooker, which includes both a hob and an oven, designed for household use.
Function Description
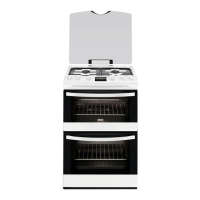
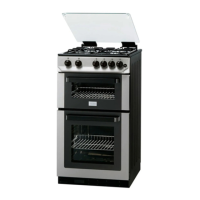
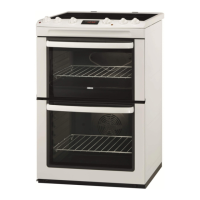
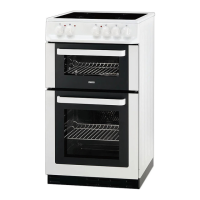
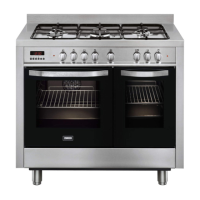
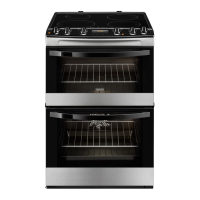
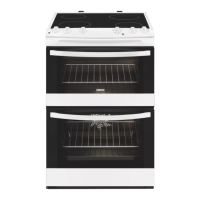
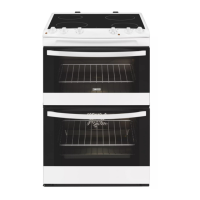
The cooker is a freestanding appliance with a gas hob and two gas ovens (a top oven and a main oven). The hob features four gas burners: one rapid burner, two semi-rapid burners, and one auxiliary burner. The top oven is smaller and suitable for cooking smaller quantities of food, while the main oven is larger and ideal for bigger dishes. Both ovens are equipped with a grill function. The appliance also includes a cooling fan that operates automatically to keep surfaces cool during and after use.
Usage Features
Hob Operation:
To ignite a hob burner, push down and turn the corresponding knob to the maximum position. The spark generator activates automatically. Keep the knob pushed for 10 seconds to allow the thermocouple to warm up and prevent the gas supply from being interrupted. Once the flame is regular, adjust it as needed. In case of an accidental flame-out, turn the knob to the off position and retry after one minute. If there is no electricity, burners can be ignited manually with a flame, pushing the knob down for 10 seconds. The hob has a lid safety device that cuts off the gas supply when closed.
Oven Operation:
Before operating the oven, the time must be set. The appliance will flash "12:00" after initial connection or a power cut, prompting the user to set the time using the '+' or '-' buttons. To ignite the oven or grill burner, open the oven door, push down the respective knob, and turn it to the spark position (counter-clockwise for the main oven, clockwise for the grill burner, or counter-clockwise for the top oven burner). Keep the knob pushed for 15 seconds to warm up the thermocouple. If the burner does not light, release the knob, turn it to off, and retry after one minute. The oven burners have a thermocouple safety device that stops gas flow if the flame goes out. The top oven burner cannot operate when the grill is active.
Cooking Guidelines:
The manual provides general guidelines for baking, roasting, and grilling in both the top and main ovens, including recommended heat settings, preparation times, and shelf positions for various foods like biscuits, cakes, pies, meats, and fish. It advises preheating the empty oven for 20 minutes before cooking. For roasting, it suggests using heat-resistant ovenware and adding water to the tray to prevent fat from burning. Grilling should always be done with the oven door open and the deep pan with trivet placed on the second or third shelf position.
Accessories:
The cooker comes with a wire shelf for cookware, cake tins, and roasts, and a grill-/roasting pan that can also be used to collect fat. A trivet is provided for roasting and grilling, which can be placed in the deep pan with its supports pointing up for roasting larger items or pointing down for grilling flat dishes.
Maintenance Features
General Cleaning:
The appliance should be cleaned regularly to prevent the deterioration of surface materials. After each use, the hob should be cleaned with a moist soft cloth and a non-abrasive detergent. Spills like melted plastic, sugar, or food with sugar should be removed immediately to prevent damage. Limescale, water rings, and fat stains can be cleaned when the hob is cool. Stainless steel parts should be washed with water and dried with a soft cloth. The oven cavity and door should be wiped dry after each use to prevent corrosion from condensation.
Burner Maintenance:
The burner crowns and caps should be correctly seated after cleaning. The spark plug, a ceramic ignition candle with a metal electrode, needs to be kept clean to ensure proper ignition. The burner crown holes should be checked for obstructions. Pan supports are not dishwasher-safe and must be washed by hand. Care should be taken when replacing pan supports to avoid damaging the hob top.
Oven Cleaning:
The oven interior should be cleaned after each use to prevent fat accumulation and food remains, which can pose a fire risk. All accessories should be cleaned and dried after use. Stubborn dirt can be removed with a special oven cleaner, but abrasive products, sharp metal scrapers, and steam cleaners should not be used on the glass door or hinged lids.
Catalytic Cleaning (if applicable):
Ovens with catalytic enamel walls are self-cleaning, as they absorb fat during operation. To support this process, the empty oven should be heated regularly. The oven floor should be cleaned with warm water and washing-up liquid. Catalytic surfaces should not be cleaned with oven sprays, abrasive cleaning agents, soap, or other detergents.
Door Glass Cleaning:
The oven door glasses can be removed for cleaning. The process involves opening the door, releasing the clip seal by pushing inwards on the top edge of the door trim, pulling the trim forward, and then removing the glass panels. Reassembly follows the reverse steps.
Lamp Replacement:
Before replacing the oven lamp, turn off the oven, disconnect it from the mains, and allow it to cool down. Place a cloth on the bottom of the cavity. The lamp glass cover, located at the back of the cavity, can be turned counterclockwise to remove. The lamp should be replaced with a suitable 300 °C heat-resistant oven lamp of the same type.