This document is a user manual for a Zanussi Cooker, specifically models ZCV66000XA, ZCV66000WA, and ZCV68000XA. It provides comprehensive information on safety, product description, daily use, care and cleaning, troubleshooting, and installation.
Function Description
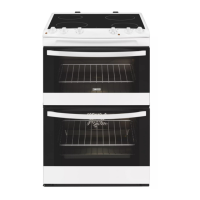
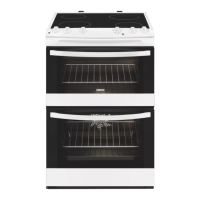
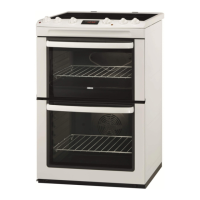
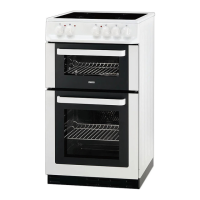
The Zanussi Cooker is a freestanding appliance designed for household cooking. It features both a hob and two ovens (a top oven and a main oven), allowing for versatile cooking options.
Hob:
The hob consists of four cooking zones with varying power outputs:
- Two 1200 W cooking zones.
- Two 1700 W cooking zones.
- A residual heat indicator for each zone, which illuminates when a cooking zone is hot.
Ovens:
The appliance includes two ovens:
- Top Oven: A smaller oven with 37 liters capacity and 3 shelf positions. It is suitable for cooking smaller quantities of food, fruitcakes, sweets, and savoury flans or quiche. Functions include:
- Off position
- Oven Lamp (to activate the lamp without a cooking function)
- Conventional Cooking (for baking and roasting on 1 shelf position)
- Dual Circuit Grill (for grilling medium quantities of food and making toasts)
- Full Grill (for grilling flat food and toasting bread)
- Main Oven: A larger oven with 74 liters capacity. It is particularly suitable for cooking larger quantities of food. Functions include:
- Off position
- Oven Lamp (to activate the lamp without a cooking function)
- Defrost (to defrost frozen food)
- Thermaflow® (to bake on up to 2 shelf positions simultaneously and to dry food)
Cooling Fan:
The appliance is equipped with a cooling fan that automatically activates during operation to keep surfaces cool. It may continue to operate after deactivation until the appliance cools down.
Important Technical Specifications
- Dimensions:
- Height: 894 - 912 mm
- Width: 600 mm
- Depth: 600 mm
- Oven Capacity:
- Top oven: 37 liters
- Main oven: 74 liters
- Hob Cooking Zones:
- Two 1200 W zones
- Two 1700 W zones
- Electrical Connection:
- Requires connection by a qualified electrician.
- Must be earthed.
- Electrical information on the rating plate must match the power supply.
- Requires a correctly installed shockproof socket.
- Isolation device in the electrical installation must have a contact opening width of minimum 3 mm.
- Recommended cross-section area for wiring is six square millimeters (6 mm²).
- Lamp: Suitable 300 °C heat-resistant oven lamp.
Usage Features
Hob - Daily Use:
- Heat Setting: Controlled by knobs with settings from 1 to 6 (1 being low, 6 being high).
- Residual Heat: Users are advised to use residual heat to reduce energy consumption by deactivating cooking zones 5-10 minutes before cooking is complete.
- Cookware: The bottom of cookware should be as thick and flat as possible. Enamelled steel, aluminium, or copper bottoms can cause discoloration on the glass-ceramic surface.
Oven - Daily Use:
- Activating/Deactivating: Ovens are activated by turning the function knob and deactivated by turning it to the "Off" position.
- Preheating: It is recommended to preheat both ovens (one at a time) to maximum temperature for 1 hour before first use to burn off remaining grease.
- Accessories:
- Wire shelf: For cookware, cake tins, roasts.
- Grill- / Roasting pan: For baking, roasting, or collecting fat.
- Trivet: For roasting and grilling; used with the Grill- / Roasting pan.
- Baking and Roasting:
- Temperature and baking times are guidelines and depend on recipes and ingredients.
- Lower temperatures are recommended for initial use.
- Baking times can be extended for multiple shelf positions.
- Residual heat can be used by deactivating the oven 10 minutes before cooking ends.
- For roasting, heat-resistant ovenware is recommended. Large joints can be roasted in the deep pan or on the wire shelf. Lean meats should be roasted with a lid. Liquid can be added to the deep pan to prevent burning. Roasts and poultry should be basted multiple times.
- Grilling:
- Always grill with the oven door closed.
- Use the maximum temperature setting.
- Preheat the empty oven with grill functions for 5 minutes.
- The deep pan should be set to the first shelf position to collect fat.
- Only grill flat pieces of meat or fish.
- Defrost: Remove food packaging and place food on a plate. Do not cover the food, as this can extend defrost time. Use the first shelf position (bottom).
Maintenance Features
General Safety:
- Only a qualified person should install and replace the cable.
- Do not operate with an external timer or remote-control system.
- Keep children and pets away from the hot appliance.
- Do not use steam cleaners.
- Do not place metallic objects on the hob surface.
- If the glass ceramic surface is cracked, switch off the appliance.
- Always use oven gloves.
- Disconnect power before maintenance or replacing the lamp.
- Do not use harsh abrasive cleaners or sharp metal scrapers on the glass door.
- Damaged supply cords must be replaced by the manufacturer or an authorized service centre.
Hob - Care and Cleaning:
- Clean the hob after each use.
- Use cookware with clean bottoms.
- Scratches or dark stains do not affect hob operation.
- Use a special cleaner and scraper for the glass surface.
- Immediately remove melted plastic, plastic foil, and food with sugar to prevent damage.
- Remove limescale rings, water rings, fat stains, and metallic discoloration when the hob is sufficiently cool, using a moist cloth and detergent, then dry with a soft cloth.
Oven - Care and Cleaning:
- Clean the front of the appliance with a soft cloth, warm water, and cleaning agent.
- For metal surfaces, use a usual cleaning agent.
- Clean the appliance interior after each use to prevent fat accumulation, which can cause fire.
- Clean stubborn dirt with a special oven cleaner.
- Clean all accessories after each use and let them dry.
- For nonstick accessories, avoid aggressive agents, sharp-edged objects, or dishwashers.
- Stainless steel or aluminium appliances: Clean with a wet sponge only. Do not use steel wool, acids, or abrasive materials.
- Removing and cleaning door glasses (top oven):
- Open the door.
- Hold the door trim on the top edge at the two sides and push inwards to release the clip seal.
- Pull the door trim to the front.
- Remove the glass panels.
- To reinstall, reverse the steps, ensuring the A trim part is attached to the door before lowering the trim.
- Removing and cleaning door glasses (main oven):
- Push the door trim at one side to remove it.
- Pull up the trim.
- Remove the glass panels.
- Replacing the lamp:
- Place a cloth on the bottom of the oven cavity.
- Deactivate the appliance and remove fuses or deactivate the circuit breaker.
- Turn the lamp glass cover counterclockwise to remove it.
- Clean the glass cover.
- Replace with a suitable 300 °C heat-resistant oven lamp of the same type.
- Install the glass cover.
Disposal:
- Disconnect from mains supply.
- Cut off and discard the mains cable.
- Remove the door catch to prevent children and pets from getting trapped.
- Recycle packaging and the appliance itself according to local regulations. Do not dispose of marked appliances with household waste.