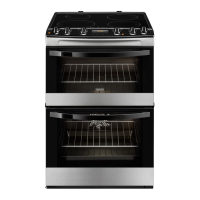
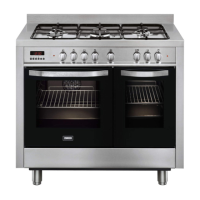
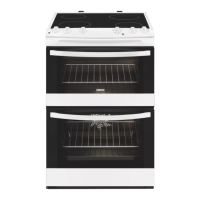
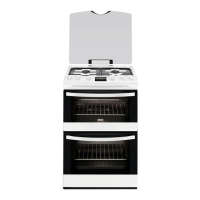
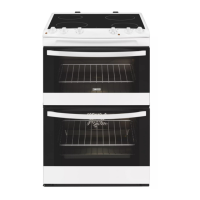
This document is a user manual for a Zanussi cooker, model numbers ZCI66050BA, ZCI66050WA, and ZCI66050XA. It provides comprehensive instructions for installation, safe operation, daily use, and maintenance of the appliance.
The manual begins with crucial safety information, emphasizing the importance of reading instructions before installation and use to prevent injuries or damages. It highlights specific safety considerations for children and vulnerable people, advising continuous supervision for children under 8 and those with extensive disabilities. Packaging should be disposed of appropriately, and children and pets kept away from the appliance during operation and cooling, as accessible parts can become hot. If a child safety device is present, it should be activated. Cleaning and user maintenance by children should always be supervised.
General safety guidelines state that only qualified persons should install and replace the appliance's cable. The appliance must be connected to the mains with a specific type of cable (H05VV-F) to withstand the rear panel's temperature. It is intended for use up to an altitude of 2000 m above sea level. The appliance is not designed for use on ships, boats, or vessels. Installation behind a decorative door is prohibited to prevent overheating, and it should not be installed on a platform. Operation via an external timer or separate remote-control system is not permitted.
The manual warns against unattended cooking with fat or oil due to fire risk and instructs never to extinguish a fire with water, but to switch off the appliance and cover the flame. Cooking processes must be supervised, with short-term processes requiring continuous supervision. Storing items on cooking surfaces is prohibited. Steam cleaners, harsh abrasive cleaners, or sharp metal scrapers should not be used on the glass door or hinged lids to avoid scratching and shattering. Metallic objects like knives, forks, spoons, and lids should not be placed on the hob surface as they can get hot. If the glass ceramic or glass surface is cracked, the appliance must be switched off and unplugged, or the fuse removed if directly connected, and an Authorised Service Centre contacted. After use, hob elements should be switched off via their controls, not relying on the pan detector. Users are cautioned that the appliance and its accessible parts become hot during use, and oven gloves should always be used when handling accessories or ovenware. Power supply must be cut before maintenance, and the appliance switched off before replacing the lamp to prevent electric shock.
For power supply cable damage, replacement must be done by the manufacturer, an Authorised Service Centre, or similarly qualified persons. Shelf supports are removed by pulling the front, then the rear, away from the side walls, and installed in reverse. Disconnection means must be incorporated into fixed wiring according to rules. Only hob guards designed or indicated by the manufacturer should be used.
Installation
Installation must be performed by a qualified person. All packaging should be removed, and a damaged appliance should not be installed or used. Installation instructions must be followed. Care should be taken when moving the heavy appliance, using safety gloves and enclosed footwear. The appliance should not be pulled by its handle. The kitchen cabinet and recess must have suitable dimensions, maintaining minimum distance from other appliances. It should be installed below and adjacent to safe structures. Live parts must be protected by furniture. The appliance sides must be adjacent to other units of the same height. It should not be installed next to a door or under a window to prevent hot cookware from falling. A stabilizing means must be installed to prevent tipping.
Electrical Connection
All electrical connections must be made by a qualified electrician, and the appliance must be earthed. Parameters on the rating plate must match the mains power supply. A correctly installed shockproof socket must always be used, avoiding multi-plug adapters and extension cables. Mains cables should not touch or come near the hot appliance door. Shock protection for live and insulated parts must be securely fastened. The mains plug should only be connected at the end of installation, ensuring access after installation. If the socket is loose, the plug should not be connected. The mains cable should not be pulled to disconnect the appliance; always pull the plug. Correct isolation devices, such as line protecting cut-outs, fuses, earth leakage trips, and contactors, must be used. The electrical installation must have an isolation device with a minimum 3 mm contact opening width at all poles. The appliance door must be fully closed before connecting the mains plug.
Use
This appliance is for household use only, and its specifications should not be altered. Ventilation openings must not be blocked. The appliance should not be left unattended during operation. Users should be careful when opening the door during operation due to hot air release. Operation with wet hands or contact with water is prohibited. The appliance should not be used as a work or storage surface. Pacemaker users should maintain a minimum distance of 30 cm from induction cooking zones.
Fats and oils can release flammable vapors when heated, so flames or hot objects should be kept away. Very hot oil vapors can cause spontaneous combustion. Used oil with food remnants can cause fire at lower temperatures. Flammable products or wet items with flammable products should not be placed on, near, or in the appliance. Sparks or open flames should not contact the appliance when the door is open. The door should be opened carefully, as ingredients with alcohol can create an explosive mixture.
To prevent damage or discoloration of the enamel, ovenware or objects should not be placed directly on the bottom, water should not be poured directly into a hot appliance, and moist dishes or food should not be left in after cooking. Care should be taken when removing or installing accessories. Enamel or stainless steel discoloration does not affect performance. A deep pan should be used for moist cakes, as fruit juices can cause permanent stains. Hot cookware should not be kept on the control panel, and cookware should not boil dry. Objects or cookware should not be dropped on the appliance, as this can damage the surface. Cooking zones should not be activated with empty or no cookware. Aluminum foil should not be placed on the appliance or directly on the bottom. Cast iron, aluminum, or damaged-bottom cookware can cause scratches, so these objects should always be lifted when moved on the cooking surface. The appliance is for cooking purposes only, not for room heating.
Care and Cleaning
Before maintenance, the appliance must be deactivated, and the mains plug disconnected. The appliance should be cold before cleaning to avoid glass panel breakage. Damaged door glass panels must be replaced immediately by an Authorised Service Centre. Care should be taken when removing the heavy door. Fat and food remnants can cause fire. The appliance should be cleaned regularly to prevent surface material deterioration. The cavity and door should be wiped dry after each use to prevent corrosion from condensation. To reduce condensation, the appliance should be operated for 10 minutes before cooking. A moist soft cloth and neutral detergents should be used for cleaning, avoiding abrasive products, abrasive cleaning pads, solvents, or metal objects. If using oven spray, safety instructions on the packaging must be followed. Catalytic enamel should not be cleaned with any detergent.
Internal Lighting
There is a risk of electric shock. The light bulb or halogen lamp is for household appliances only and should not be used for general house lighting. Before replacing the lamp, the appliance must be disconnected from the power supply. Only lamps with the same specifications should be used.
Service
For repairs, an Authorised Service Centre should be contacted. Only original spare parts should be used.
Disposal
To dispose of the appliance, disconnect it from the mains supply, cut off the electrical cable, and remove the door catch to prevent children or pets from becoming trapped.
Product Description
The cooker features a control panel and hob, air vents for the cooling fan, heating elements, lamps, removable shelf supports, a fan, and multiple shelf positions.
Cooking Surface Layout
The hob has four induction cooking zones:
- Left front: 1400 W with PowerBoost 2500 W
- Left rear: 1800 W with PowerBoost 2800 W
- Right front: 1800 W with PowerBoost 2800 W
- Right rear: 2300 W with PowerBoost 3600 W
The layout also includes steam outlets, whose number and position depend on the model, and a control panel.
Cooker Control Panel
The control panel includes knobs for the hob, a knob for top oven functions, a knob for main oven functions, a temperature indicator/symbol for the main oven, and a temperature indicator/symbol for the top oven.
Accessories
The appliance comes with a wire shelf for cookware, cake tins, and roasts; a grill-/roasting pan for baking, roasting, or collecting fat; and a trivet, which should only be used with the grill-/roasting pan.
Before First Use
Initial Cleaning
All accessories and removable shelf supports should be removed from the oven. The oven and accessories should be cleaned before first use, then returned to their initial positions.
Preheating
The empty appliance should be preheated before first use. Both ovens should be preheated one at a time. For each oven, set the maximum temperature and let it operate for 1 hour. Then, set a function and let it operate for 15 minutes. Accessories may become hotter than usual, and the appliance may emit an odor and smoke, which is normal. Ensure sufficient airflow.
Hob - Daily Use
The hob is operated using sensor fields, with displays, indicators, and sounds providing feedback.
Hob Control Panel
Sensor fields include:
- Heat setting display
- Timer indicators for cooking zones
- Timer display
- Cooking zone selection
- Increase/decrease time
- Lock/Child Safety Device
- Pause
- PowerBoost
Heat Setting Displays
- 0: Cooking zone deactivated.
- 1-9 / 2-6: Cooking zone operates (dot indicates half-level change).
- U: Pause operates.
- A: Automatic Heat Up operates.
- P: PowerBoost operates.
- E + digit: Malfunction.
- H / h: OptiHeat Control (3-step Residual heat indicator): continue cooking / keep warm / residual heat.
- L: Lock / Child Safety Device operates.
- F: Incorrect or too small cookware, or no cookware.
- _: Automatic Switch Off operates.
OptiHeat Control (3-Step Residual Heat Indicator)
This feature warns of residual heat, indicating the level for currently used cooking zones and potentially neighboring ones. Induction zones heat cookware directly, and the glass ceramic is heated by the cookware.
The Heat Setting
To set or change the heat setting, turn the knob. To deactivate, turn the knob to position 0.
Automatic Switch Off
The hob deactivates automatically if:
- All cooking zones are deactivated.
- No heat setting is set after activation.
- Something spills or is placed on the control panel for more than 10 seconds (acoustic signal sounds, hob deactivates; remove object or clean panel).
- The hob gets too hot (e.g., dry-boiled saucepan; let cool before reuse).
- Incorrect cookware is used (F symbol appears, zone deactivates after 2 minutes).
- A cooking zone is not deactivated or heat setting changed (hob deactivates after a certain time).
The manual provides a table showing the relation between heat setting and automatic deactivation time.
Automatic Heat Up
This function provides a necessary heat setting in a shorter time by initially setting the highest heat setting and then decreasing to the correct one. It can only be activated when the cooking zone is cold. To activate, turn the knob to position A, then immediately set the correct heat setting. To deactivate, turn the knob to the off position.
PowerBoost
This function provides more power to induction cooking zones for a limited time, after which the zone automatically reverts to the highest heat setting. To activate, touch the P symbol. To deactivate, change the heat setting.
Timer
Count Down Timer: Sets how long a cooking zone operates for a single session. First, set the heat setting, then the function. To set the cooking zone, touch the timer symbol repeatedly until the desired zone's indicator appears. To activate, touch '+' to set the time (00-99 minutes). The indicator flashes slowly as time counts down. To see remaining time, set the cooking zone with the timer symbol; the indicator flashes quickly, showing the time. To change the time, use '+' or '-'. To deactivate, set the cooking zone with the timer symbol and touch '-'; the time counts back to 00, and the indicator goes out. It can also be deactivated by touching '+' and '-' simultaneously. When time ends, a sound operates, 00 flashes, and the zone deactivates. To stop the sound, touch the timer symbol.
CountUp Timer: Monitors how long a cooking zone operates. To set the cooking zone, touch the timer symbol repeatedly until the desired zone's indicator appears. To activate, touch the timer symbol; "UP" appears, and the indicator flashes slowly as time counts up, switching between "UP" and counted time (minutes). To see operating time, set the cooking zone with the timer symbol; the indicator flashes quickly, showing the time. To deactivate, set the cooking zone with the timer symbol and touch '+' or '-'; the indicator goes out.
Minute Minder: Used as a minute minder when the hob is activated but cooking zones are not operating. The heat setting display shows '--'. To activate, touch the timer symbol, then '+' or '-' to set the time. Cooking zones display deactivates after 10 seconds. When time ends, a sound operates, and 00 flashes. To stop the sound, touch the timer symbol. To deactivate, activate for a short time and deactivate the left front cooking zone. This function does not affect cooking zone operation.
Pause
This function sets all operating cooking zones to the lowest heat setting but does not stop timer functions. Touch '||' to activate; 'U' appears, and the heat setting is lowered to 1. If the heat setting is changed, the function stops, and the new heat setting is displayed.
Lock
Locks the hob sensors while cooking zones operate. First, set the heat setting. To activate, touch the lock symbol for 4 seconds; 'L' appears, and the timer stays on. To deactivate, touch the lock symbol; the previous heat setting appears. Deactivating the hob also deactivates this function.
Child Safety Device
Prevents accidental hob operation. To activate, the hob must be deactivated. Touch the lock symbol for 4 seconds until 'L' flashes, then '||' appears for 4 seconds. To deactivate, the hob must be deactivated. Touch the lock symbol for 4 seconds until 'L' flashes, then '||' appears for 4 seconds. To override for one cooking time, activate a cooking zone; 'L' appears. Touch the lock symbol for 4 seconds until 'L' appears for all zones. Set the heat setting within 4 seconds to operate the hob. The function reactivates when the appliance is deactivated.
Offsound Control (Deactivation and Activation of the Sounds)
To deactivate the hob, touch the timer symbol for 3 seconds. Then, touch '+' or '-' for 3 seconds; 'b0' (sounds off) or 'b1' (sounds on) appears. Wait for automatic deactivation to confirm selection. When set to 'b0', sounds are heard only for Minute Minder, Count Down Timer, or when something is placed on the control panel.
Power Management Function
All cooking zones and both ovens are connected to one phase with a maximum electricity load. The function divides power within the appliance, prioritizing the oven. It activates when total electricity load is exceeded, decreasing power on cooking zones to prevent circuit overload. The heat setting display for reduced zones changes between two levels.
Hob - Hints and Tips
Cookware
Induction cooking zones quickly create heat in cookware using a strong electromagnetic field. Suitable cookware includes cast iron, steel, enameled steel, stainless steel, and multi-layer bottom cookware with a manufacturer's marking. Unsuitable materials include aluminum, copper, brass, glass, ceramic, and porcelain. Cookware is suitable if water boils quickly on the highest heat setting and a magnet sticks to the bottom. The cookware bottom must be thick and flat, clean, and dry. Induction zones adapt to cookware dimensions, but smaller diameters receive less power. A minimum cookware diameter table is provided.
Noises During Operation
Crack noise, whistle sound, humming, clicking, and hissing/buzzing are normal and do not indicate malfunction. These noises are caused by different materials in cookware, high power levels, electric switching, and fan operation.
ÖKO Timer (ECO Timer)
To save energy, the cooking zone heater deactivates before the count down timer sounds, with the difference in operation time depending on the heat setting and cooking duration.
Examples of Cooking Applications
The correlation between heat setting and power consumption is not linear; medium heat settings use less than half the power of higher settings. A table provides guidance on heat settings, usage, time, and hints.
Hob - Care and Cleaning
The hob should be cleaned after each use with cookware having a clean base. Scratches or dark stains do not affect operation. A special cleaner suitable for the hob surface and a special scraper for the glass should be used. Immediately remove melted plastic, plastic foil, sugar, and sugary foods to prevent damage. When the hob is sufficiently cool, remove limescale rings, water rings, fat stains, and shiny metallic discoloration with a moist cloth and non-abrasive detergent, then wipe dry. Shiny metallic discoloration can be removed with a water and vinegar solution.
Oven - Daily Use
Top Oven Functions
- Off position: Oven is off.
- Oven Lamp: Turns on the lamp without a cooking function.
- Conventional Cooking (100-250°C): Bakes and roasts food on one shelf position.
- Dual Circuit Grill: Grills medium quantities of food in the middle of the shelf, makes toasts.
- Full Grill: Grills flat food and toasts bread.
Main Oven Functions
- Off position: Oven is off.
- Oven Lamp: Turns on the lamp without a cooking function.
- Defrost: Defrosts frozen foods like vegetables and fruits; defrosting time depends on amount and size.
- Thermaflow® (100-250°C): Bakes on up to two shelf positions simultaneously, dries food. Set temperature 20-40°C lower than Conventional Cooking.
Activating and Deactivating the Top / Main Oven
The appliance may have knob symbols, indicators, or lamps. The indicator comes on when the oven heats up, the lamp when it operates. The symbol shows whether the knob controls cooking zones, oven functions, or temperature. To select a function, turn the knob. To deactivate, turn the knob to the off position.
Cooling Fan
The cooling fan turns on automatically during oven operation to keep surfaces cool and may continue after the oven is turned off until it cools down.
Inserting Oven Accessories
Deep pan: Push between shelf support guide bars.
Wire shelf and deep pan together: Push the deep pan between guide bars, and the wire shelf on guide bars above.
All accessories have small indentations for safety and anti-tip. The high rim prevents cookware from slipping.
Trivet and Grill-/Roasting Pan: Use the trivet with the deep pan. For larger meat/poultry pieces, supports point up. For grilling flat dishes or toasting, supports point down. Always be careful when removing hot accessories due to burn risk.
Oven - Hints and Tips
Temperature and baking times are guidelines. Preheat an empty oven for 20 minutes before cooking.
Top Oven
The smaller top oven has 3 shelf positions, ideal for smaller quantities of fruitcakes, sweets, and savory flants/quiche.
Main Oven
The main oven is suitable for larger quantities of food.
Baking
Use lower temperatures initially. Baking times can be extended by 10-15 minutes for multiple cakes. Uneven browning is normal and equalizes during baking. Trays may twist when hot but straighten when cold.
Tips on Baking: A table provides common baking results, possible causes (e.g., incorrect shelf position, wrong temperature, too much liquid, uneven mixture), and remedies (e.g., adjust shelf, temperature, baking time, liquid, or mixture distribution).
Conventional Baking - Top Oven
A table provides food types, temperatures, times, and shelf positions for various items like biscuits, bread, cakes, casseroles, fish, pies, puddings, pastries, shortcrusts, scones, souffles, vegetables, and Yorkshire puddings.
Thermaflow® Baking - Main Oven
Shelf positions are not critical but ensure even spacing. A table provides food types, temperatures, times, and shelf positions for biscuits, bread, cakes, fish, pies, puddings, pastries, plate tarts, quiches/flans, scones, and roasting.
Roasting
Use heat-resistant ovenware. Roast large joints directly in the tray or on the wire shelf above. Add water to the tray to prevent burning. Meat with crackling can be roasted without a lid. Turn the roast after 1/2 - 2/3 of cooking time. For more succulent meat, roast with a lid or in a roasting bag, and baste frequently. A table provides food types, temperatures, and times for beef, mutton, lamb, pork, veal, ham, chicken, turkey, goose, duck, pheasant, and rabbit.
Grilling in General
Always grill with the oven door closed and at maximum temperature. Set the shelf as recommended in the grilling table. Set the deep pan to the first shelf position to collect fat. Grill only flat pieces of meat or fish. The grilling area is in the center of the shelf.
Dual Grill - Top Oven
A table provides food types, times, and shelf positions for bacon rashers, chicken joints, chops (lamb/pork), fish (whole/trout/mackerel, fillets), and kebabs.
Defrost
Remove food packaging and place food on a plate. Do not cover with a bowl or plate, as this can extend defrost time. The first shelf position (bottom) should be used.
Information for Test Institutes - Main Oven
A table provides food types, functions, temperatures, times, accessories, and shelf positions for small cakes, apple pie, fatless sponge cake, and shortbread/pastry strip.
Top Oven
A table provides food types, functions, temperatures, times, accessories, and shelf positions for small cakes, apple pie, fatless sponge cake, shortbread/pastry strip, toast, and beef burger.
Oven - Care and Cleaning
Clean the oven front with a soft cloth, warm water, and mild cleaning agent. For metal surfaces, use a dedicated cleaning agent. Clean the oven interior after each use to prevent fat accumulation and fire, especially for the grill pan. Clean all accessories after each use, let them dry, and do not clean them in the dishwasher. Clean stubborn dirt with a special oven cleaner. Do not use aggressive agents, sharp-edged objects, or a dishwasher on nonstick accessories. Wipe moisture from the cavity after each use.
Stainless Steel or Aluminum Ovens
Clean the oven door with a damp cloth or sponge only, then dry with a soft cloth. Do not use steel wool, acids, or abrasive materials. Clean the oven control panel with the same precautions.
Removing the Shelf Supports
To clean the oven, remove shelf supports by pulling the front away from the side wall, then the rear. Install in reverse.
Removing and Cleaning the Door Glasses - Top Oven
The door glass type and number may vary by product. Open the door. Hold the door trim on the top edge at both sides and push inwards to release the clip seal. Pull the trim to the front to remove it. Remove the glass panels. Install in reverse.
Removing and Cleaning the Door Glasses - Main Oven
The door glass type and number may vary by product. Push the door trim at one side to remove it. Pull up the trim. Remove the glass panels. To replace, reverse the steps, attaching the 'A' trim part to the door before lowering the trim.
Replacing the Lamp
Turn off the oven and let it cool down. Disconnect from the mains. Place a cloth on the cavity bottom. The lamp glass cover is at the back of the cavity. Turn the cover counterclockwise to remove it. Clean the glass cover. Replace the oven lamp with a suitable 300°C heat-resistant oven lamp of the same type. Install the glass cover.
Troubleshooting
A table lists common problems (e.g., appliance not activating, hob not operating, residual heat indicator not coming on, automatic heat up not working, hot sensor fields, no signal, error codes), possible causes (e.g., incorrect connection, blown fuse, multiple sensor field touches, stains, objects on panel, short operation time, hot zone, high heat setting, large cookware, deactivated signals, automatic switch off, child safety/lock function), and remedies (e.g., check connection, contact electrician, touch one sensor field, clean panel, remove objects, contact service center, let cool, activate signals, deactivate/reactivate hob, refer to manual).
Further problems related to the hob display (no cookware, incorrect cookware, small cookware diameter) and oven (not heating up, lamp not operating, steam/condensation) are also addressed with causes and remedies.
Service Data
If problems persist, contact the dealer or an Authorised Service Centre. Necessary data is on the rating plate, located on the front frame of the oven cavity, and should not be removed. Users are encouraged to write down the model, product number (PNC), and serial number (S.N.).
Installation
Refer to safety chapters.
Technical Data
Dimensions:
- Height: 894 - 912 mm
- Width: 600 mm
- Depth: 609 mm
Location of the Appliance
The freestanding appliance can be installed with cabinets on one or two sides and in a corner. Minimum distance 'A' is 685 mm.
Levelling of the Appliance
Use small feet on the bottom to level the appliance top surface with other surfaces.
Electrical Installation
The manufacturer is not responsible for non-compliance with safety precautions. The appliance is supplied without a main plug or cable. Applicable cable types for different phases are provided: 3 with neutral requires 5x1.5 mm², and 1 phase requires 3x6.0 mm². The power cable must not touch the shaded part of the appliance.
Covering Terminal Board
The recommended cross-section area is 6 mm². When refitting the mains terminal cover, ensure lower tabs are inside the aperture bottom edge before fixing screws. Ensure the cover is securely fastened. To open, reverse the procedure. Do not remove blanking plates. Ensure links are fitted as shown.
Energy Efficiency
- Model identification: ZCI66050BA, ZCI66050WA, ZCI66050XA
- Type of hob: Hob inside Freestanding Cooker
- Number of cooking zones: 4
- Heating technology: Induction
- Diameter of circular cooking zones (Ø): Left front 21.0 cm, Left rear 14.0 cm, Right front 18.0 cm, Right rear 18.0 cm
- Energy consumption per cooking zone (EC electric cooking): Left front 171.4 Wh/kg, Left rear 176.4 Wh/kg, Right front 171.2 Wh/kg, Right rear 166.2 Wh/kg
- Energy consumption of the hob (EC electric hob): 171.3 Wh/kg
This information complies with EN 60350-2.
Hob - Energy Saving
Tips for saving energy: use only necessary water, always put lids on cookware, place cookware on the zone before activating, use smaller cookware on smaller zones, center cookware on the zone, and use residual heat to keep food warm or melt it.
- Supplier's name: Zanussi
- Model identification: ZCI66050BA, ZCI66050WA, ZCI66050XA
- Energy Efficiency Index: Top oven: 105.6, Main oven: 95.4
- Energy efficiency class: Top oven: A, Main oven: A
- Energy consumption with a standard load, conventional mode: Top oven: 0.75 kWh/cycle, Main oven: not applicable
- Energy consumption with a standard load, fan-forced mode: Top oven: not applicable, Main oven: 0.83 kWh/cycle
- Number of cavities: 2
- Heat source: Electricity
- Volume: Top oven: 39 l, Main oven: 77 l
- Type of oven: Oven inside Freestanding Cooker
- Mass: ZCI66050BA 60.5 kg, ZCI66050WA 60.8 kg, ZCI66050XA 60.6 kg
This information complies with EN 60350-1.
Oven - Energy Saving
The oven has features to save energy.
General hints: Ensure the oven door is closed properly, do not open it too often, keep the door gasket clean, use metal dishes, and avoid preheating if possible.
Cooking with fan: Use fan cooking functions to save energy.
Keep food warm: Choose the lowest temperature setting to use residual heat and keep meals warm.
Residual heat: For cooking durations over 30 minutes, reduce oven temperature 3-10 minutes before the end of cooking time; residual heat will continue to cook. Use residual heat to warm other dishes. Keep baking breaks short.
Environmental Concerns
Recycle materials with the symbol. Put packaging in relevant containers. Help protect the environment by recycling waste electrical and electronic appliances. Do not dispose of marked appliances with household waste. Return the product to a local recycling facility or contact your municipal office.