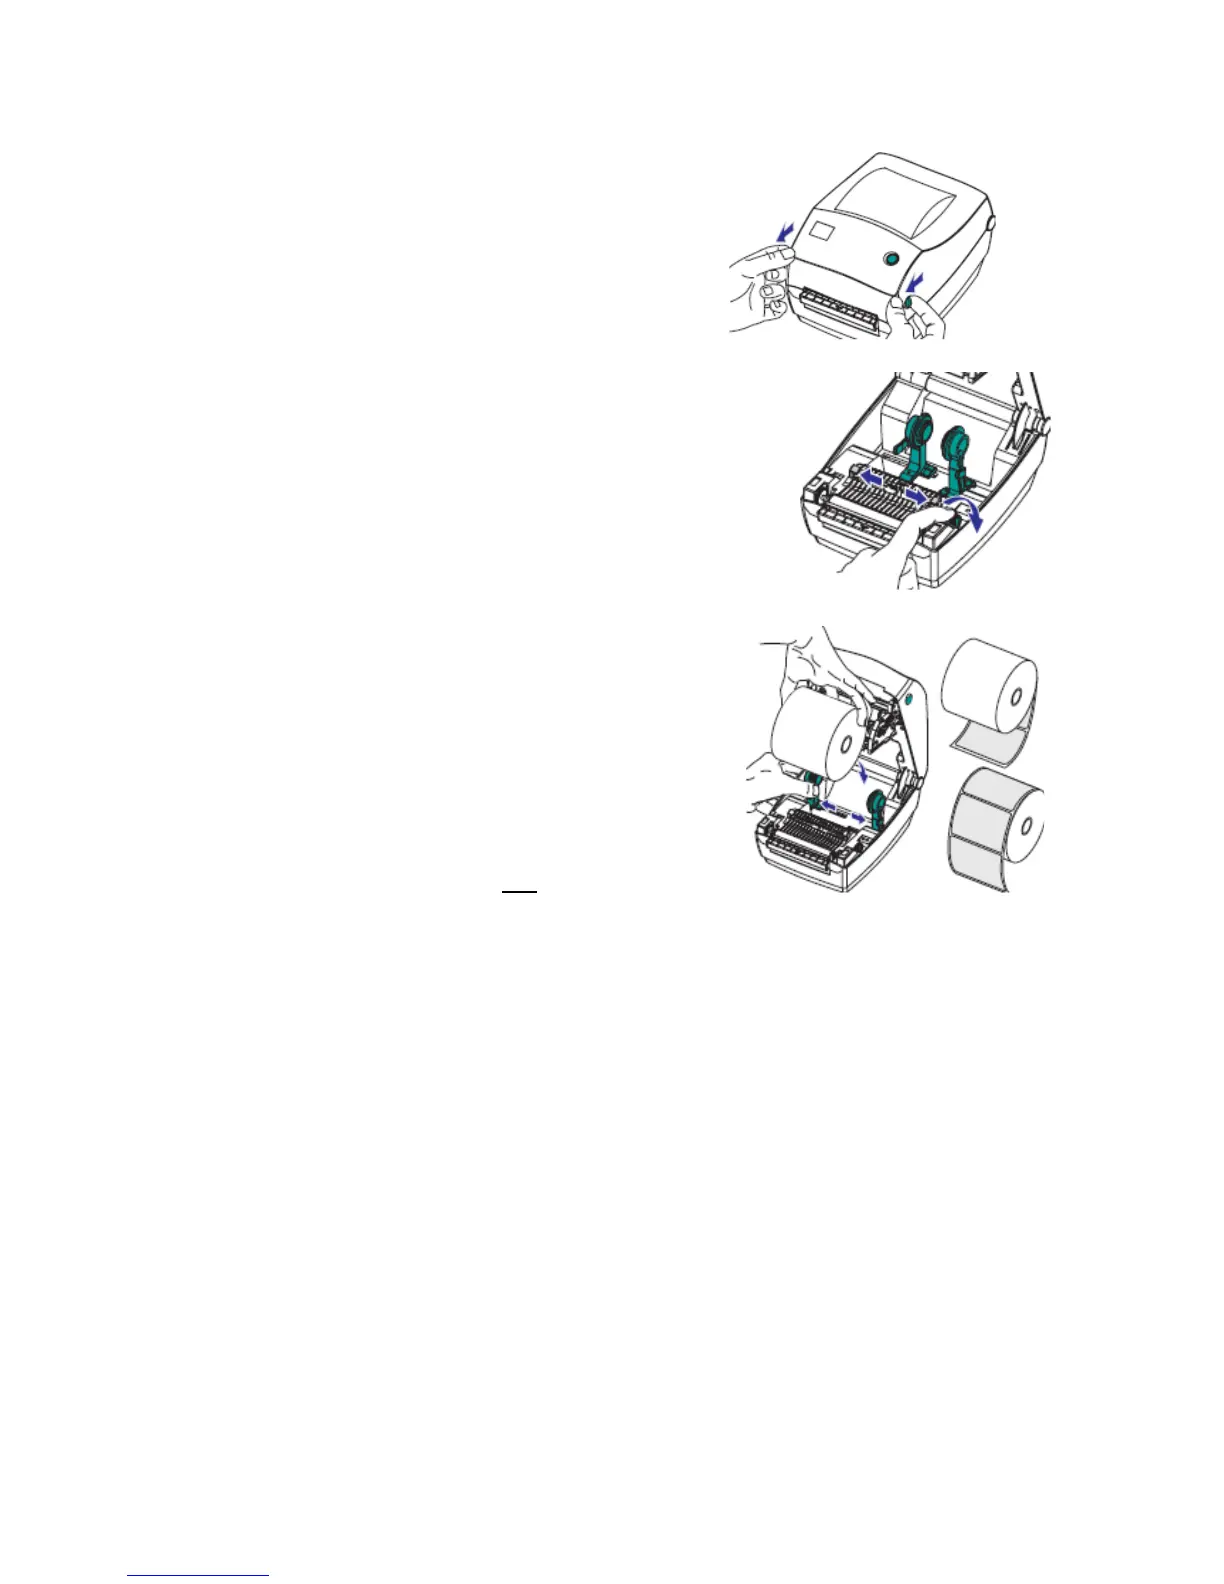
Loading the labels
1. Open the printer, there is a small green
button on either side that you pull towards
you, to open the cover.
2. On the right hand side towards the front is a
small green roller wheel; use this to open
the small black guides to let the labels pass
through the print area. Roll this until the
black guides are as far apart as possible.
After you have loaded the labels you’ll
move these guides back in till they just
touch the labels very gently.
3. Now put the label roll onto the big green
spool holders. They are spring loaded so
you will have to hold them apart. Start by
removing the outer wrapping of the labels
and enough labels so that you have clean
labels. (You don’t want dust and dirt going
through the new printer!) Then pull enough
labels through so that they feed through the
black guides, and out the front of the
printer. Now adjust these black guides
inwards, so that they just
stop the labels
from moving freely around.
4. Don’t turn it on yet!
 Loading...