Loading the Printer Ribbon
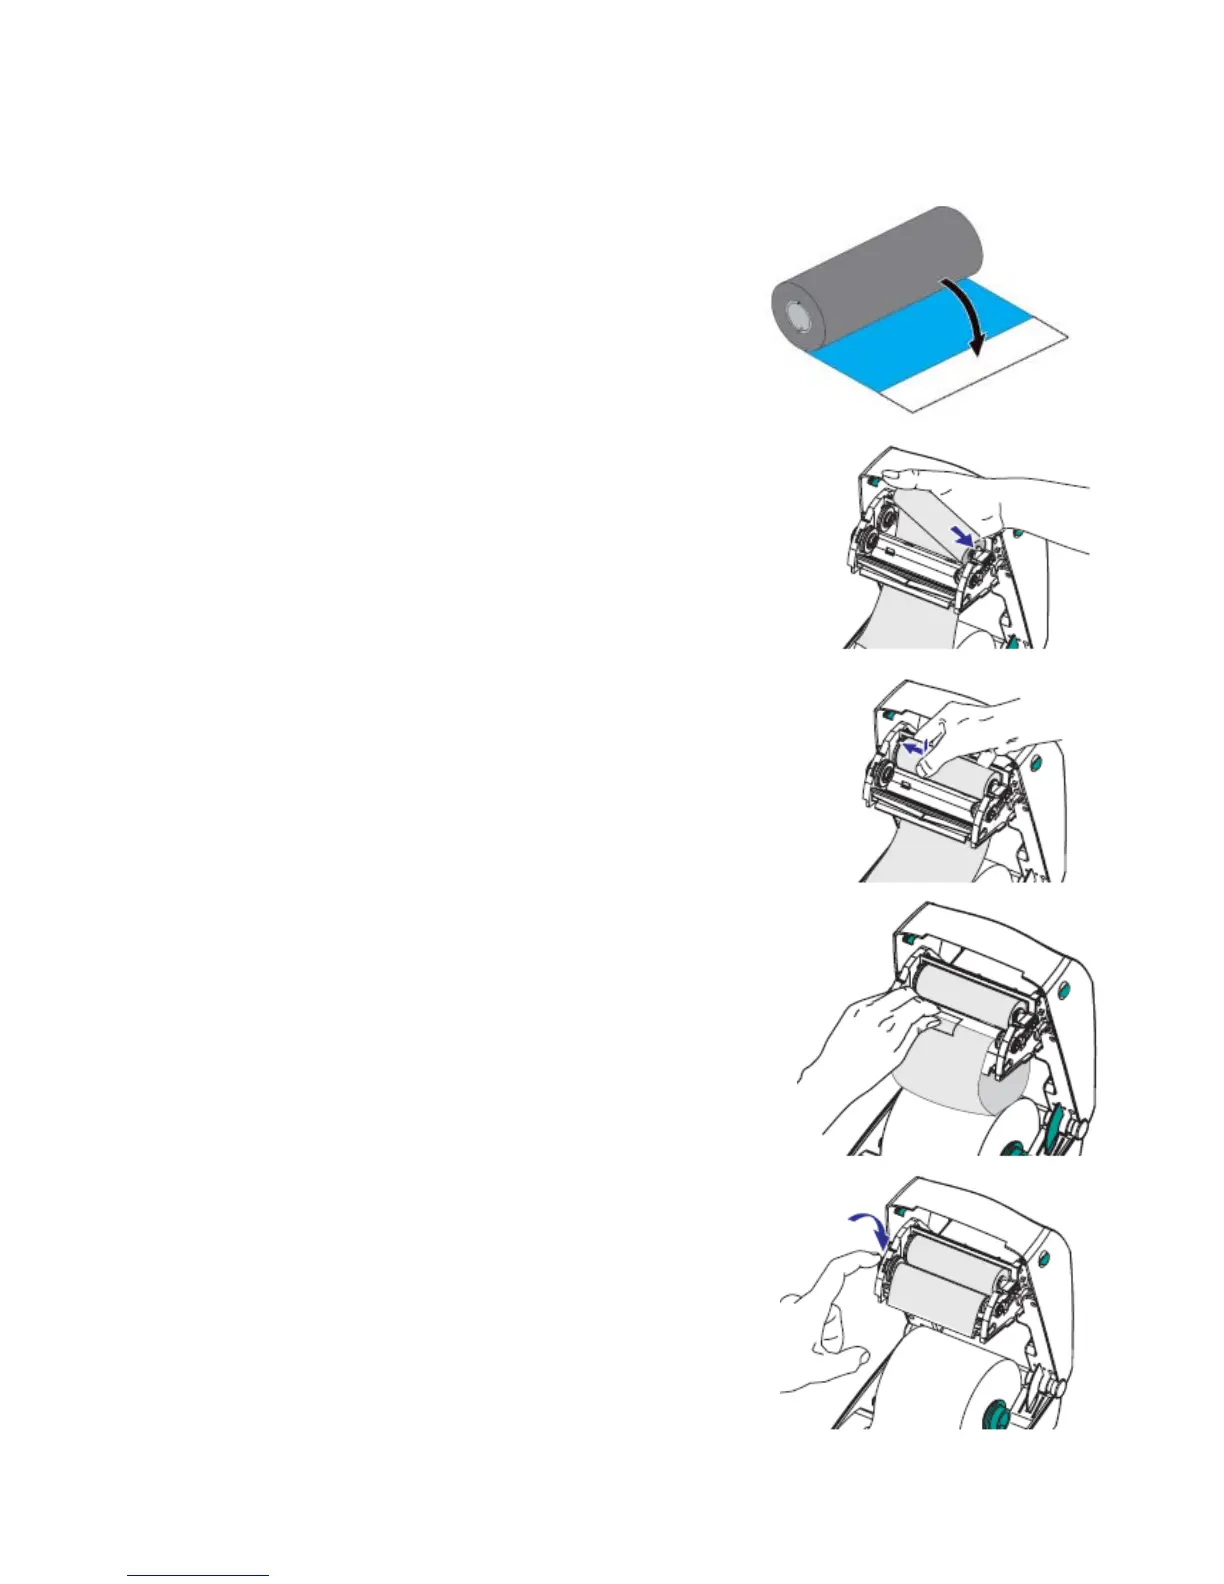
1. The printer ribbon looks silver. The printer
comes with a cardboard “take-up” spool - you
will need too. Take your ribbon out of the
plastic bag. Undo the first part of the ribbon –
it is sticky, you’ll use the sticky part to attach
to the “take-up” spool. Notice that the ends of
the ribbon and the “take-up” spool have
notches in them. This is important.
2. In the open lid of the printer, is the area where
the printer ribbon goes. It is black and may have
opened while you were putting the labels in. If
not, then open it now with your finger tip by
pulling gently down on it. Drop the leading edge
of the ribbon through the gap at the back. Put
the right hand side of the ribbon spool onto the
hub.
3. Slot the left hand side of the ribbon spool onto the
left hand hub with the spokes; make sure the slots
on the reel click into place on the spokes. You
might have to fiddle with it a bit to get this right. It
is important that you get this right or the ribbon
won’t turn.
4. Now put the “take-up” spool onto the other hub.
Use the same process as before, you will have
to make sure that the slots in the end of the
spool slot onto the spokes on the left hand hub.
Then stick the loose end of the ribbon to the take
up spool as shown.
5. Now take up the slack on the printer ribbon buy
turning the green wheel on the left hand take-
up spool hub. Then close the ribbon holder
back into place in the lid of the printer. It will
close automatically as you shut the lid of the
printer anyway.
 Loading...