Playing back cues
Before playing back the programmed cues, it’s suggested
to remove any unrecorded commands from the command
line by pressing the Clear button twice.
Raising the playback’s fader to full will automatically trigger
the first cue within the playback.
To output the next memory in the playback, simply press
the Go button. Each time you press it, the console will
continue down the list one cue at a time.
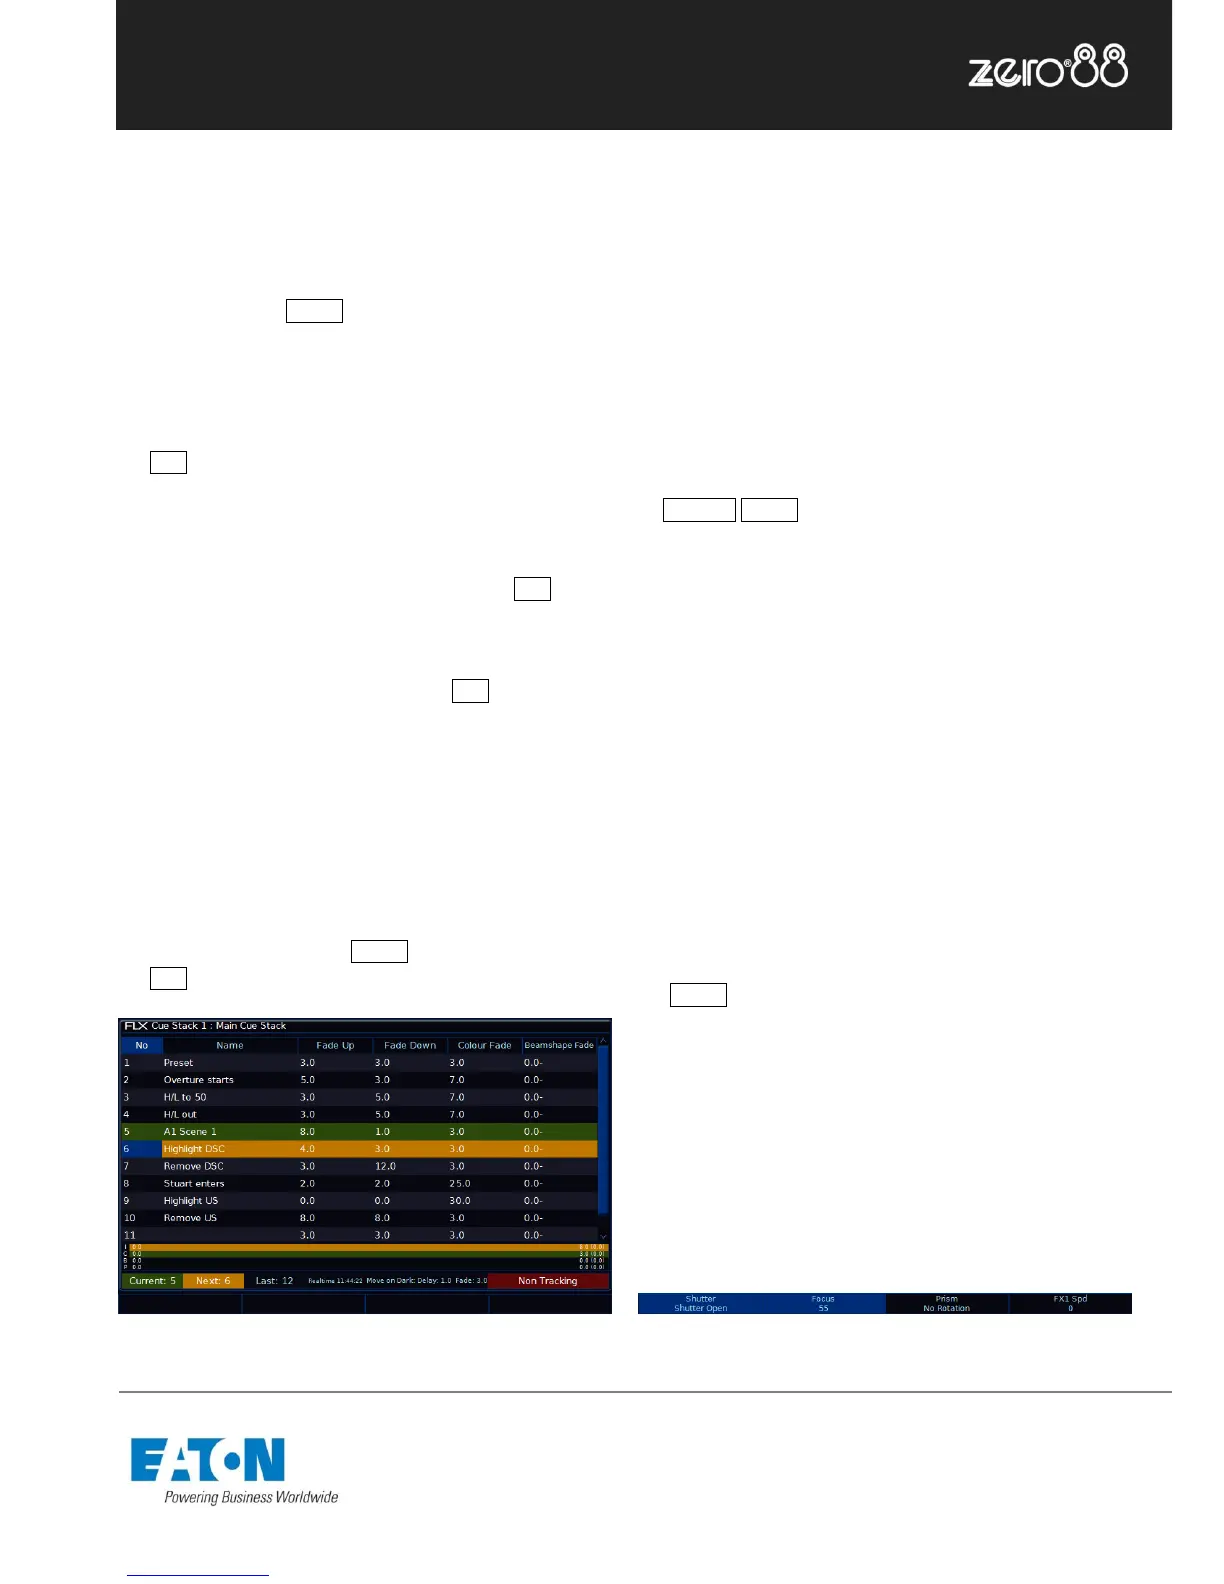
Within the Playback window, the green bar shows you the
currently active cue, while the yellow bar highlights the
next cue (which will become active if you press Go ).
You can change which cue is next by simply selecting it
(using either the touch screen or the arrow keys). The cue
will go yellow, and become active when Go is pressed.
Once the end of the playback is reached, the first cue will
be selected as the next cue, resulting in a loop.
Releasing playbacks
Once you have finished playing back cues it is important to
release the playback. This stops the playback having any
further control over the channels. When you lower a fader,
the playback is automatically released, but you can also
manually do this by holding Clear and pressing
the Go button of the playback.
Figure 9 – Playback window
Updating cues
In order to update a cue, the first thing to do is to ensure
that the cue is outputting (with a green bar) and you are
viewing the playback.
Once the cue is outputting, make the changes required
(using the MFFs, encoder wheels, touchscreen or number
pad).
To record the changes to the current cue, type:
… Update Enter …
The cue will inherit the new information and the update will
be complete.
Tagging
Sometimes, you only want a specific parameter (such as
“strobe”) to be controlled by a cue, palette or UDK. To do
this, you “tag” the parameters you want recorded, and
“untag” those you don’t want recorded.
Changing a parameter on the encoder wheels
automatically tags it. When tagged, the parameter will be
shown on the internal touchscreen with a bright
background, whereas when it’s untagged it will be shown
with a dark background (fig. 10).
To manually tag or untag a parameter, just tap it’s box on
the touchscreen above the encoder wheel, or hold down
the Clear key whilst moving the encoder wheel.
Tracking
There are two tracking modes that the FLX supports -
Tracking and Non Tracking. By default, FLX is in Non-
Tracking mode. More information about tracking is
available in the full manual. It is strongly recommended to
only using Tracking Mode if you are familiar with its
functionality.
Figure 10 – Showing tagged & untagged parameters