EasyManua.ls Logo

Zippity Newport Vinyl Picket Gate User Manual

Zippity Newport Vinyl Picket Gate
7 pages
To Next Page IconTo Next Page
Page #1 background imageLoading...
Page #1 background image
Check Box for These Contents
In the event of missing or defective parts please call our customer service department at
1 877 234 6196
(Mon. to Fri. 8:00 AM to 4:00 PM EST).
1.
Top Gate Brackets
(2)
2. Top Rail
(
1) - 1½” x 3½“ x 40¾”
3. Vertical Rails (2) - 1½“ x 3½” x 18½“
4.
Pickets
(6) - .875” x 3” x 29¾“
5. Bottom Gate Brackets
(2)
6. Bottom Rail
(1) - 1½” x 3½“ x 40¾”
7.
1-3/8 Self-Auguring Stainless Steel Screw
(24)
8. Gate
Hardware Kit with Fasteners
Tools You Will Need
• Cordless Drill
• Level
Newport Vinyl Picket Gate
(31”H x 41”W)
Please read through before starting assembly.
ASSEMBLY INSTRUCTIONS
1
7
Not to Scale
IMPORTANT: CHECK THE INSIDE OF THE LARGER PIECES IN YOUR BOX FOR OTHER MATERIALS
PACKED INSIDE.
Ver 1.1/051615
1
4
2
3
5
8
Ground
3 in
6
42 in Opening
1/2 in 1/2 in
33 1/2 in
2 in
41 in Gate Width
This Gate is designed to be integrated with our Newport Vinyl Picket Fence
This gate can easily be trimmed down horizontally
to fit your custom opening.
Use a fine toothed circular saw or hack saw
DO-IT-YOURSELF
FRIENDLY PRODUCTS
Zippity
Question and Answer IconNeed help?

Do you have a question about the Zippity Newport Vinyl Picket Gate and is the answer not in the manual?

Zippity Newport Vinyl Picket Gate Specifications

General IconGeneral
MaterialVinyl
StylePicket
ColorWhite
Assembly RequiredYes
Gate TypeWalk-through
Height36 inches
Width48 in.

Summary

Assembly Instructions and Parts Identification

Gate Dimensions and Trimming Guide

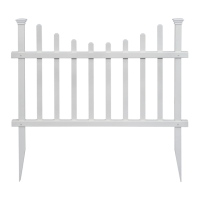
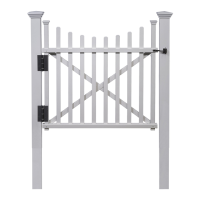
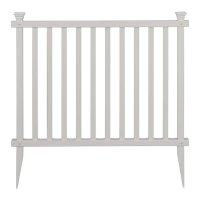
Details the gate's size and instructions for horizontal trimming to fit custom openings.

Included Gate Components

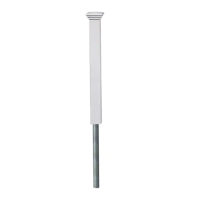
Lists all parts included in the box, essential for verifying contents before assembly.

Required Tools for Assembly

Specifies the necessary tools, such as a cordless drill and level, for building the gate.

General Assembly Guidance and Best Practices

Review Fence Instructions Prior to Assembly

Emphasizes reading fence instructions first for better gate and fence integration.

Pre-Assemble Gate Frame for Fit Check

Recommends a dry run assembly of the gate frame to check parts and fit before final screwing.

Optimal Post Installation Sequence

Advises installing gate posts before fence posts for easier and more accurate fitting.

Support Gate Weight on Multiple Posts

Explains the importance of supporting the gate's weight on two posts for better performance and longevity.

Gate Frame Construction Steps

Assemble Bottom Rail and Sides

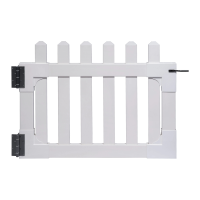
Connects the bottom rail to the bottom gate brackets and inserts vertical rails.

Assemble Top Rail and Attach to Sides

Connects the top rail to the top gate brackets, aligning routed holes.

Gate Frame Final Assembly and Securing

Complete Gate Frame Assembly

Slides the top gate brackets with the attached top rail down over the vertical posts.

Secure Gate Frame Brackets

Fastens the gate frame brackets into the rails using screws for structural integrity.

Picket Installation and Hinge Attachment

Insert Pickets into Gate Frame

Inserts the vertical pickets through the top rail and down into the bottom rail.

Fasten Gate Hinges to Brackets

Attaches the gate hinges to the gate brackets using the provided hardware screws.

Gate Installation and Hinge Securing to Posts

Position and Align Gate for Installation

Uses temporary spacers or blocks to rest and align the gate during installation.

Secure Hinges to Gate Posts

Fastens the hinges to the gate posts, noting potential need for pre-drilling.

Final Gate Operation: Latch Installation

Align and Install Gate Latch

Aligns and fastens the gate latch to ensure proper fit and function with the gate finger.

Related product manuals