COMPUTER MANUAL
Remove the safety film from the display before use.
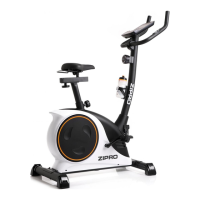
COMPUTER (MODEL)
MRMS03-GRN
AUTO ON/OFF
The computer is switched on when the flywheel moves
or any button is pressed. The display shows an up
arrow. The computer is switched off after four minutes
of inactivity.
BUTTONS
• MODE - selects the parameter.
• SET - sets parameter values.
• RESET - resets time, distance, and calories
immediately.
FUNCTIONS (SPECIFICATION)
Displays all measured training parameters in a cycle.
Total exercise duration, from the start to the end.
Displays the current speed.
Total distance from the start to the end of the exercise.
Total calories burnt from the start to the end of the exercise.
(The measurement is an approximation for comparing training
sessions. Do not use for medical purposes).
Total distance from battery installation.
Displays the current heart rate.
SETTING COUNTDOWN VALUES
• Press the MODE button repeatedly to select the parameter you want to base your training on: time,
distance, calories, or the upper heart rate value.
(The display should show only the parameter, without the SCAN option.)
• Press SET multiple times to set the value.
• The countdown starts when you start pedalling. A down arrow will be displayed on the screen.
• When the countdown is over, or you reach the set heart rate value, the device makes a sound.
PULSE RATE
ATTENTION! The heart rate is measured for sports purposes only (not for medical use).
• Press MODE until the display shows PULSE.
• Put both your hands on the heart rate sensors on the handlebar. During the measurement, the
computer displays a heart icon.
• The computer displays the current heart rate after three to four seconds.