H0360600.A2.EN Ver.05/2011 8
Place the rear wheels on the support wedges (Diagram 151). Tilt the robot, then push it backwards until it
reachesitstorageposition(152).
3.3.RECYCLINGTHEPRODUCT
Whenyour appliance has reachedthe end ofitslifespan, andif you wouldlike todispose of itor
replace it: do not throw it into your household waste and do not use your household recycling
containers either. When this symbol is mentioned on an appliance, it means that the equipment
mustnotbedisposedofcasually.Itwillbecollectedselectivelysothatitcanbereused,recycledor
recovered.Anysubstancesitmaycontainwhicharepotentiallydangeroustotheenvironmentwill
beeliminatedorneutralised.
Enquirewithyourretailerfortheconditionsthatapplytotherecyclingofyourproductandtotheorganisations
thatcanhandleitsrecycling.
REPLACEMENTOFACCESSORIES
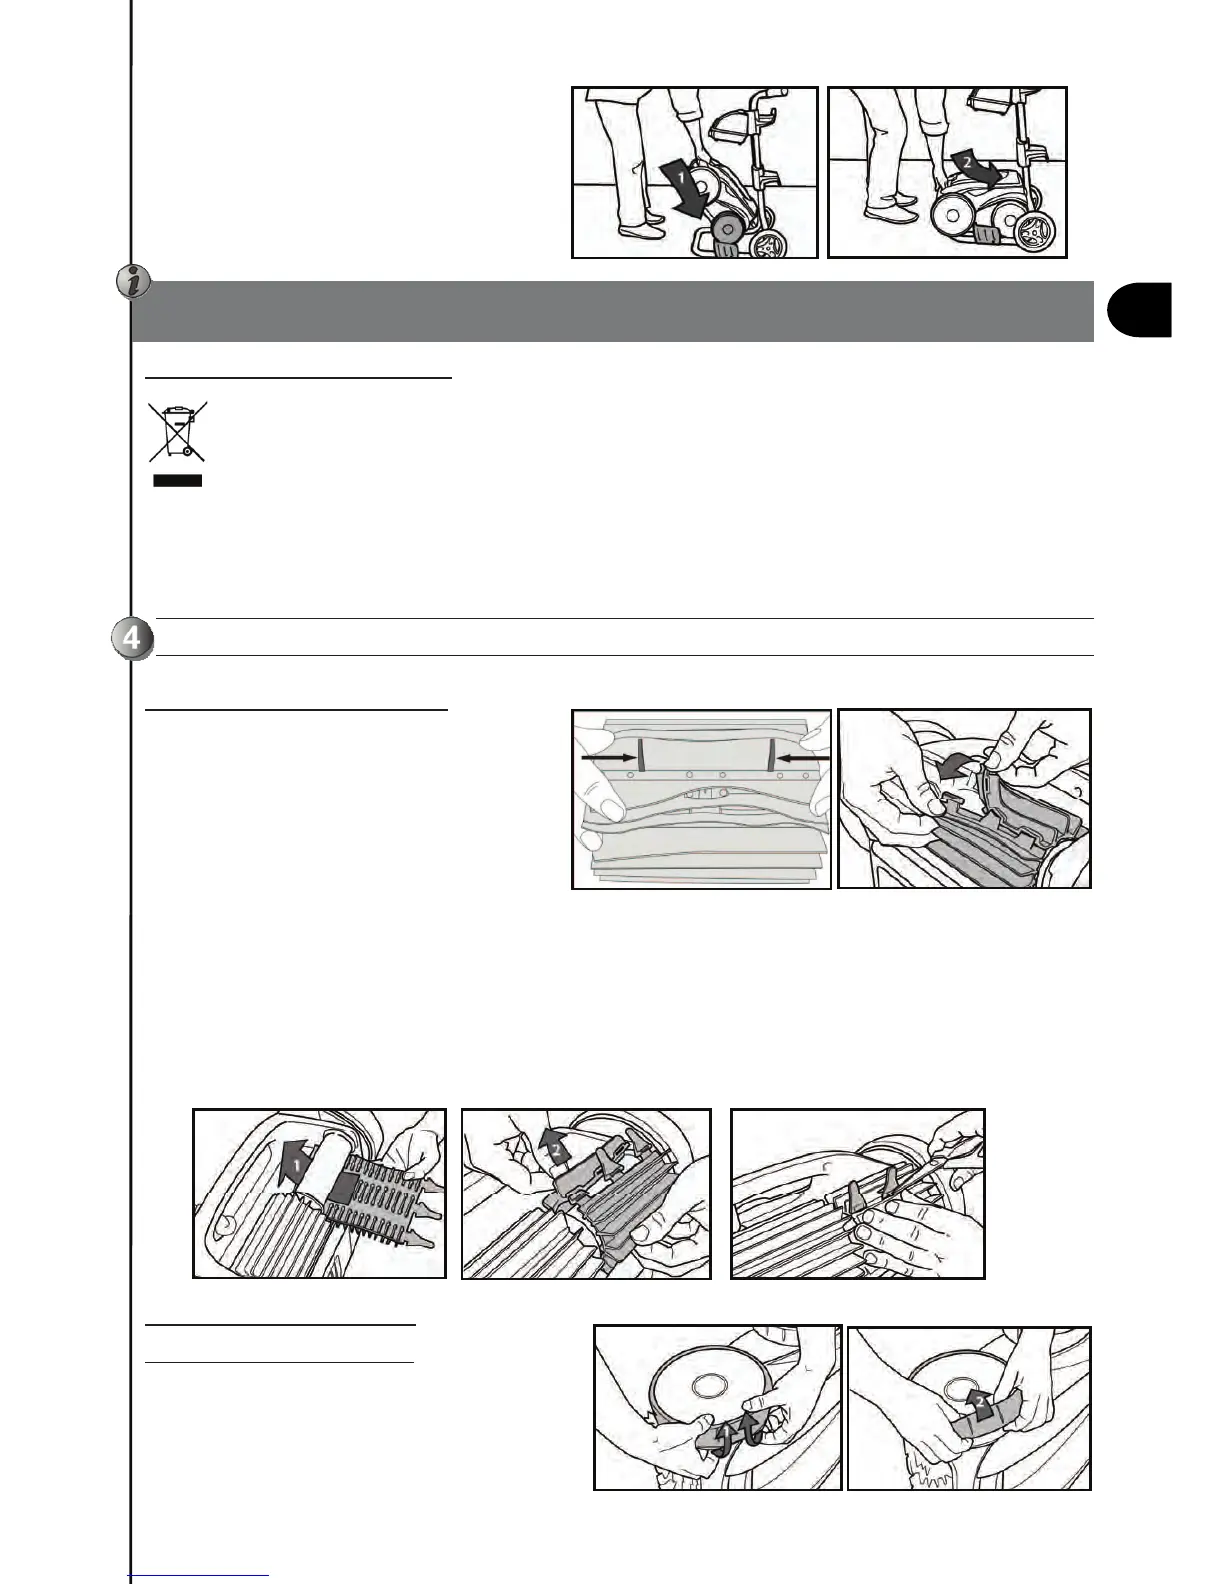
4.1.REPLACINGTHEBRUSHES
ThecleanerisfittedwithPVCbrushes.Thereare
''wear''indicatorsonthebrushes(Diagram16).
Tomaintaincleanerperformanceatitsbestyou
need to replace the brushes as soon asone of
the wear indicators has been reached (even if
thebladewearisnoteven).
We recommend that you replace the brushes
everytwoseasons.
Toremovewornbrushes,removethetabsfromtheholesinwhichtheyarefitted(Diagram17).
Tofitnewbrushesstartbyfittingthesidewithouttabsunderthebrushholder(Diagram181).
Rollthebrusharounditsholderandslidethetabsintothefixingholes.Pullontheendofeachtab(182)sothat
itsedgepassesthroughtheslit.Cutthetabsusingscissorssothattheyareatthesamelevelastheotherblades.
Repeatthisoperationwiththesecondbrush.
4.2.REPLACINGTHETYRES
4.2.1.Removingtheoldtyres
Pullontherearsideoftheoldtyre(Diagram191)
toremovethetyrelipfromthewheel.
Removetheoldtyre(192).
Thecleanercablemustbedisconnectedfromthecontrolboxbeforeremovingthecleanerfromthepool.
Windthecleanercablearoundthehookslocatedattherearofthecadd