7
© Copyright 2020 Zoeller
®
Co. All rights reserved.
Indoor Prepackaged System Installation Instructions
This set of instructions is for factory prepackaged indoor systems only. If your system is a eld assembled indoor system,
use these instructions as a guideline. If your system is an outdoor system then go to the next section in this manual that covers outdoor systems.
1. Indoor grinder pump systems are for installing at grade in an indoor
application only. If you will be installing this system outside next
to the residence then you will need an outdoor system. DO NOT
INSTALL THE INDOOR SYSTEM OUTDOORS.
2. Review the drawing in Fig. 2 on page 6 and the actual system to
become familiar with the components in the grinder pump system.
Review where the unit will be installed. Determine where the power
feed, inlet pipe, discharge pipe and vent will be located.
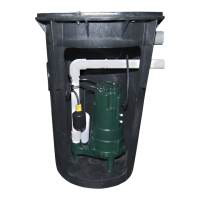
3. Remove the unit from the packing. Indoor prepackaged systems
are preassembled at the Zoeller Company and require a minimum
of eld assembly work. All work inside the basin can be performed
via the inspection port. There should be no reason to remove the
cover from the basin. Pump and oat switches are already set
inside the basin.
4. Remove the inspection plate from the cover. All oats are set and
tethered for proper operation from the factory. Verify that where
the oat switches are set will work for your application.
Verifying
that the float switches are set properly and will not hang up inside the
basin is the responsibility of the installing contractor.
Float switches
are tied in place for shipping purposes. Cut the cable tie around
each oat switch bulb or the unit will not operate properly.
5. Dig a hole for the basin. The basin should be located in a very low
trafc area within 15’ of the power disconnect. The hole should be at
least 8” larger in diameter than the basin in order to leave 4” of backll
all the way around the perimeter. A minimum of 4” of compacted
subbase is also required. Backll and subbase should be 1/8” to
3/4” pea gravel or 1/8” to 1/2” crushed stone. Also reference the
basin installation instructions included with the unit.
6. The 4” inlet hub should be located between the top lip of the basin
and the alarm oat “on” level with a minimum distance of 10 inches
between the oor of the basin and hub. Determine the location of
the inlet hub based upon your inlet pipe arrangement. The inlet
hub must be used with 4” pipe. It is best to install the inlet on the
side of the basin opposite the oat switches. To install, use a 4”
hole saw to drill into the side of the basin at the correct elevation.
Center the hub inner diameter with the hole in the basin. Attach
the hub to the side of the basin using the sealant and hardware
provided.
7. Set the basin in the hole and connect the 4” inlet pipe to the inlet
hub using the rubber insert. If using a cast iron hub, the 4” inlet pipe
will need to be caulked or gasketed to the hub. Backll around the
basin with specied media. Care should be taken not to damage
components or leave voids when backlling. Finish grade of oor
should be poured in place around the top 6” of the basin assembly.
8. Connect the discharge pipe, valves and vent according to all
applicable National, State and Local plumbing codes.
9. Mount the alarm panel on the wall above the system. Connect the
alarm oat switch and pump power cord.
10. Clean any debris out of the basin. Fill the basin with water and
check the system for proper operation.
11. Record system start-up data for future reference.
12. Seal and secure the inspection plate to the lid using the proper
bolts and sealant. Pouring concrete around the system can now
be completed.



 To Next Page