DOUGH(BASIC DOUGH, QUICK DOUGH)
- 17 -
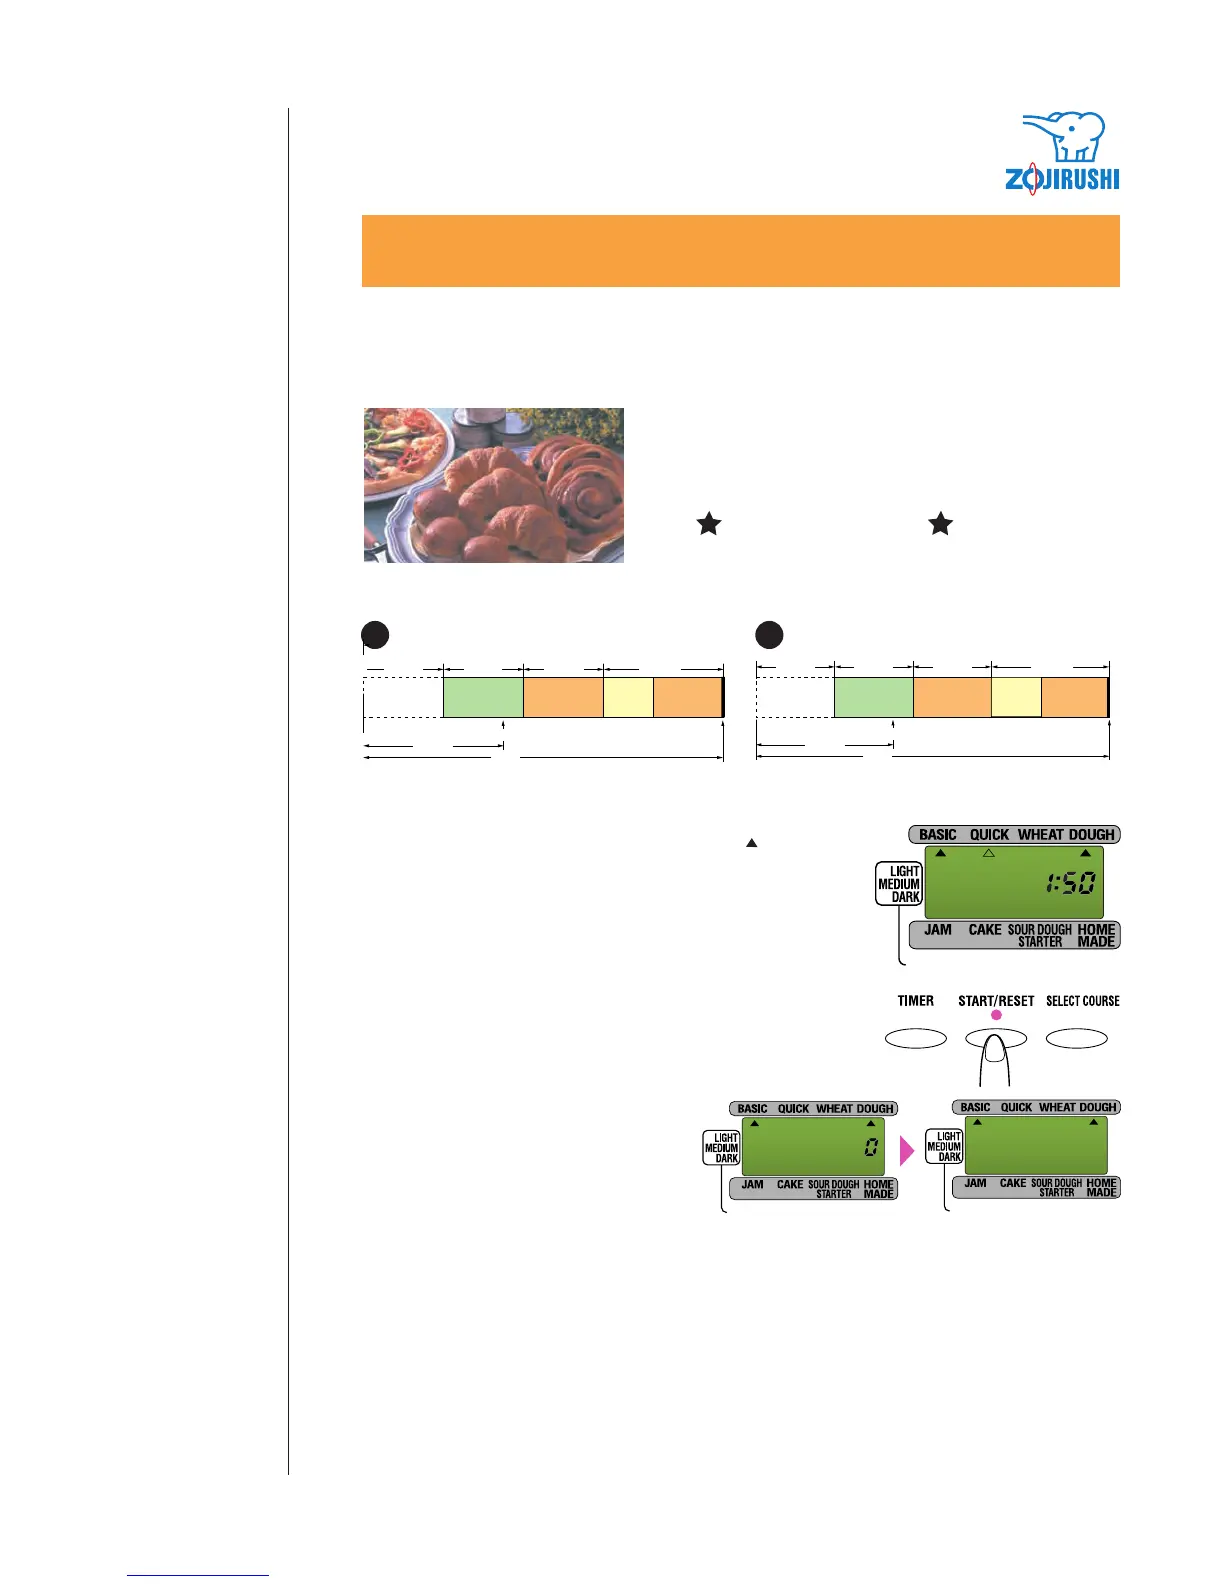
Dough
(Basic Dough,
Quick Dough)
Basic Dough Setting Quick Dough Setting
Use the Dough Setting to prepare
dough for baking rolls, croissants,
or other favorites in your oven.
Basic
Use active dry yeast.
Quick
Use rapid rise yeast.
Add Beep
Preheating
Kneading First rising
about
30 min
1:50
Complete Beep
22 min 45 min21 min 22 min
Second
rising
Stir
down
Add Beep
Preheating
Kneading First rising
about
25 min
0:45
Complete Beep
9 min 21 min 10 min
5 min
Second
rising
Stir
down
1-5. Follow the same procedure as steps 1-5 for Basic Bread (see page 10).
7. Beeps tell you the dough is done.
1) When the cycle is complete, beeps alert
you that the dough is ready and the
Operation Light will turn off.
2) Press and hold the START/REST key.
3) Remove the baking pan. Open the lid and
pull the baking pan toward you by
grasping the pan’s shorter flanges. This
will unlatch the spring so you can lift the
pan to remove.
8. Remove the dough.
Prepare a lightly floured board. Gather the
dough at the center of the baking pan. Place it
on the board. Remove the dough carefully by
raising it gently. If the baking blade remains in
the bottom of your dough, remove the blade.
9. Be sure to unplug after using.
Do not tug on the cord.
10. Shape the dough and bake.
Shape the dough as you like and let it rise. Then
bake in an oven.
6. Select the desired setting.
1) Press the SELECT COURSE key to set the arrow ( ) to "BASIC
DOUGH" or "QUICK DOUGH"
2) Press the START/RESET key. The Operation Light will go on
and the first process is shown (i.e. PREHEAT).
• As the process continues, the indication advances from
PREHEAT, KNEAD, then to RISE.
• The ADD indicator will flash for 5 minutes until the KNEAD
process is complete. When it’s time to add ingredients such as
raisins or nuts, the unit will beep for the first 30 seconds of the
indicator flashing. The unit will count down remaining time at
one-minute intervals until the dough is done.
• The unit will count down remaining time at 1-minute intervals
until the bread is done.
COMPLETE
COMPLETE
To use the Timer setting, please refer to "HOW TO
USE THE TIMER" on page 5.
 Loading...