Do you have a question about the ZOLL LifeVest 4000 and is the answer not in the manual?
| Brand | ZOLL |
|---|---|
| Model | LifeVest 4000 |
| Category | Medical Equipment |
| Language | English |
Overview of the LifeVest device and its function.
Crucial warnings and precautions for safe operation.
Covers environmental considerations, risks, use locations, and essential performance.
Information on aircraft use and profiles of device users.
Explains the essential training provided to patients before using the device.
Discusses potential interference from other devices and how to avoid it.
Guidelines for using cell phones and hotspots to prevent interference.
Compliance information with FCC rules for the device.
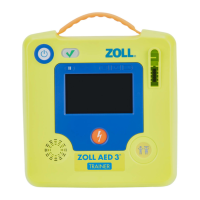
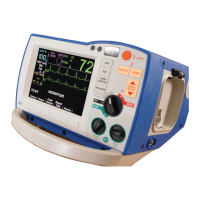
Introduces the main parts of the LifeVest system with descriptions.
Explains the monitor's connector, battery, touchscreen, and response buttons.
Describes the garment, electrode belt, sensors, connector, vibration box, and therapy pads.
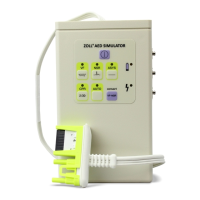
Details the charger with touchscreen and indicator lights, including components.
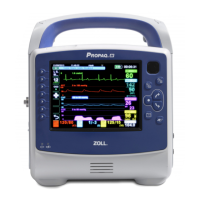
Shows an example of the monitor screen and explains patient name, menu, connection, and battery level.
Illustrates the charger screen for data transfer, status, menu, and help functions.
Explains how to use help screens on the monitor or charger.
Provides steps for the daily use of the LifeVest system.
Step-by-step guide to starting the LifeVest monitor after battery insertion.
Important information about battery types, charging, and handling power outages.
Instructions on how to swap and recharge the device batteries every 24 hours.
Initial setup for the charger with a touchscreen, including placement and power connection.
Explains how to interpret battery and charger status indicators on the touchscreen.
Initial setup for the charger with indicator lights, including placement and power connection.
Details the meaning of indicator lights for battery status and alarm conditions.
Step-by-step guide on how to manually transmit data from the monitor.
Explains symbols indicating monitor and cellular signal strength.
Procedure to manually record heart rhythm for doctor review.
How to adjust volume and modes for screen prompts and messages.
How to enable/disable airplane mode to prevent wireless transmission interference.
Guide to navigating system information screens for support purposes.
Explains the feature allowing ZOLL to update the device remotely.
Steps to initiate support mode for device updates or troubleshooting.
Instructions for cleaning device parts and inspecting for damage.
Key information for family members regarding patient safety and device response.
Instructions for returning the device and recycling batteries.
Steps for attaching the electrode belt to the garment.
How to position and fasten the vibration box and insert therapy pads.
How to connect the ECG electrodes to the garment by matching colors.
Shows outside and inside views of the properly assembled garment and electrode belt.
Steps for putting on the garment correctly, including bra placement for females.
How to connect the garment ends in the front, ensuring clips are fully inserted.
Verifying the garment is not twisted, electrodes touch skin, and cabling is clear.
How to adjust shoulder straps for proper garment placement relative to the body.
Step-by-step guide to connecting and disconnecting the electrode belt from the monitor.
Instructions on how to remove the LifeVest device before showering or bathing.
Steps to remove electrodes, vibration box, and therapy pads from the garment.
Detailed instructions for washing and drying the LifeVest garment.
Organizes alarms into Physiological, Technical, and Informative categories.
Explains vibration and siren alarms related to patient's physiological state.
Actions to take when the siren alarm includes a "respond" message.
Guidance on reporting treatment to doctor and continuing to wear the system.
What to do if the siren alarm includes a "call for help" message.
Explains technical alarms indicating device problems and how to interpret messages.
Describes informative alarms for battery status and other system information.
Addresses messages related to electrode connection and signal quality.
How to resolve issues where therapy pads are not making proper skin contact.
Explains belt problem messages and symbols indicating electrode contact issues.
Steps to take when the monitor prompts to check electrodes.
What to do if the system repeatedly shows belt problem messages.
How to resolve issues with therapy pads not making good skin contact.
Instructions for adding gel when prompted by the system after a treatment.
Steps to follow when you receive a message to replace the electrode belt.
How to remove excess gel from the skin between therapy pads.
Overview of health survey and walk test options for condition evaluation.
Explains how the health survey works and its importance for condition assessment.
How to start the health survey when prompted or at a later time.
Guide to answering questions presented on the LifeVest monitor.
Steps to access and complete the health survey if deferred.
Explains common messages encountered during the health survey.
Explains the purpose and procedure of the walk test for condition evaluation.
Critical warnings to follow during the walk test to ensure safety.
How to start the walk test when prompted or at a later time.
Guide to answering the initial questions before starting the walk test.
Instructions for the 6-minute walking portion of the test.
Guide to answering the final questions after completing the walk test.
Final steps after finishing the walk test, including resting and contacting ZOLL.
Steps to access and complete the walk test if deferred.
Explains common messages encountered during the walk test.
Visual summaries of daily use, assembly, and system wear.
Flowcharts for device removal, data sending, and alarm response.
Definitions of key terms related to arrhythmias, device components, and medical conditions.
Explains symbols for signals, battery levels, and charger status.
Defines symbols for buttons, navigation, and general device functions.
Explains symbols for garment care, safety, and product disposal.
Symbols related to manufacturing information, connectors, and packaging.
Symbols for power, temperature, MR safety, warnings, and protection.
Information regarding open source components, licensing, and warranty disclaimers.