Page | 1
Zoom F4 Mixer/Recorder Instructions
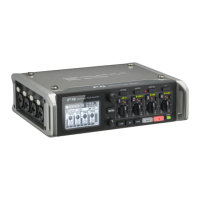
When the Zoom F4 is issued to you it comes with a protective case and a rain hood. You can unhinge
the hood by tearing the Velcro strip on one side or remove it by unzipping it on the other side.
The bottom of the case contains a large battery, able to power for three days of continuous filming,
and access to the timecode, inputs and sd cards.
At the top of the case there are two Velcro straps that are threaded through metal loops. These
support the weight of the Zoom F4 and should not be removed.
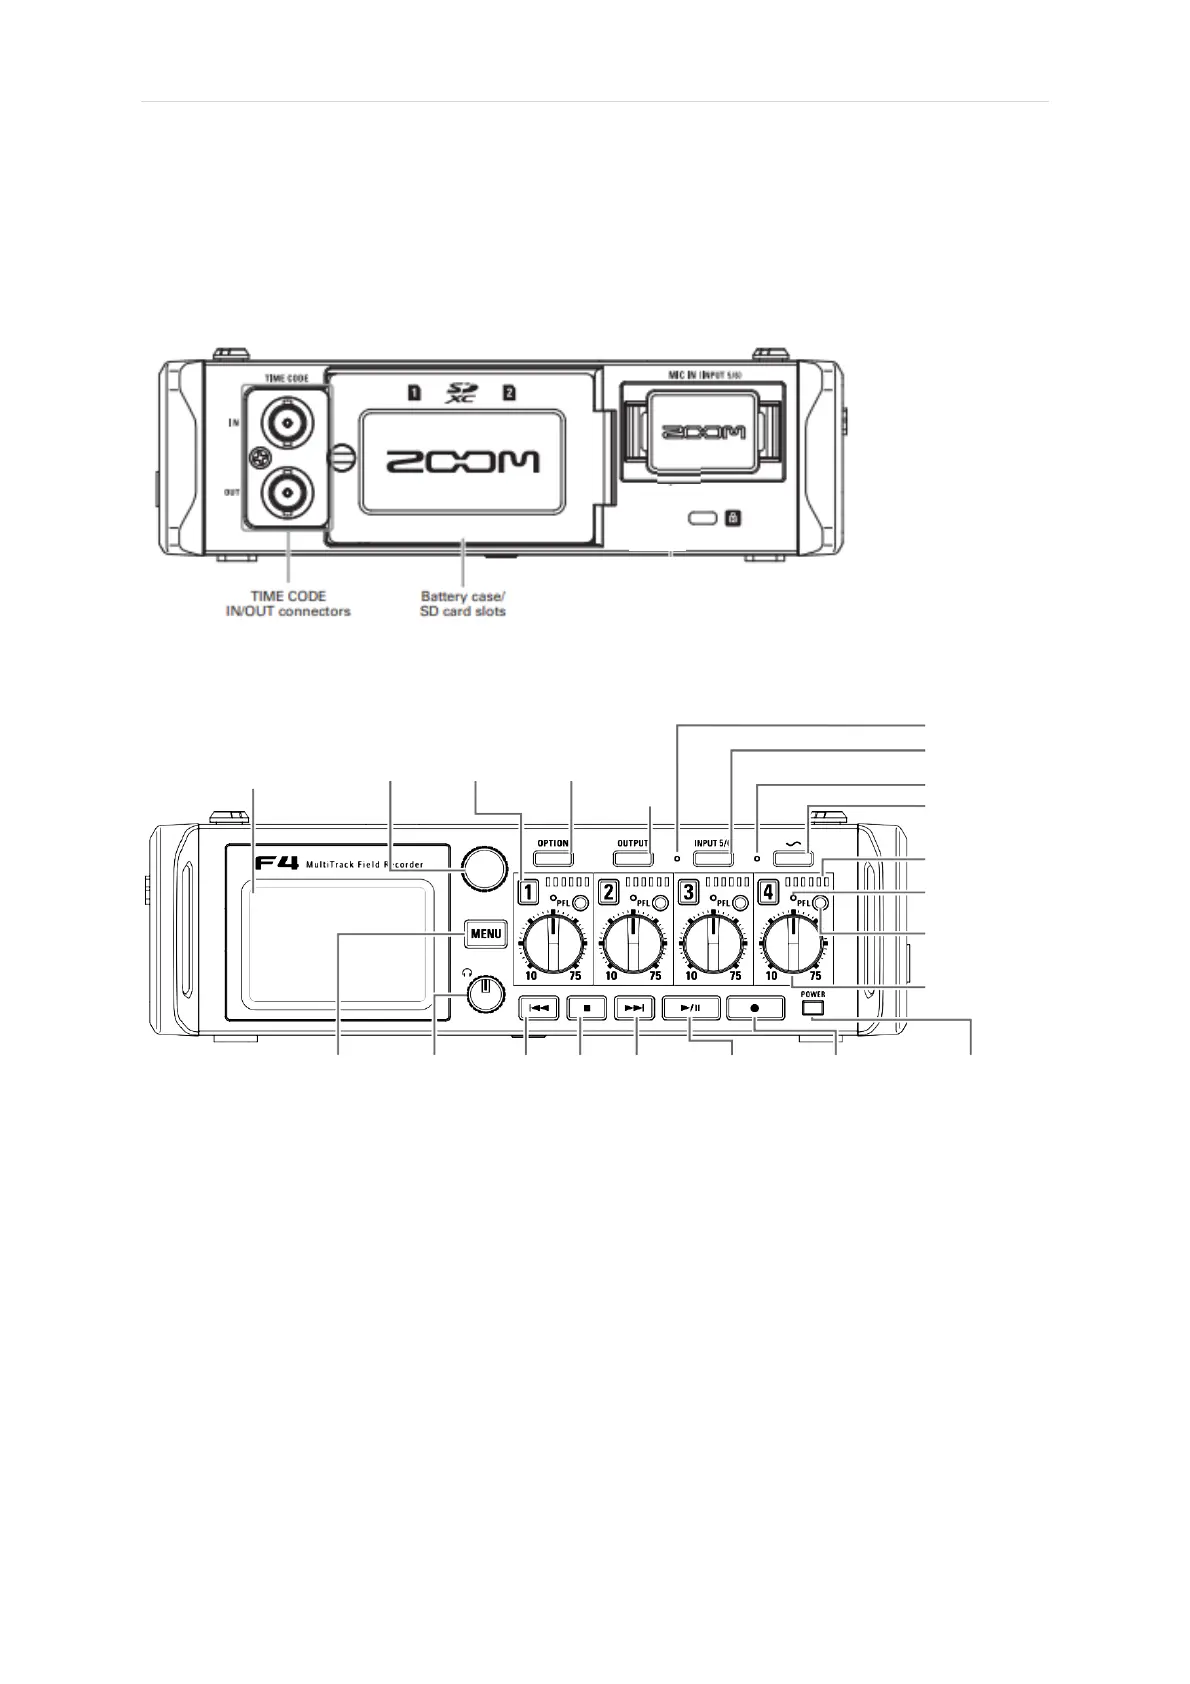
1. LCD screen – displays information you currently have selected based on menu or monitor options
2. Selection dial – Cycles through the menus, press down to confirm menu option, and changes the
home screen window when menu is not active.
3. Track key – There are four buttons labelled 1, 2, 3 and 4. Pressing them makes the record channel
live. A red light shows when they are pressed.
4. Option key – press to show shortcut menu. Press option and track 1 to go to timecode jam (sync).
All available options can be viewed in the menu under System, Shortcut List
5. Output key – opens a virtual menu where you can route or select outputs from the Zoom. These
options do not affect the recording only the output.
6. Input 5/6 indicator – Shows if input 5 and 6 are active or not. Activation is set in the input 5/6 menu.
7. Input 5/6 key – opens the input 5/6 menu. Monitor/record the output of a DSLR or equivalent.
8. Slate tone indicator – a solid red light will show the slate tone is active and must be disabled if
recording.
5
7
8
9
10
11
12
13