ZURN PEX® RESIDENTIAL FIRE PROTECTION SYSTEMS
INSTALLATION INSTRUCTIONS
6
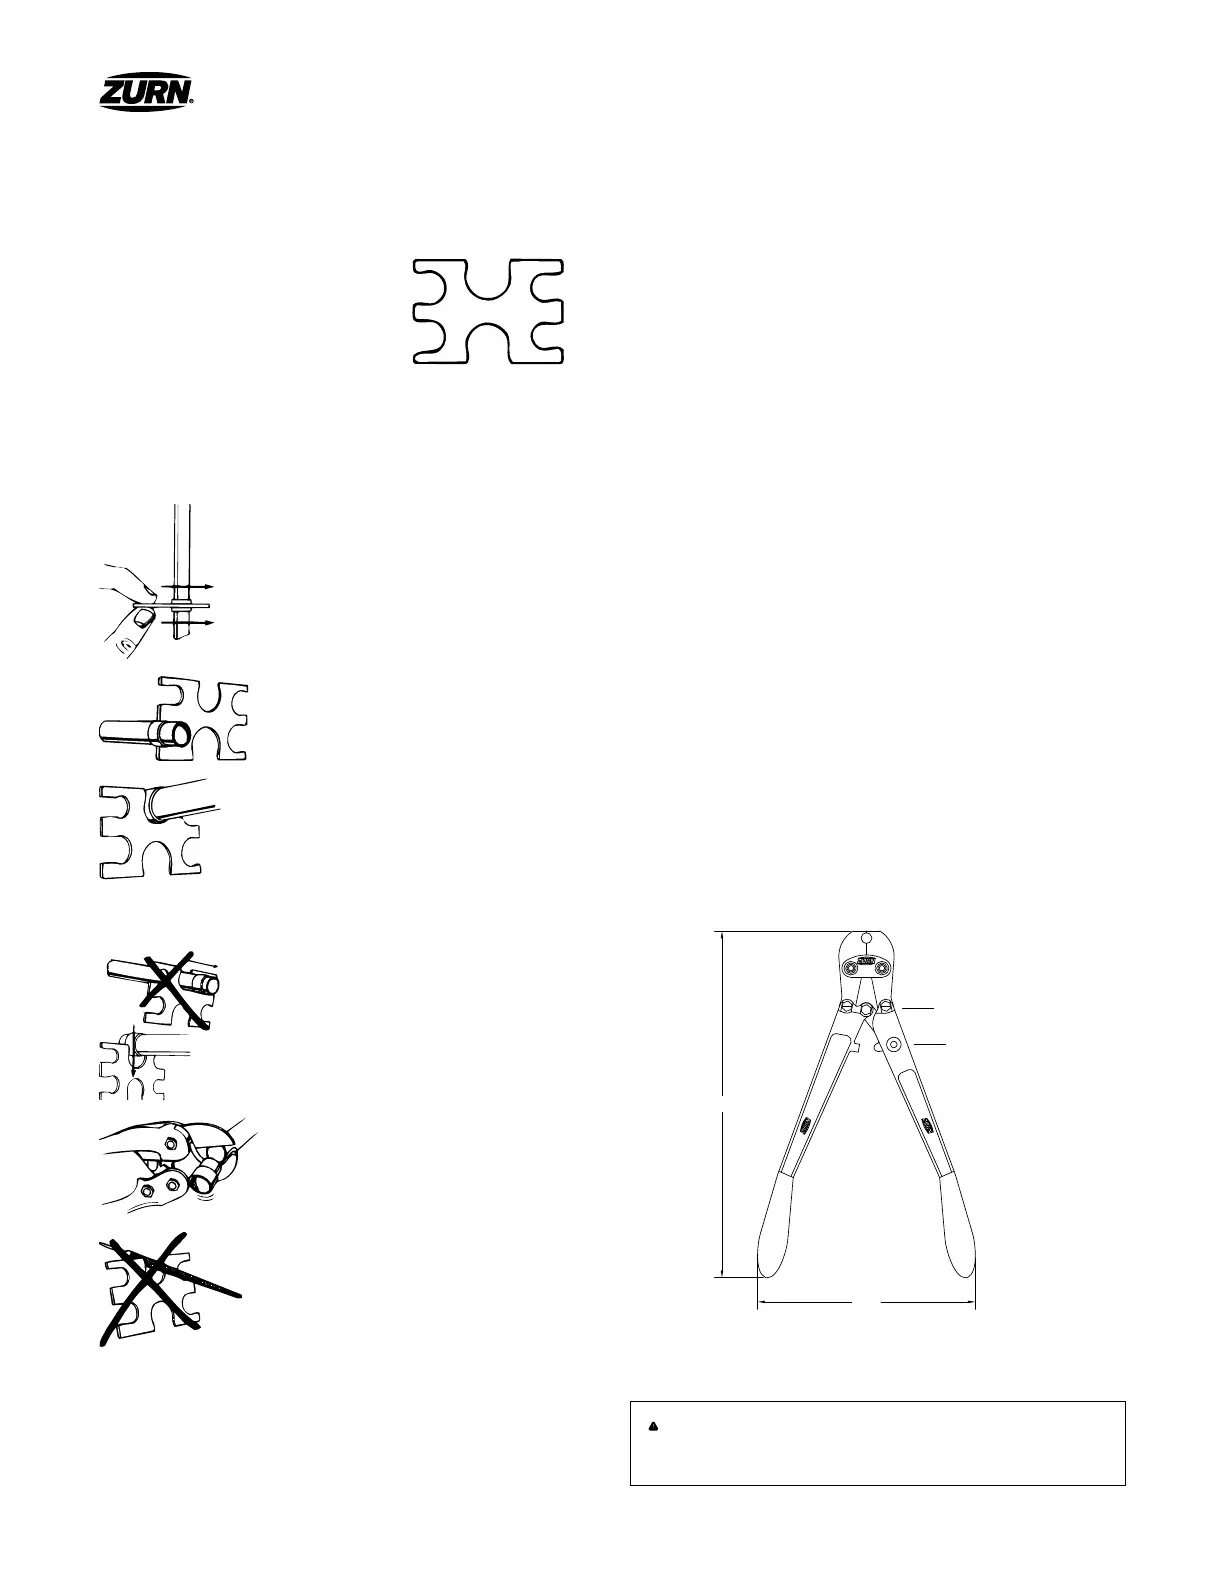
USING THE ZURN GO/NO-GO GAUGE
After making a crimp connection, use
the appropriate opening of this flat
“Go/No-Go” Gauge to check your
finished crimp. The “Go” opening
should go freely across a crimped
ring anywhere on its diameter with
the possible exception of the upset
area on the ring surface caused by
the tool jaws closing. Do not force the gauge across the ring. The
“No-Go” opening should not go across a crimped ring anywhere.
If the crimp fails either test, cut out the fitting and replace.
DO:
Always place the gauge opening on
the crimp ring at a 90° angle for an
accurate check.
Go and No Go Openings
No Go
No
Go
Go
Go
No Go
Go
Be certain to use the gauge opening sized
for the diameter of your tube.
We recommend you check every finished
crimp with this gauge.
DO NOT:
Do not slide the gauge onto the
connection. Push it directly onto the
crimp ring.
Yes
Do not try to save time by recrimping a
crimp that does not gauge properly. The
fitting must be cut out and replaced.
Do not modify the gauge opening for
any reason. They have been carefully
manufactured to .002" tolerance.
ADJUSTING THE LARGE CRIMP TOOL
Zurn Crimp Tools are factory set to provide proper crimps. This
should be checked before use by making a test crimp connection
and checking it with the crimp gauge. As long as the finished crimp
connection gauges properly, there is no need to adjust the tool.
1 Loosen the bottom Locking Setscrew two turns using the hex
wrench provided with the tool.
2 Close the tool until the jaws just touch and increased resistance
is felt. This is the pre-load point.
3 Turn the top Adjusting Setscrew until the distance between
the raised “+” marks on the handles is between 7" and 8-1/2"
for QCRT2T, 3T, JT, and 4T. The distance for QCRT5T should
be 13". Tighten the bottom Locking Setscrew. See Warning for
QCRT2T, 3T, JT, 4T, and QCRT5T tool.
4 Make a test crimp connection and check it with the “Go”
and “No-Go” openings of the gauge. If the “No-Go” opening
goes over the crimped ring, the tool is too tight. The distance
between the “+” marks should be decreased. If the “Go”
opening does not go over the crimped ring, the tool is too loose
and the distance between the “+” marks should be increased.
5 Apply a light oil to the pivot points each time the tool is
adjusted. Failure to lubricate the tool will shorten its life.
WARNING: Increasing the pre-load distance beyond 9" for the QCRT2T, 3T,
JT, 4T or 13" for the QCRT5T will make the tool hard to use and shorten tool life
because of excessive stress.
QCRT2T, 3T, JT, 4T
'B'
'A'
7"-8-1/2"
Adjusting Screw
Locking Screw
 Loading...