3DPlatform.com
24
Printing Tips
Orienting the part for success
Part orientation—the direction the part is positioned on
the print bed—effects the print quality, print time, surface
finish, and overall print-ability of the model. The following
tips are intended to assist in orienting your part for a
successful print:
• Position so the most surface area is in level contact
with the print bed
• If possible, orient the part to reduce or eliminate
support structures
• Consider surface finish and position the part
accordingly
• Reduce support structures to reduce print time
• Use a raft to avoid adhesion problems when break-
away support structures are used directly on the
print bed
Link to article: Perfecting the First Layer
Good First Layer
The first layer may be the most important layer of any
print—and perhaps the most difficult. A good first layer is
vital to the success of your print.
Qualities of a good first layer include:
• Clean (clear of debris), prepared glass
• Proper bed temperature
• Optimal first layer nozzle height (
Z-Gap, page 23)
A good first layer adheres to the print bed, is the correct
distance from the print bed and is visibly smooth and
level without gaps or bumps.
Here are a few tips for getting a good first layer:
• Make sure the print bed is level
• Clean and clear any debris from the print bed and
prepare the glass for printing (Prepare the
Print Bed, page 18)
• Getting the first layer height dialed in is critical
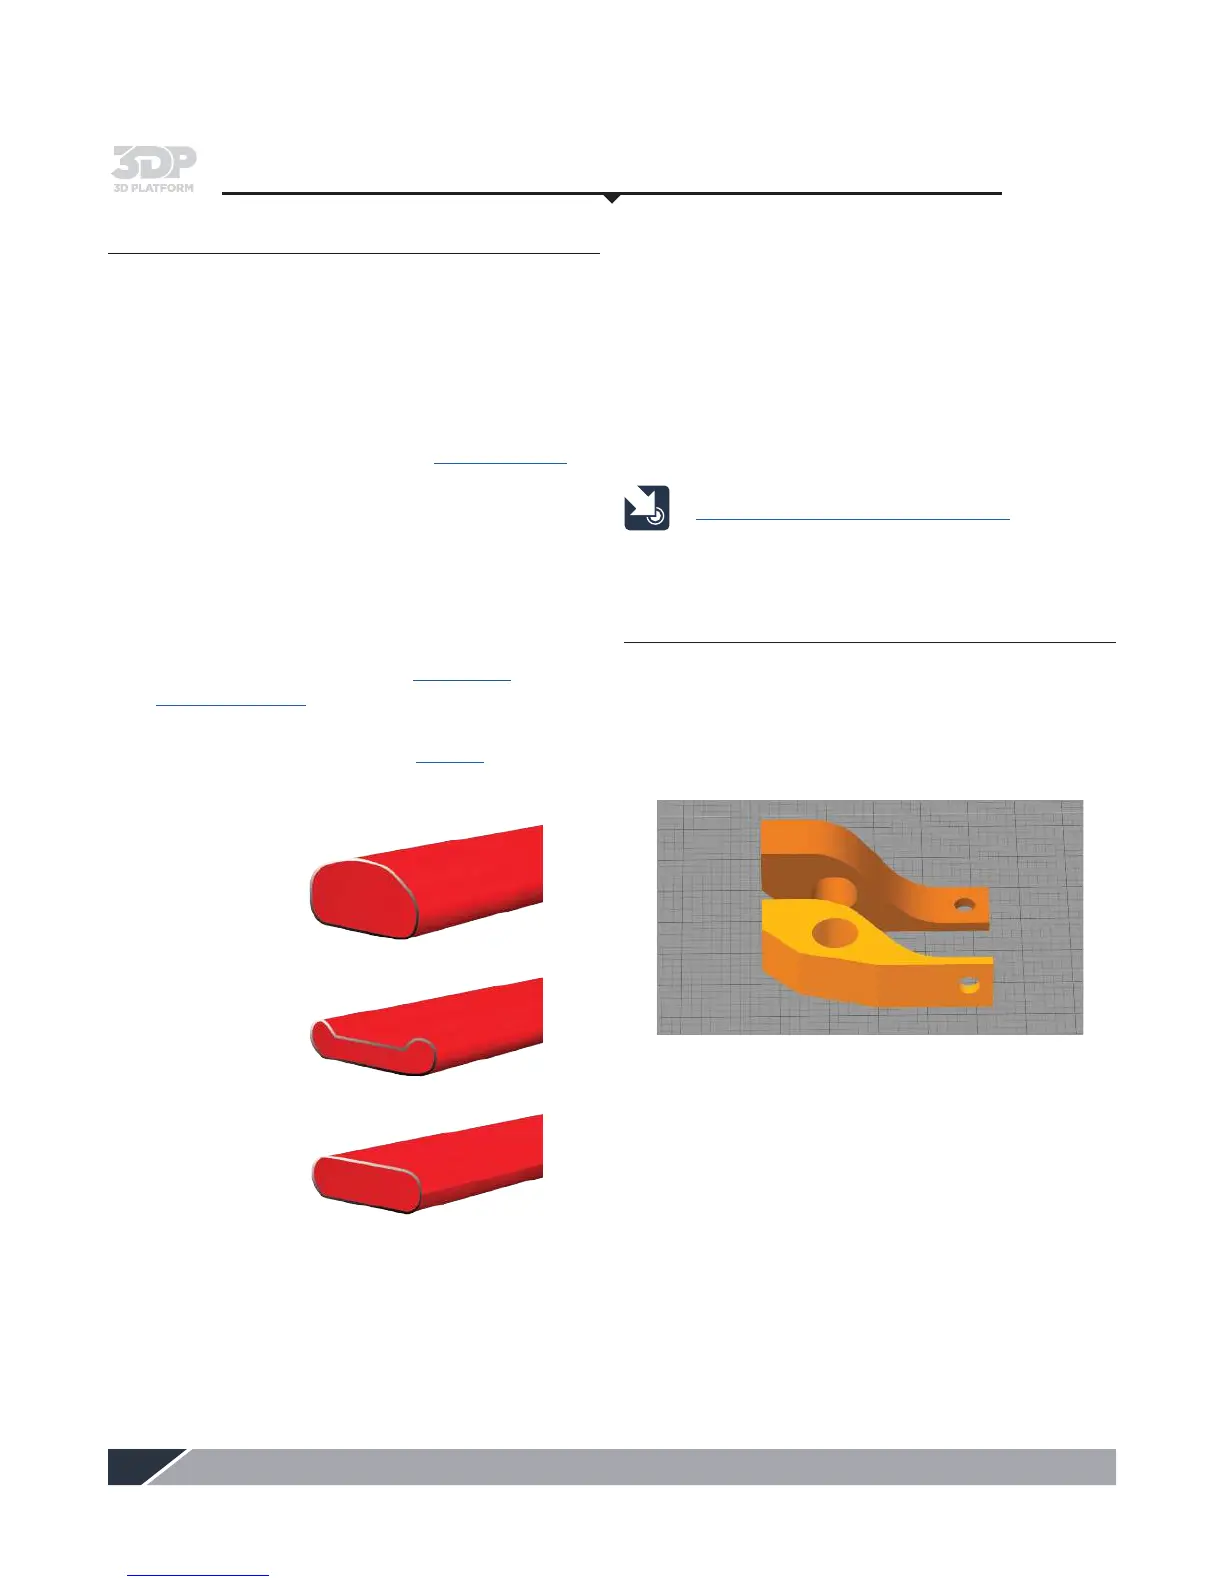
See graphic below. Reference page 23.
– If the first layer is too high it will not stick
– If the first layer is too low it will create a valley,
and may drag the nozzle on the glass
– The first layer height is correct when the bead
of filament is flattened slightly and even
• Heat the print bed to the recommended
temperature; based upon the material being used
– If adhesion problems persist, increase bed
temperature to 80ºC to 85ºC
• Increase the nozzle temperature by 10ºC to 20ºC for
the first 1-3 layers to aid in adhesion
•
Decrease the printing speed by 30% for the first layer
• Print a test print to ensure good first layer adhesion
First layer height too high
First layer height too low
First layer height correct