32 © 3M 2008. All Rights Reserved.
User Controls 3M™ Digital Projector
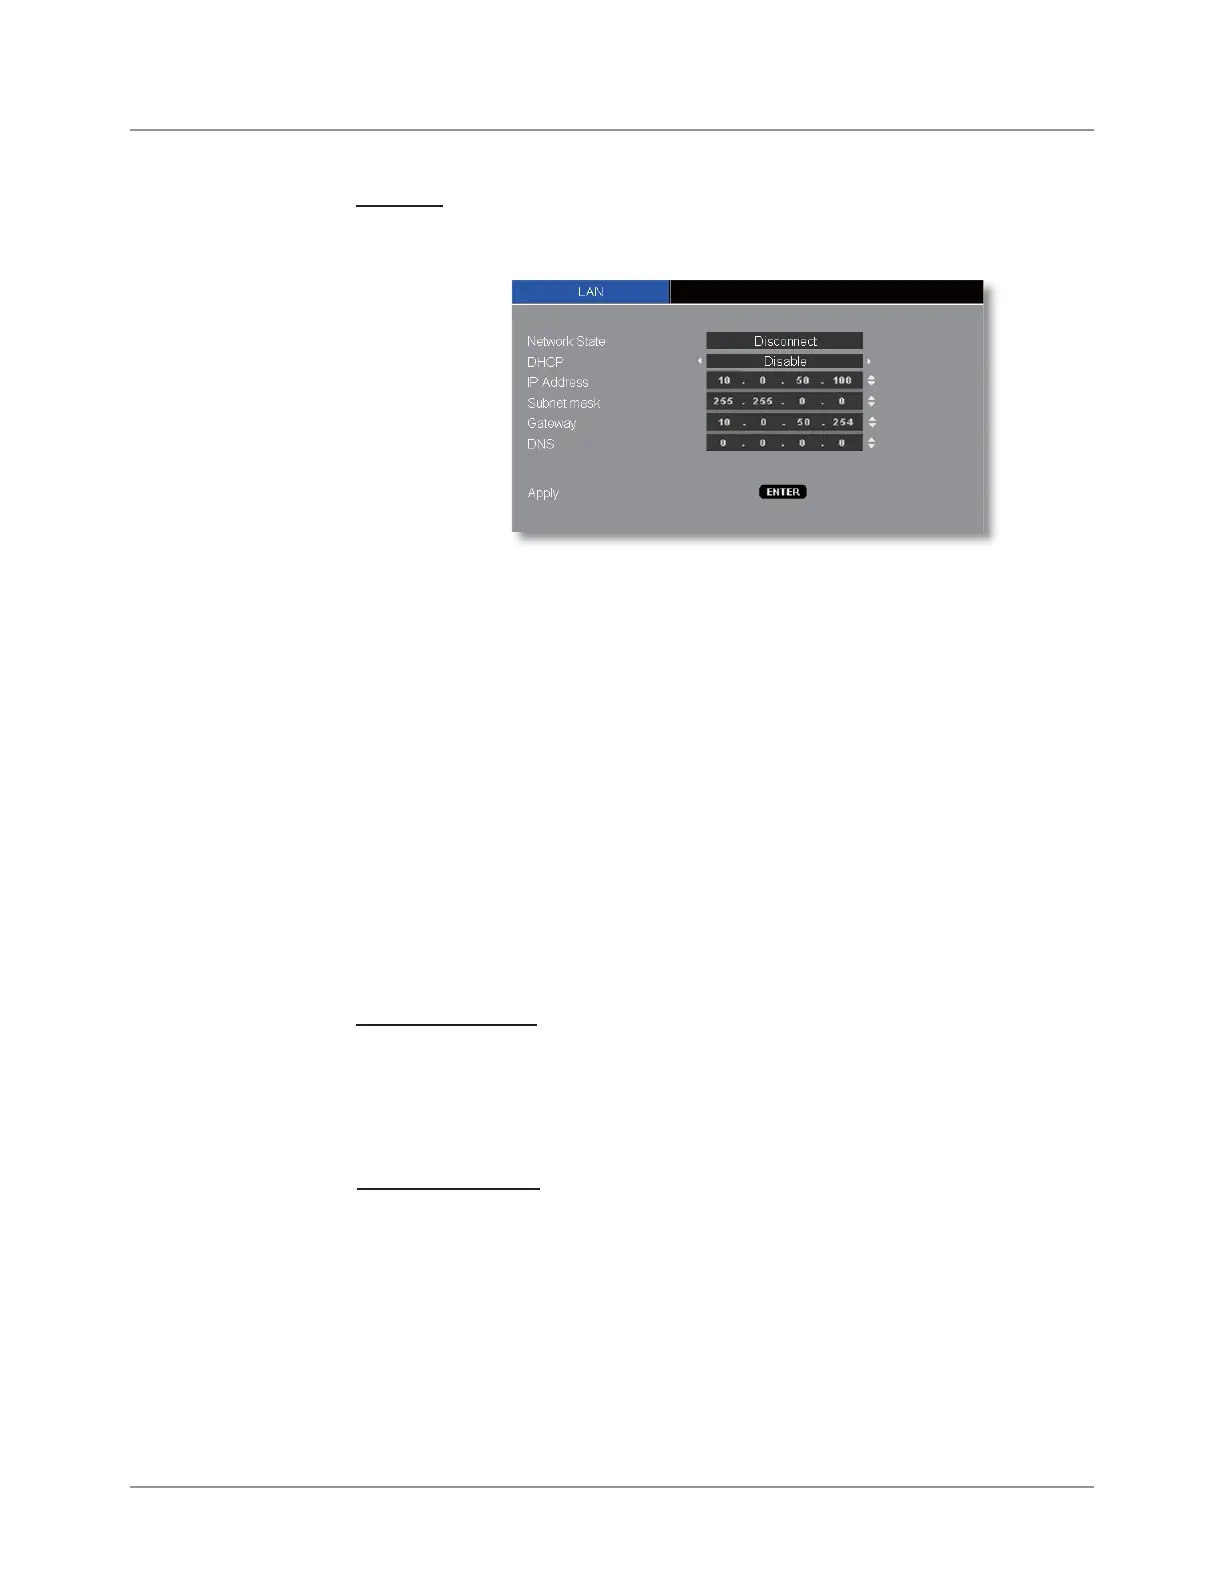
LAN
Press “Enter” to apply LAN settings. If the connection is successful,
the OSD display will show the following dialogue box.
Network State: To display network information.
DHCP:
Enable: Assign an IP address to the projector from the DHCP
server automatically.
Disable: Assign an IP address manually.
IP Address: Select an IP address.
Subnet Mask: Select subnet mask number.
Gateway: Select the default gateway of the network connected to
the projector.
DNS: Select DNS number.
Apply: Press “Enter” to apply the selection.
RS232 Port
RS232: Allows RS232 control of an individual projector.
Network: Allows LAN via web browser (Internet Explorer) to
control of projector. (Default setting)
Projector ID
,'GH¿QLWLRQFDQEHVHWXSE\PHQXUDQJHaDQGDOORZXVHU
control an individual projector by RS232. The related order please
refer page 44.