Nozzle Z leveling
This procedure is the key to get good printing results.
Therefore take your time to perform it correctly, you will be rewarded with consistent printing quality!
Before going on, check that all nozzles are clean and free from plastic remains on the tips: to clean them you can warm up
all extruders at working temperature with a paper towel (be sure not to leave further paper traces on nozzles!).
Also, check the printing plate: if the protective film is damaged, change it now.
Finally, be sure that no plastic particles are trapped between tray and heated plate. This should never happen, but anything
done wrong now will affect all your following prints!
After going thru above check, you can proceed to the calibration procedure: please remember that each procedure step is
meant to be performed on ALL extruder mounted on your machine!
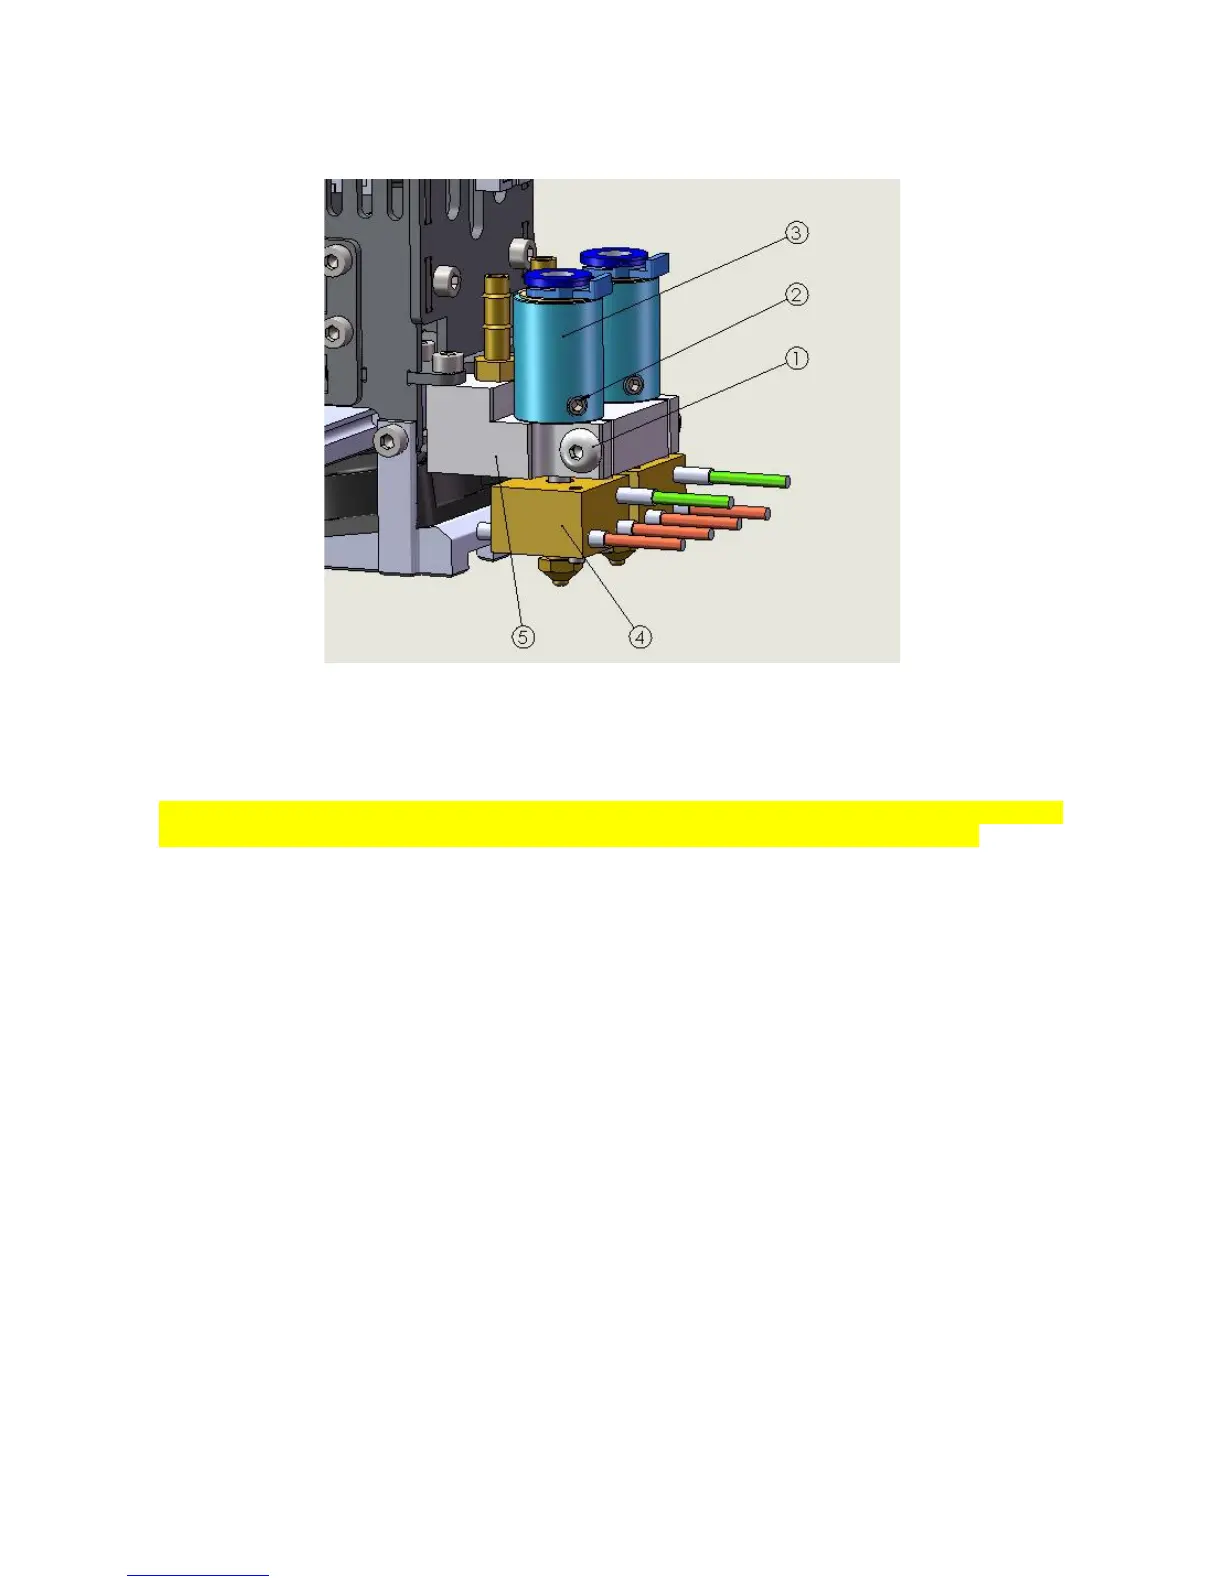
1. Check that there is at least one millimeter clearance between lower part of tube adapter(3) and extrusion holder
(5)
2. Release the setting screw(1) on extruder block
3. Pull the extruder up
4. Slightly tighten the setting screw(1) to temporarily hold the extruder at “all-up” position
5. Do X and Y homing (X and Y “home” icon on Repetier Host manual control section)
6. Move extruders to parking position (in the “manual control” window, use the “GCODE” text box to enter the “G1
X0 Y50” command)
7. Do the Z homing
8. Move the extruders at the center of printing area
9. Release the extruder setting screw (1)
10. Release screw(2), unscrew the tube adapter(3) until extruder nozzle will touch the printing plate
33
Fig 40: Extruder assembly