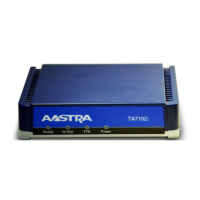
TA7102i Hardware Installation
© 2014 Aastra Sweden | 153_1531 ANF 90114| A | 2014-01-24 24
Default Static IPv4 Address Configuration
If there is no DHCP server in your network, then the IP address has to be configured statically.
• To start the TA7102i with a static IP address:
1. With a 10/100 Hub and two 10/100 BaseT Ethernet RJ-45 straight cables, connect both
cables to the Hub; one of them is connected into the WAN connector. The other cable links
the computer to the Hub.
2. Reconfigure the IP address of your computer to 192.168.0.11 and the Subnet Mask to
255.255.255.0.
3. Restart the computer.
4. Power on the TA7102i, by connecting the other end of the power cord to an electrical outlet.
The electrical outlet must be installed near the TA7102i so that it is easily accessible.
5. Insert a small, unbent paper clip into the Reset / Default hole located at the rear of the
TA7102i. The Power LED will start blinking, and after a few seconds, all the LEDS will start
blinking. Release the paper clip after all the LEDs start blinking and before they all stop
blinking (between 7-11 seconds).
This procedure is called a partial reset. After a partial reset is performed, the TA7102i uses
the default IP address 192.168.0.1/24. Refer to “Partial Reset”
for details on the partial reset
procedure.
The corresponding link-local IPv6 address is also available and printed on the sticker under
the TA7102i.
You can now access the TA7102i web interface. Refer to the Software Configuration Guide
for more details.
IPv6 Link Local Address Configuration
If there is no DHCPv6 server or IPv6 router in your network, you can use the link local address
to contact the unit. Note that the TA7102i IPv6 interface is disabled by default.
1. With a 10/100 Hub and two 10/100 BaseT Ethernet RJ-45 straight cables, connect both
cables to the Hub; one of them is connected into the WAN connector. The other cable links
the computer to the Hub.
2. Power on the TA7102i by connecting the other end of the power cord to an electrical outlet.
The electrical outlet must be installed near the TA7102i so that it is easily accessible.
3. Insert a small, unbent paper clip into the Reset / Default hole located at the rear of the
TA7102i. The Power LED will start blinking, and after a few seconds, all the LEDS will start
blinking. Release the paper clip after all the LEDs start blinking and before they all stop
blinking (between 7-11 seconds). This procedure is called a partial reset. After a partial
reset is performed, the TA7102i enables its link local IPv6 address. Refer to Partial Reset

 Loading...