ACH550 E-Clipse Bypass User’s Manual 2-11
Installation
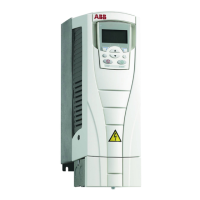
Ratings and frame size
The chart in the Ratings
section of the ACH550-UH User’s Manual on page 1-297
lists technical specifications, and identifies the drive’s frame size – significant, since
some instructions in this document vary, depending on the drive’s frame size. To
read the Ratings table, you need the “Output current rating” entry from the Type code
(see above). Also, when using the Ratings tables, note that there are three tables
based on the drive’s “Voltage rating”.
Suitable mounting location (supplement to ACH550-UH User’s Manual)
In selecting a suitable mounting location for E-Clipse Bypass configurations, refer to
the Technical data on page 2-239 in this manual for the appropriate information on:
• Branch circuit protection
• Dimensions and weights
• UL Type 3R, BX3R-1...BX3R-4 enclosures are designed to be mounted on a wall.
Mounting these 3R enclosures on an open rack system requires the use of the
supplied 3R enclosure back plates to maintain 3R integrity.
Installing the wiring (supplement to ACH550-UH User’s Manual)
WARNING!
• Do not connect or disconnect input or output power wiring, or control wires, when
power is applied.
• Never connect line voltage to drive output Terminals T1, T2, and T3.
• Do not make any voltage tolerance tests (Hi Pot or Megger) on any part of the
unit. Disconnect motor wires before taking any measurements in the motor or
motor wires.
• Make sure that power factor correction capacitors are not connected between the
drive and the motor.
Wiring requirements
Refer to the Wiring requirements on page 1-18 in the ACH550-UH User’s Manual.
The requirements apply to all ACH550 drives. In particular:
• Use separate, metal conduit runs to keep these three classes of wiring apart:
– Input power wiring.
– Motor wiring.
– Control/communications wiring.
• Properly and individually ground the drive, the motor and cable shields.
• Use wire ties to permanently affix control/communications wiring to the hooked
wire race tie points provided maintaining a minimum 6 mm (1/4") spacing from
power wiring.
• Use a separate motor conduit run for each motor.
 Loading...