17
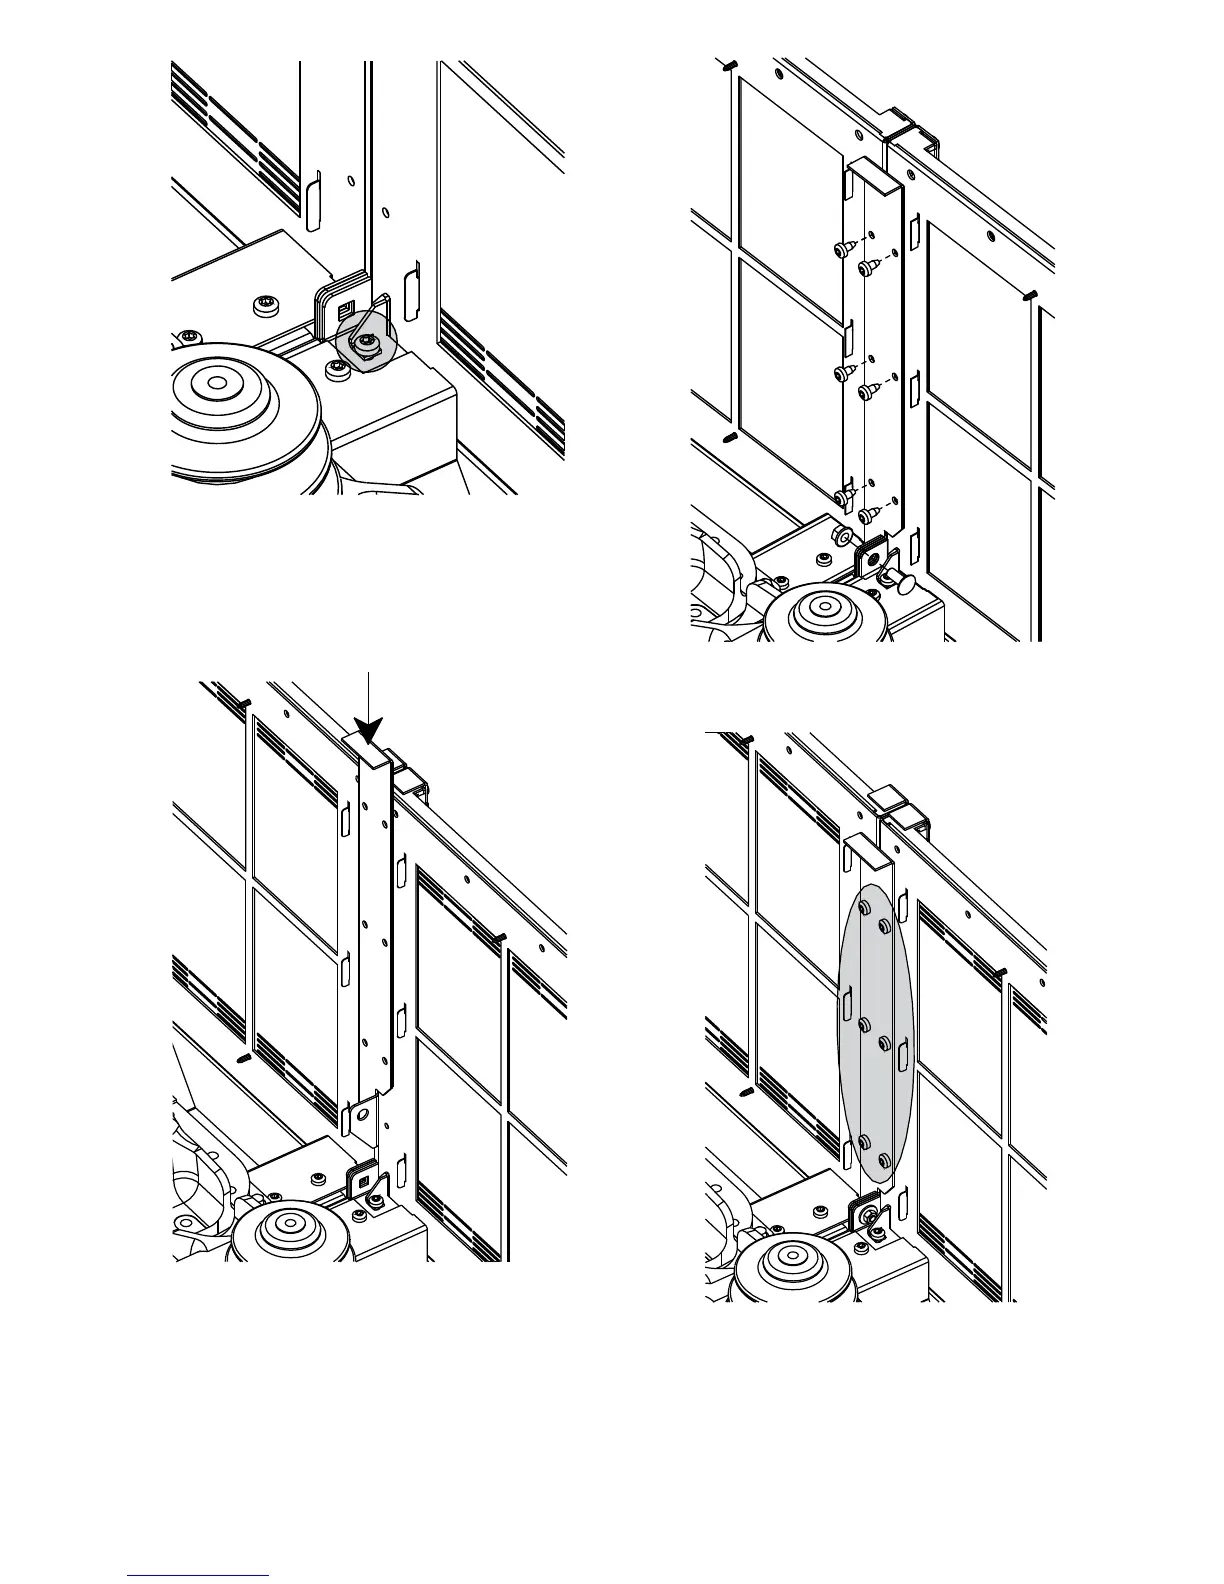
Figure 43. Screw for the lower joining plate
d) Slide the joining plate to the fixing point of the units (on the
inner rear wall).
Figure 44. Installation of top joining plate
e) Screw the joining plate and the unit plates together (with 6
Torx M6x12 screws) so that they are fully tightened. Insert a
bolt (M8x20 round-headed with square neck) with a nut (M8
hexagonal nut with flange) (figure 45) to tighten the units and
the joining plate.
Figure 45. Screws for the top joining plate
Figure 46. Plates installed
f) Insert 5 bolts (M10x20 hexagonal with flange) and 5 nuts
(M10x20 hexagonal with flange) into the LV and instrument
compartment (front, upper part of the units), but do not
tighten them yet.