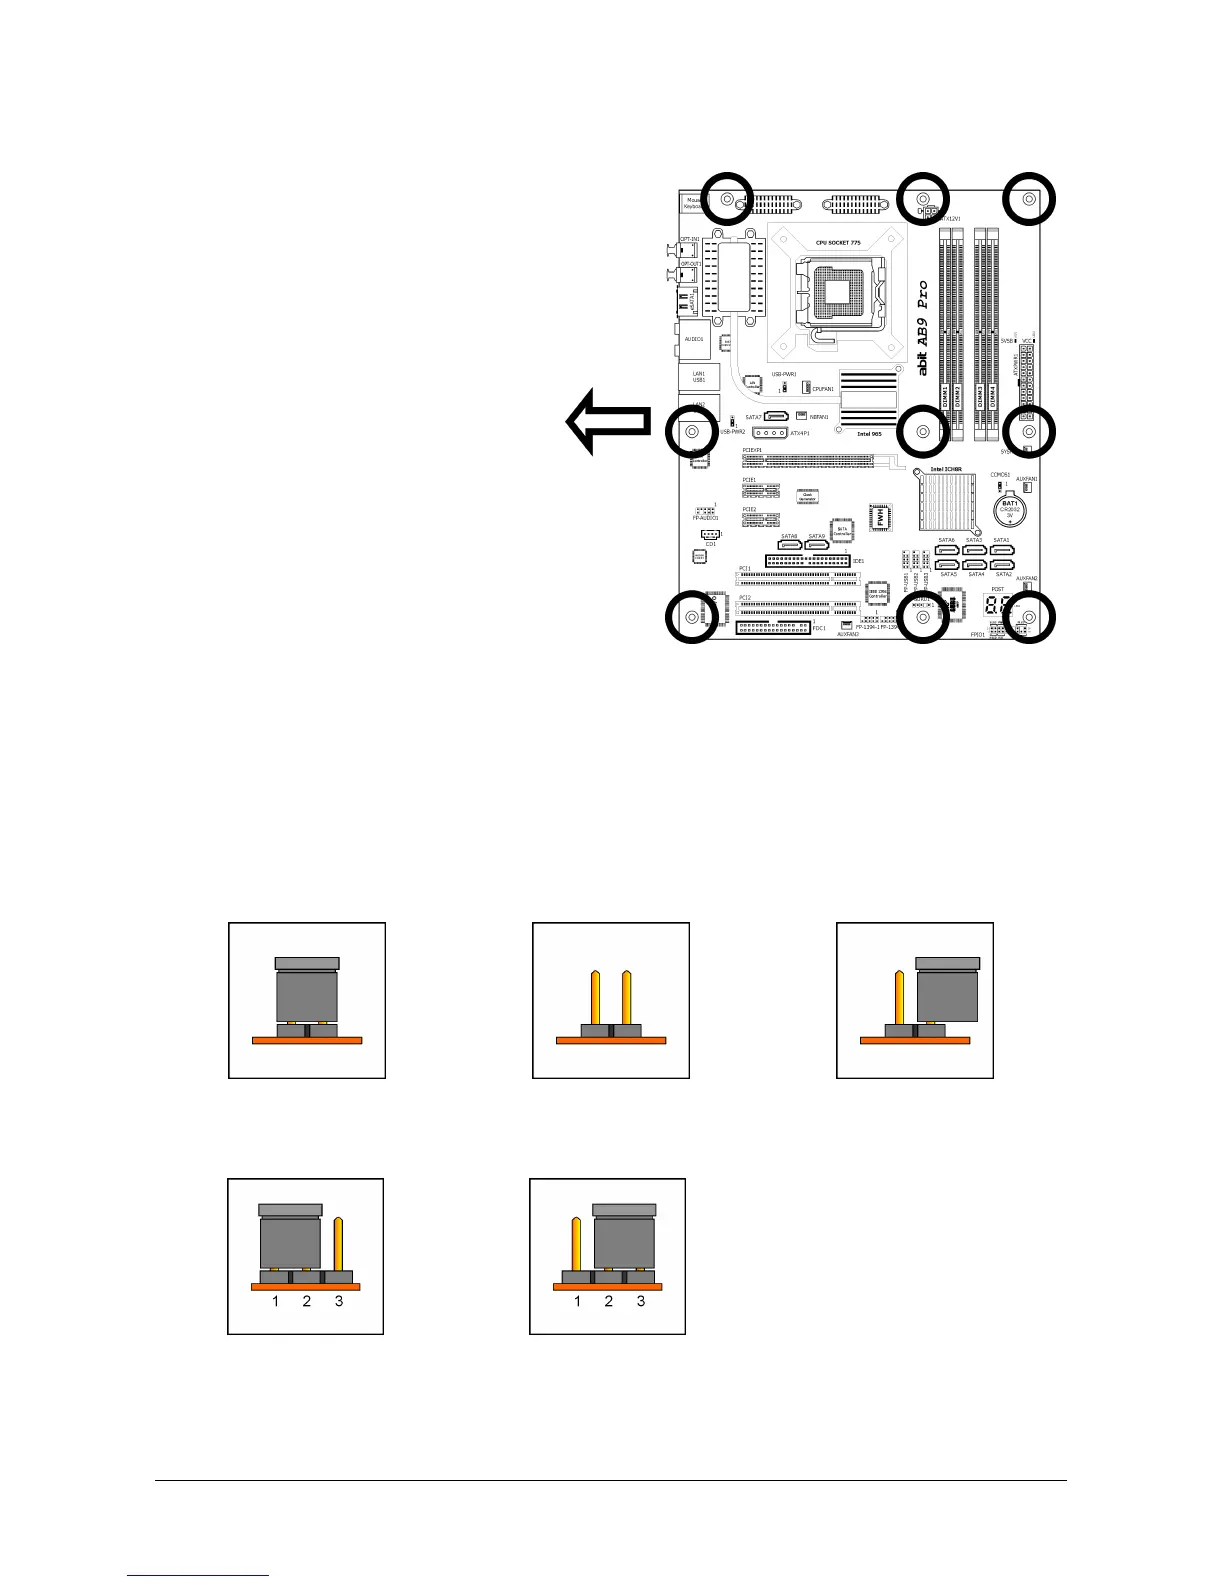
To install this motherboard:
1. Locate all the screw holes on
the motherboard and the
chassis base.
2. Place all the studs or spacers
needed on the chassis base
and have them tightened.
3. Face the motherboard’s I/O
ports toward the chassis’s rear
panel.
4. Line up all the motherboard’s
screw holes with those studs o
spacers on the chassis.
5. Install the motherboard with
screws and have them
tightened.
Face the chassis’s rear panel.
※ To prevent shorting the PCB circuit, please REMOVE the metal studs or spacers if
they are already fastened on the chassis base and are without mounting-holes
on the motherboard to align with.
2.3 Checking Jumper Settings
For a 2-pin jumper, plug the jumper cap on both pins will make it CLOSE (SHORT). Remove the
jumper cap, or plug it on either pin (reserved for future use) will leave it at OPEN position.
SHORT OPEN OPEN
For 3-pin jumper, pin 1~2 or pin 2~3 can be shorted by plugging the jumper cap in.
Pin 1~2 SHORT Pin 2~3 SHORT
2-2 AB9 Pro, AB9