50
English
8-A GRIFF LINKSHÄNDER SCHRITT 1
8-C GRIFF LINKSHÄNDER SCHRITT 3
3-B PATRONE AUSSTECKEN SCHRITT 2
position of the activation handle is between the chest
and shoulder. If it is not correct, the handle attachment
can be adjusted to the appropriate height. Attach the
handle to the fastening strap that is most suitable for
you. The handle can be attached to the right-hand
shoulder strap for those who are left-handed.
STEP 8
Left-handed assembly
Remove the inflator (see Step 9) and remove the
handle in the OFF position from the fastening strap.
Loosen the connector under the neoprene and move
the cable from the left-hand shoulder strap to the right-
hand shoulder strap. Reinsert the activation handle and
adjust to the correct height on the strap.
Lift the safety sleeve to the ON position and rotate the
handle 180°. Do not pull the activation handle down,
as this will activate the device. Repeat Step 5 to check
that the handle is ready for use.
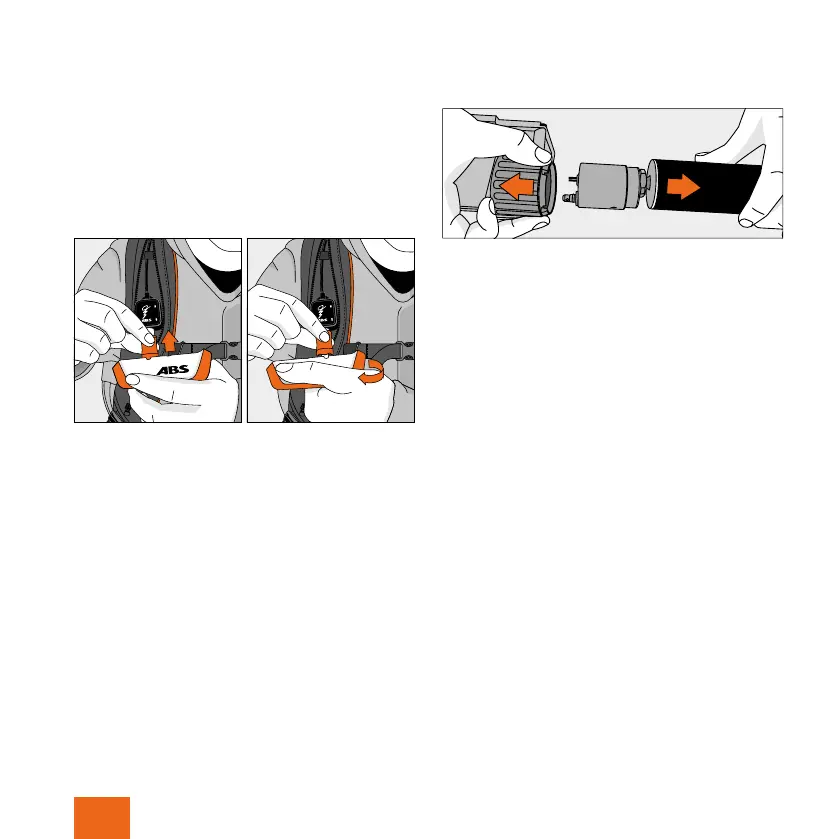
STEP 9
Remove inflator
Push the black rocker above the control module down
with one hand while pulling the seal sleeve on the
thumbrest upwards. Pull out the inflator with your other
hand.
STEP 10
Practice activation
We want you to feel 100% comfortable with the ABS
®
P.RIDE System. We therefore strongly recommend that
you practice the activation as part of your training so
that the functional principle of the ABS
®
P.RIDE Sys-
tem can be demonstrated as realistically as possible.
Practice the activation so that you get used to the force
required and to be able to intuitively activate the airbag
in a real avalanche situation.