EasyManua.ls Logo

Acer H6815BD Series - User Manual

Acer H6815BD Series
57 pages
Print Icon
To Next Page IconTo Next Page
Loading...
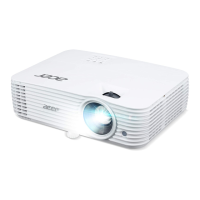
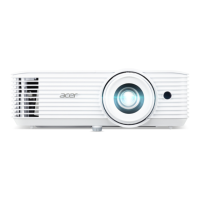
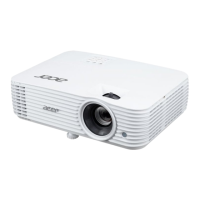
Acer DLP Projector
H6815/E8615/HE-4K15/
GM835/VH-736/H6815BD+/
H6815ABD/H6815BD/H6815+/
H6815A/H6822BD/A4K2008/
H6830BD/E8630/HE-4K30/
GM835Z/VH-736Z/
H6830BDZ+/H6831BD/
H6830BD+/H6830/A4K2111
Series User's Guide
Copyright © 2020. Acer Incorporated.
All Rights Reserved.
Acer Projector User's Guide
Original Issue: 11/2020

Questions and Answers

  • B
    Brian GarciaAug 15, 2025
    How to fix Acer Projector when no image appears on screen?
    • K
      Katrina KellerAug 15, 2025
      First, ensure all cables are correctly connected as described in the "Getting Started" section. Check that none of the connector pins are bent or broken. Finally, make sure the projector is switched on.
  • A
    anthonywillisAug 18, 2025
    Why is the Acer H6815BD Projector image too small or too large?
    • K
      Keith ComptonAug 18, 2025
      Adjust the zoom lever on the top of the projector. You can also move the projector closer to or further from the screen. Alternatively, press "MENU" on the control panel or remote control, go to "Image" > "Aspect Ratio," and try different settings.
  • R
    riveratanyaAug 22, 2025
    What to do if the Acer H6815BD Projector image is out of focus?
    • J
      jonathanjohnsonAug 22, 2025
      First, adjust the focus ring on the projector lens. Then, ensure the projection screen is within the required distance. Refer to the "How to Get a Preferred Image Size by Adjusting Distance and Zoom" section for more information.
  • D
    donnadukeAug 26, 2025
    Why is the screen of the notebook computer not displaying my presentation on Acer Projector?
    • B
      Brianna WilsonAug 26, 2025
      If you are using a Microsoft® Windows® based notebook: Some notebook PCs may deactivate their own screens when a second display device is in use. Each has a different way to be reactivated. Refer to your computer's manual for detailed information. If you are using an Apple® Mac® OS based notebook: In System Preferences, open Display and select Video Mirroring "On."
  • D
    Dalton JohnsonAug 28, 2025
    How to correct slanted sides on Acer H6815BD Projector image?
    • Z
      Zachary LutzAug 28, 2025
      If possible, reposition the Acer projector so that it is centered on the screen and below the bottom of the screen. You can also press the Keystone correction keys on the control panel or remote control until the image becomes square. Alternatively, press "MENU" on the control panel or remote control to open the OSD menu and navigate to "Image" > "H/ V Keystone" to make adjustments.
  • M
    Mrs. Nicole ClineSep 1, 2025
    What to do if Acer Projector image is reversed?
    • E
      Emily JacksonSep 1, 2025
      Select "Image" > "Projection Mode", "Image" > "Projection Location" on the OSD and adjust the projection direction.
  • R
    Rachel HerreraSep 4, 2025
    How to fix partial, scrolling, or incorrectly displayed image on Acer H6815BD Projector (For PC)?
    • J
      Janice SloanSep 4, 2025
      For an incorrectly displayed image, open "My Computer > Control Panel," and then double-click the "Display" icon. Select the "Settings" tab. Verify that your display resolution setting is lower than or equal to 1600 x 1200 or 1920 x 1080. Click the "Advanced Properties" button. If the problem still appears, change the monitor display you are using and follow the steps below: Verify that the resolution setting is lower than or equal to 1600 x 1200 or 1920 x 1080. Click the "Change" button under the "Monitor" tab. Click "Show all devices > Standard monitor types" under the SP box, and choose the resolution mode you need under the "Models" box. Verify that the resolution setting of the monitor display is lower than or equal to 1600 x 1200 or 1920 x 1080.
  • N
    ngreenSep 7, 2025
    How to fix partial, scrolling, or incorrectly displayed image on Acer Projector (For notebooks)?
    • N
      Nicole SalazarSep 7, 2025
      For an incorrectly displayed image: Follow the steps for item 2 (above) to adjust the resolution of your computer. Press the toggle output settings. Example: [Fn]+[F4], Compaq [Fn]+[F4], Dell [Fn]+[F8], Gateway [Fn]+[F4], IBM [Fn]+[F7], HP [Fn]+[F4], NEC [Fn]+[F3], Toshiba [Fn]+[F5]. If you experience difficulty changing resolutions or your monitor freezes, restart all equipment including the projector.
  • N
    Nicole SanchezSep 12, 2025
    Why is the Acer H6815BD image stretched when displaying a "widescreen" DVD title?
    • C
      Cassandra MaxwellSep 12, 2025
      When you play a DVD encoded in anamorphic or 16:9 aspect ratio, you may need to adjust the following settings: * If you play a 4:3 format DVD title, please change the format to 4:3 with the projector OSD. * If the image is still stretched, you will also need to adjust the aspect ratio. Set up the display format to 16:9 (wide) aspect ratio on your DVD player.

Summary

Safety and Comfort Information

General Safety Advice

Provides general safety guidelines, plug safety, and accessibility advice.

Electrical Power and Usage Guidelines

Safe Electrical Power Usage

Guidelines for safe and optimal use of electrical power for the projector.

Product Servicing and Handling

Servicing and Additional Safety

Instructions for servicing, handling, and additional safety measures.

Listening, Disposal, and Environmental Notes

Listening, Disposal, and Mercury Advisory

Advice on safe listening, proper disposal, and mercury content.

First Thing First

Usage Notes and Precautions

Essential usage guidelines and safety precautions before operation.

Introduction

Product Features Overview

Details on the projector's key features and technologies.

Package Contents

Projector Overview

Component Identification

Identification of projector components and ports through diagrams.

Control Panel

Control Panel Functions

Explanation of buttons and their functions on the projector's control panel.

Remote Control

Remote Control Functions

Explanation of buttons and their functions on the remote control.

Getting Started

Connecting the Projector

Guide to connecting the projector to various devices and sources.

Powering the Projector

Turning On the Projector

Step-by-step instructions for powering on the projector.

Turning Off the Projector

Adjusting Image Projection

Adjusting Image Height

Instructions for adjusting the projector's image height using adjustment wheels.

Image Sizing and Positioning

Distance and Zoom for Image Size

Table and guide for achieving desired image size via distance and zoom.

User Controls and Settings

Installation Menu

Using the OSD for projector installation and maintenance.

Onscreen Display (OSD) Navigation

Using OSD Menus

How to navigate and use the projector's OSD menus for settings.

Color Settings

Color Adjustment Options

Configuration of color settings like BluelightShield, Display Mode, and Wall Color.

Advanced Color Management

Image Settings

Projection Mode and Location

Settings for projection orientation, location, and aspect ratio.

Image Distortion Correction

Image Sharpness and HDMI

System Settings

HDR and Startup Screen

Configuring HDR imaging and selecting the startup screen.

HDMI CEC and Low Input Lag

Management Options

Power and Eco Modes

Managing power consumption, fan speed, auto shutdown, and turn off modes.

Control Panel and Lamp Management

Audio Settings

Volume and Audio Output

Adjusting volume, mute, notification sounds, and audio output formats.

3 D Display Settings

3 D Configuration

Settings for enabling and configuring 3D display modes and warnings.

Acer Splash Downloader Tool

System Requirements and Mode Entry

Requirements for the tool and entering download mode.

Connecting and Loading Images

Connecting to PC and loading custom startup images.

Downloading Images to Projector

Process of downloading the selected image to the projector.

Troubleshooting Guide

Image Problems and Solutions

Common image display issues and their troubleshooting steps.

Notebook and DVD Image Issues

Troubleshooting specific issues with notebooks and DVD playback.

Projector Response and Lamp Issues

Resolving projector control issues and lamp end-of-life problems.

OSD Message Reference

Message Reminders and Meanings

Explanation of OSD messages like Fan Fail and Overheated.

LED Status Indicators

Power, Lamp, and Temp LED Definitions

Meaning of Power, Lamp, and Temp LED indicators during operation.

Ceiling Mount Installation

Mounting Procedure

Steps for drilling holes, choosing length, and securing the mount base.

Bracket Connection and Angle Adjustment

Connecting the projector bracket and adjusting its angle and position.

Product Specifications

General and Package Details

Overview of projection system, compatibility, weight, dimensions, and package contents.

Resolution and Projection Details

Specific resolution, aspect ratio, lens, and distance details for different models.

I;O Connectors and Power

List and comparison of I/O connectors and power specifications.

Compatibility Modes

PC Signal Compatibility

Table detailing PC signal modes, resolutions, and frequencies.

Video Signal Compatibility

Table detailing video signal modes, resolutions, and frequencies.

Regulatory Compliance

FCC and Canadian Notices

FCC and Canadian regulatory statements and warnings.

Radio Device Notices and Country Lists

Radio device notices and information on applicable countries.

EU Declaration of Conformity

FCC Declaration of Conformity

Acer H6815BD Series Specifications

General IconGeneral
Contrast Ratio10, 000:1
Projection TechnologyDLP
HDR CompatibilityYes
3D CompatibilityYes
Speakers10W
Resolution3840 x 2160
Keystone CorrectionVertical ±40°
InputsHDMI, VGA, USB, RS232, 3.5mm audio
Outputs3.5mm audio
Projection Size30" - 300"
Lamp Life (Normal)Up to 4, 000 hours

Related product manuals