EasyManua.ls Logo

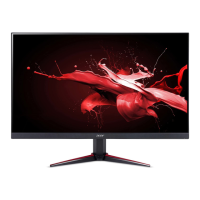
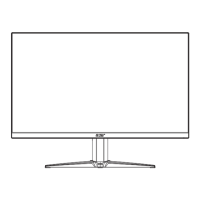
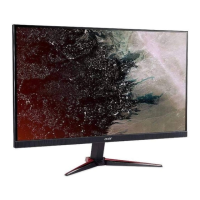
Acer NITRO VG2 VG272U User Manual

Acer NITRO VG2 VG272U
33 pages
To Next Page IconTo Next Page
Page #1 background imageLoading...
Page #1 background image
Acer LCD Monitor
User's Guide

Questions and Answers:

Acer NITRO VG2 VG272U Specifications

General IconGeneral
Screen Size27 inches
Panel TypeIPS
Refresh Rate170Hz
Response Time1ms (VRB)
Brightness400 nits
Contrast Ratio1000:1
Adaptive SyncAMD FreeSync Premium
Aspect Ratio16:9
Color Gamut95% DCI-P3
HDRHDR10
VESA Mount100 x 100 mm
Tilt-5° to 20°
Height AdjustmentYes
PivotYes
Resolution2560 x 1440
Color Support16.7 million colors
Ports2 x HDMI 2.0, 1 x DisplayPort
Swivel±360°

Summary

Information for Your Safety and Comfort

Safety Instructions

Read instructions carefully and keep for future reference. Follow all product warnings.

Cleaning Your Monitor

Unplug monitor before cleaning. Use a soft cloth to wipe screen and cabinet.

Connecting and Disconnecting the Device

Guidelines for connecting/disconnecting power safely, ensuring proper setup.

Accessibility and Safety Guidelines

Accessibility

Ensure power outlet is accessible for easy and safe disconnection of equipment.

Safe Listening Practices

Protect hearing by adjusting volume gradually and limiting exposure time at high volumes.

General Warnings

Avoid water, unstable surfaces, blocked vents, and inserting foreign objects into the unit.

Electrical Power Safety

Use correct power type, avoid overloading, and ensure proper grounding for safe operation.

Product Servicing and Recycling

Product Servicing Guidelines

Refer servicing to qualified personnel; do not attempt self-repair.

Potentially Explosive Environments

Avoid operating in areas with explosive atmospheres like fuel depots or chemical plants.

IT Equipment Recycling Information

Information on Acer's commitment to environmental protection and product recycling.

Disposal and Pixel Information

Disposal Instructions

Do not discard electronic devices in trash; recycle to protect the global environment.

LCD Pixel Statement

LCD units may have minor pixel defects that do not constitute a malfunction.

Ergonomic Use and Vision Care

Tips for Comfortable Computer Use

Provides guidance on comfortable computer usage to prevent strain and injury.

Finding Your Comfort Zone

Adjust monitor angle, use a footrest, or adjust seating for maximum comfort and good posture.

Taking Care of Your Vision

Guidance on how to reduce eyestrain during prolonged monitor use.

Eye Care Practices

Rest eyes frequently, blink often, and focus on distant points to reduce strain.

Display Optimization for Vision

Keep display clean, adjust height, brightness, contrast, and eliminate glare.

Developing Good Work Habits

Take breaks, stretch, breathe fresh air, and exercise regularly for better work habits.

Initial Setup and Adjustments

Unpacking Instructions

Check all items are present when unpacking and save packing materials for future transport.

Attaching and Removing the Base

Attach the monitor stand arm to the base and ensure it is screwed tight.

Wall Mounting Note

For wall mounting, use a VESA kit with specific screws.

Screen Position Adjustment

Adjust the tilt of the monitor to optimize the viewing position.

Tilt Adjustment

Adjust the tilt angle of the monitor to find the best viewing position.

Connection, Safety, and Cleaning

Connecting the Power Cord

Ensure correct power cord type and connect to AC inlet and outlet properly.

Safety Precautions

Avoid cord damage, moisture, dust, blocked vents, and direct sunlight. Handle with care.

Cleaning Your Monitor

Unplug monitor, use soft cloth. Do not spray liquid directly or use ammonia/alcohol cleaners.

Monitor Features and Technical Details

Power Saving Modes

Monitor enters power saving mode indicated by amber LED; recovers when active.

DDC Protocol

DDC enables Plug and Play by allowing the monitor to inform the system of its capabilities.

Connector Pin Assignments

Details pin assignments for 19-pin and 20-pin display signal cables.

Standard Timing Table

Lists supported display modes, resolutions, and refresh rates.

Monitor Installation and Controls

Monitor Installation Guide

Provides steps for installing the monitor to your host system.

Connecting Cables

Connect HDMI or DP cables to the computer and power cords to the monitor and outlet.

User Controls Overview

Explains the base controls: power button, hotkeys, input selection, and navigation/OK button.

OSD Settings and Adjustments

Adjusting OSD Settings

Provides guidance on navigating and adjusting On-Screen Display menus.

OSD Main Page

Access OSD via MENU key; adjust picture quality, OSD position, and general settings.

Mode Selection

Turn modes on or off to select user-defined profiles for display settings.

Adjusting Brightness

Use Navi/OK button to select and adjust the brightness setting.

Selecting Input Source

Open Input control and select an available input source using the Navi/OK button.

Adjusting Picture Settings

Adjusts picture settings like brightness, contrast, blue light, black boost, HDR, and sharpness.

Adjusting Color Settings

Adjust color temperature, gamma, color space, and hue/saturation for desired visual output.

Adjusting Audio Settings

Adjust volume and mute settings via the OSD menu.

Adjusting Gaming Settings

Configure Over Drive, FreeSync Premium, Refresh Rate, and VRB for enhanced gaming experience.

Adjusting OSD Settings

Configure OSD language, timeout, transparency, and lock settings.

Adjusting System Settings

Set input source, DP format, hotkey assignments, wide mode, and DDC/CI.

Product Information Display

View main source, resolution, frequency, mode, and reset settings to factory defaults.

Troubleshooting Common Issues

Related product manuals