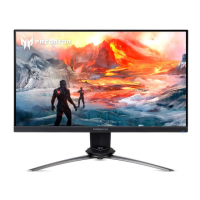
This document is a user guide for an Acer LCD Monitor, providing essential information for its safe and effective operation, maintenance, and troubleshooting.
Function Description
The Acer LCD Monitor is designed to display visual information from a computer. It features various input options, including HDMI and DisplayPort, allowing connectivity with different devices. The monitor offers a range of display modes and settings to optimize the viewing experience, including adjustments for brightness, contrast, color, and gamma. It also includes gaming-specific features such as Over Drive and Aim Point. The monitor is equipped with user controls for easy navigation through its on-screen display (OSD) menu, enabling users to customize settings according to their preferences.
Important Technical Specifications
Display:
- Panel Type: LCD (Liquid Crystal Display)
- Pixel Density: The LCD screen has 99.99% or more effective pixels. It may include blemishes of 0.01% or less, or a missing pixel or pixel lit all the time.
- Resolution and Refresh Rates (DP Timing):
- 640x480 @ 60Hz
- 800x600 @ 60Hz
- 1024x768 @ 60Hz
- 1920x1080 @ 60Hz
- 1920x1080 @ 85Hz
- 1920x1080 @ 100Hz
- 1920x1080 @ 120Hz
- 1920x1080 @ 144Hz
- Resolution and Refresh Rates (HDMI Timing):
- 640x480 @ 60Hz VGA, IBM
- 800x600 @ 60Hz VESA
- 1024x768 @ 60Hz VESA
- 1920x1080 @ 60Hz
- Color Depth: 20-pin color display signal cable (DDC) and 19-pin color display signal cable.
- DDC Protocol: The monitor supports the DDC2B standard, allowing it to communicate with the host system for optimal display settings.
Connectivity:
- Input Ports: HDMI (optional), DP (DisplayPort) (optional)
- USB Ports: USB 3.0 cable (optional)
- Audio Output: Audio output is available for audio output models.
Power:
- Power Input: Universal power supply that allows operation in either 100/120 V AC or 220/240 V AC voltage area.
- Power Cord: Use a UL-listed cord set, type SVT wire and plug rated 10 A/125 V for 120 V AC units. Use a cord set consisting of H05VV-F cord and plug rated 10 A/250 V for 220/240 V AC units.
- Power Saving Mode: The monitor enters "Power Saving" mode when the control signal from the display controller is indicated by an amber-color power LED. The recovery time from Active OFF state back to ON state is around 3 seconds.
- Deep Sleep Mode: The monitor will go to sleep mode after 15 minutes of inactivity. When in deep sleep, the monitor will not go to sleep mode.
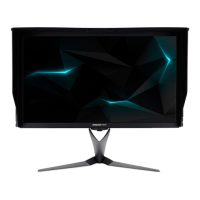
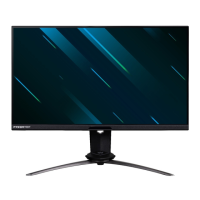
Physical:
- Adjustments: Height adjustment (up to 115mm), Tilt (-5° to 25°), Swivel (20° left and 20° right), Monitor Pivot (90° clockwise or counter-clockwise).
Certifications and Compliance:
- EMC Directive: 2014/30/EU (EN 55032:2015/AC:2016 Class B, EN 61000-3-2:2014 Class D, EN 61000-3-3:2013, EN 55024:2010)
- LVD Directive: 2014/35/EU (EN 60950-1:2006/A11:2009/A1:2010/A12:2011/A2:2013)
- RoHS Directive: 2011/65/EU (EN 50581:2012)
- ErP Directive: 2009/125/EC (Regulation (EC) No. 1275/2008, EN 50564:2011)
- Federal Communications Commission (FCC): Complies with Part 15 of the FCC Rules.
Usage Features
User Controls:
- Power Button: Turns the monitor on/off. Blue indicates power on, amber indicates standby/power saving mode.
- Function Keys (Hotkeys):
- Hotkey 1 (Modes): Press to view Main page. Press again to enter hotkey1 function. When the Function Menu is active, press this key to view the basic information for your monitor and current input or reset the custom color settings to the factory defaults. Allows selection of scenario modes (G1, G2, G3) or user-defined profiles (User, Standard, ECO, Graphics, Movie).
- Hotkey 2 (Brightness): Press to view Main page. Press again to enter hotkey2 function. When the Function Menu is active, press this button to select select scenario mode or game mode. Opens the Brightness control to adjust the preferred brightness setting.
- Hotkey 3 (Input Switch): Press to view Main page. Press again to enter Input select function. Opens the Input control to select HDMI or DP.
- Hotkey 4 (Main Menu): Press to view Main page. When the Function Menu is active, this button will quit the OSD. Opens the main OSD menu.
- Hotkey 5 (Next Function): Press to view Main page. Press again to enter next function in the Function Menu.
- Joystick: A single five-way button on the backside of the Display bezel operates like a joystick. To move the cursor, simply toggle the button in four directions. Press the button to select desired option. Red indicates operable, Grey indicates inoperable.
OSD Menu Navigation:
- Picture Settings: Adjusts Brightness, Contrast, Blue Light, Dark Boost, Adaptive Contrast, Gamma, Color Temperature, Saturation, and 6-axis Color.
- Audio Settings: Adjusts Volume.
- Gaming Settings: Controls Over Drive, ULMB (Ultra Low Motion Blur), and Aim Point.
- OSD Settings: Sets Language, OSD timeout, Transparency, and Refresh rate num.
- System Settings: Manages Input source, Hot Key Assignment, Wide Mode, Deep Sleep, Power-off USB Charge, and Quick start mode.
G-SYNC & the 3D Experience:
- The monitor supports 3D-compatible software, NVIDIA® 3D Vision™ glasses kit, and a compatible NVIDIA® 3D graphics card.
- Requires an NVIDIA GeForce GTX650Ti BOOST GPU or higher. For more information, visit the NVIDIA® website.
Ergonomic Features:
- Height Adjustment: Allows users to adjust the monitor height for optimal viewing comfort.
- Tilt: Enables tilting the screen to find the best viewing angle.
- Swivel: Allows swiveling the monitor for comfortable viewing from different positions.
- Pivot: Enables rotating the display to a portrait orientation.
Safety and Comfort Guidelines:
- Accessibility: Ensure the power outlet is easily accessible and located as close to the product as possible.
- Safe Listening: Gradually increase volume until you can hear it clearly and comfortably. Limit the amount of time listening to music at high volume. Avoid turning up the volume to block out noisy surroundings.
- Warnings: Do not place this product near water. Do not place this product on an unstable cart, stand, or table. Slots and openings are provided for ventilation. Never push objects of any kind into this product through cabinet slots. Never spill liquid of any kind onto or into the product. To avoid damage of internal components and to prevent battery leakage, do not place the product on a vibrating surface. Never use it under sporting, exercising, or any vibrating environment.
- Using Electrical Power: This product should be operated from the type of power indicated on the marking label. Do not allow anything to rest on the power cord. Do not locate this product where people will walk on the cord.
- Product Servicing: Do not attempt to service this product yourself. Unplug the product from the wall outlet and refer servicing to qualified service personnel when: the power cord or plug is damaged, cut or frayed; liquid was spilled into the product; the product was exposed to rain or water; the product has been dropped or the case has been damaged; the product exhibits a distinct change in performance; indicating a need for service; the product does not operate normally after following the operating instructions.
- Potentially Explosive Environments: Switch off your device in any area with a potentially explosive atmosphere. Be advised to turn off your vehicle engine. Sparks in such areas could cause an explosion or fire.
- IT Equipment Recycling Information: Acer is strongly committed to environmental protection and views recycling as a top priority.
- Tips and Information for Comfortable Use:
- Eyestrain and Headaches: Take regular breaks, adjust posture, and ensure proper lighting.
- Musculoskeletal Disorders: Maintain good posture, adjust monitor height, and use an ergonomic keyboard/mouse.
- Finding Your Comfort Zone: Adjust the viewing angle, monitor height, and distance from the screen. Refrain from staying too long in one fixed posture, avoid slouching forward/leaning backward, and stand up and walk around regularly.
- Taking Care of Your Vision:
- Eyes: Rest your eyes frequently. Give your eyes regular breaks by looking away from the monitor and focusing on a distant point. Blink frequently to keep your eyes from drying out.
- Display: Keep your display clean. Keep your head at a higher level than the top edge of the display so your eyes point downward when looking at the middle of the display. Adjust the display brightness and/or contrast to a comfortable level. Eliminate glare and reflections by placing your display in such a way that the side faces the window or any light source, minimizing room light by using drapes, shades or blinds, using a task light, changing the display's viewing angle, using a glare-reduction filter, and using a display visor. Avoid adjusting your display to an awkward viewing angle. Avoid looking at bright light sources, such as open windows, for extended periods of time.
- Developing Good Work Habits: Take short breaks regularly and often. Perform some stretching exercises. Breathe fresh air as often as possible. Exercise regularly and maintain a healthy body.
Maintenance Features
Cleaning Your Monitor:
- Always unplug the monitor before cleaning.
- Use a soft cloth to wipe the screen and cabinet front and sides.
Troubleshooting:
- No picture visible: Check LED status (Blue for normal operation, Off for no power, Amber for power saving mode). Verify AC power cord connection, video signal cable connection, and computer system power status.
- Deep Sleep: If the monitor goes to sleep mode after 15 minutes, Deep sleep is set to on. To prevent this, set Deep sleep to off.
- Quick start mode: Check quick start mode setting in the OSD.
- Power-off USB charge: Turn On or Off. On: DC off/Saving mode can electrify for USB port. Off: DC off/Saving mode can't to electrify for USB port.
Product Servicing:
- Do not attempt to service this product yourself. Refer all servicing to qualified service personnel.
- Unplug the product from the wall outlet and refer servicing to qualified service personnel when:
- The power cord or plug is damaged, cut or frayed.
- Liquid was spilled into the product.
- The product was exposed to rain or water.
- The product has been dropped or the case has been damaged.
- The product exhibits a distinct change in performance, indicating a need for service.
- The product does not operate normally after following the operating instructions.