46
ACORN 80 Maintenance & Service Manual
SECTION 7
Dismantling Components
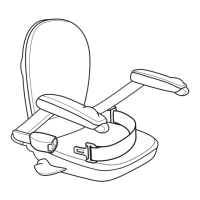
6 At the same time as pressing down on
the trigger make sure that the latch &
lever is located around the wedge arm
and that the gears are in mesh on the
opposite side of the OSG. Please note
the images below show the OSG removed
from the carriage, to make it clearer.
7 Re-fit the Power Bogie outers back onto
the carriage.
8 Switch on the lift using the holding switch
located on the seat arm/ back of the seat
cover.
9 Run the lift an upward direction using the
direction controller.
WEDGE ARM
5 Press down on the White trigger into its
normal operating position ensuring the
teeth of the regulator stay clear of the
gear.
TRIGGER
White
CAM GEAR
Correct position of
regulator and gearing
4 Whilst keeping the reset lever held hand
wind the stair lift in an upwards direction
until OSG wedges release and the
regulator weight is in a horizontal position
(normal operating position) ensuring the
teeth of the regulator are clear of the
Cam gear. Once set, release the reset
lever.
LATCH & LEVER
Located around the
wedge arm