54
ACORN 80 Maintenance & Service Manual
THE LEVELLING MOTOR AND ENCODER AND GEARBOX MUST BE REPLACED AS A
COMPLETE ASSEMBLY. THEY MAY BE REMOVED WITHOUT REMOVING THE LEVELLING
BOGIE FROM THE CARRIAGE.
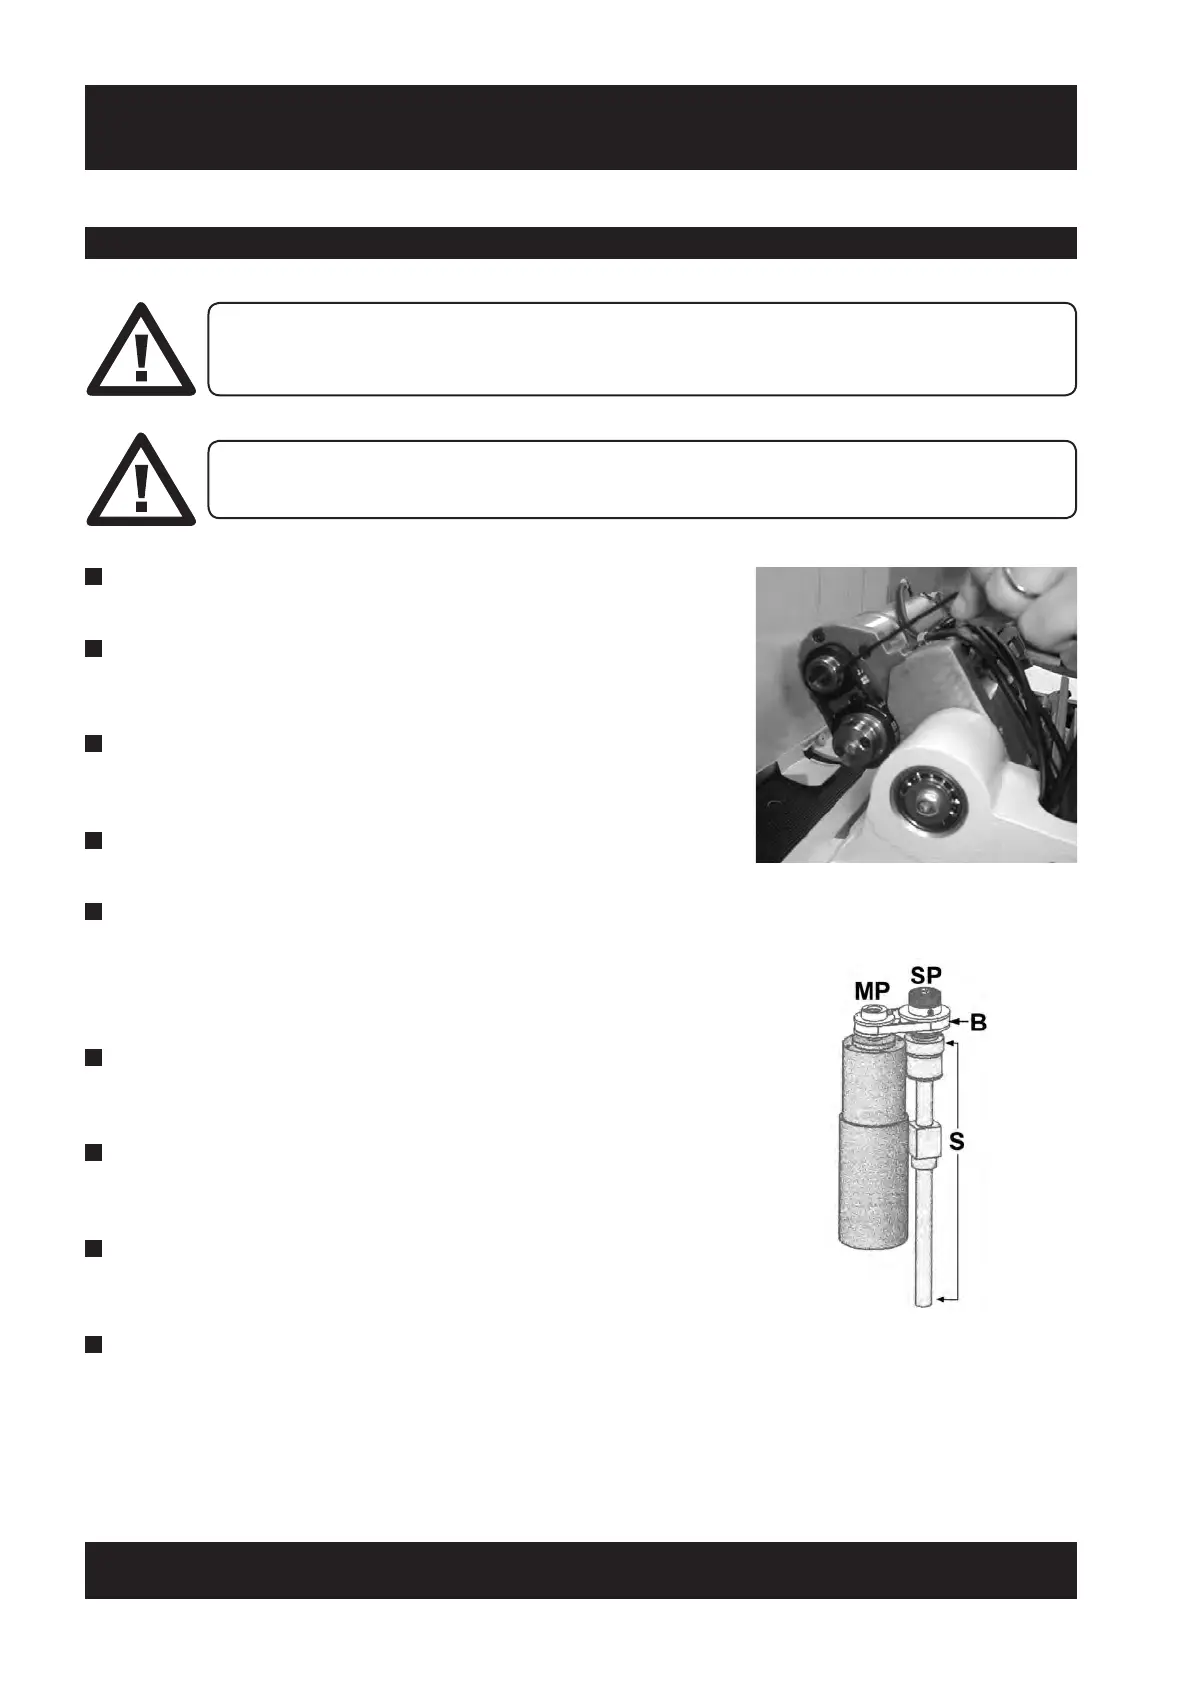
1 Disconnect the Motor and Motor Encoder from the main PCB.
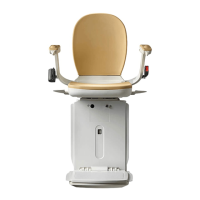
2 Remove the motor pulley (MP) and ball-screw pulley (SP) together
with the timing belt (B).
3 Unscrew the four cap screws and remove the motor from the
centre block.
4 Inspect the timing belt and renew if necessary.
5 Inspect the levelling screw (S) and renew if necessary. Note that
the Ball screw unit MUST BE REPLACED AS A COMPLETE UNIT
– Do not attempt to remove the ball screw bearing from the
levelling screw.
6 Apply thread-locking compound to the four cap screws and refit the
motor to the centre block.
7 Refit the motor pulley and ball-screw pulley together with the
timing belt.
8 Levelling Motor marked LEVEL MOTOR POSITIVE and LEVEL
MOTOR NEGATIVE on the main PCB.
9 Reconnect the levelling Motor Encoder to terminal marked LEVEL
MOTOR ENCODER on the main PCB.
7.8.6 Levelling Drive Unit
SECTION 7
Dismantling Components
BEFORE CARRYING OUT THE FOLLOWING PROCEDURE, REFER TO INSTRUCTIONS
IN APPENDIX 9.