Section 1 Getting Started
7
Ready to record
1 Open the GENEActiv software and connect the charging cradle to a USB port. Insert a GENEActiv device into
the cradle. The software will display information about the device and any data previously stored on it will be
shown.
2 Click ‘Config. Setup’ from the left-hand menu. This page allows you to set recording options and to enter
information about the trial and test subject. A few fields must be completed for the device to operate, the rest
can be filled in where appropriate.
3 Select ‘Measurement Frequency’ (the measurement frequency selected will
determine the maximum time data can be recorded for, lower frequency =
longer time).
– Select ‘Measurement Period’ (this can be anything between an hour and the
maximum period displayed just above).
– Select ‘Local PC Time’
– Select when you want the recording to start, ‘On Button Press’, ‘Immediately’
on ‘Disconnect’, or ‘At Future Time’. If you select ‘On Button Press’, a
further option, ‘Allow Stop and Restart’, will appear. This is useful for lab
experiments but during actual user trials could lead to recording being
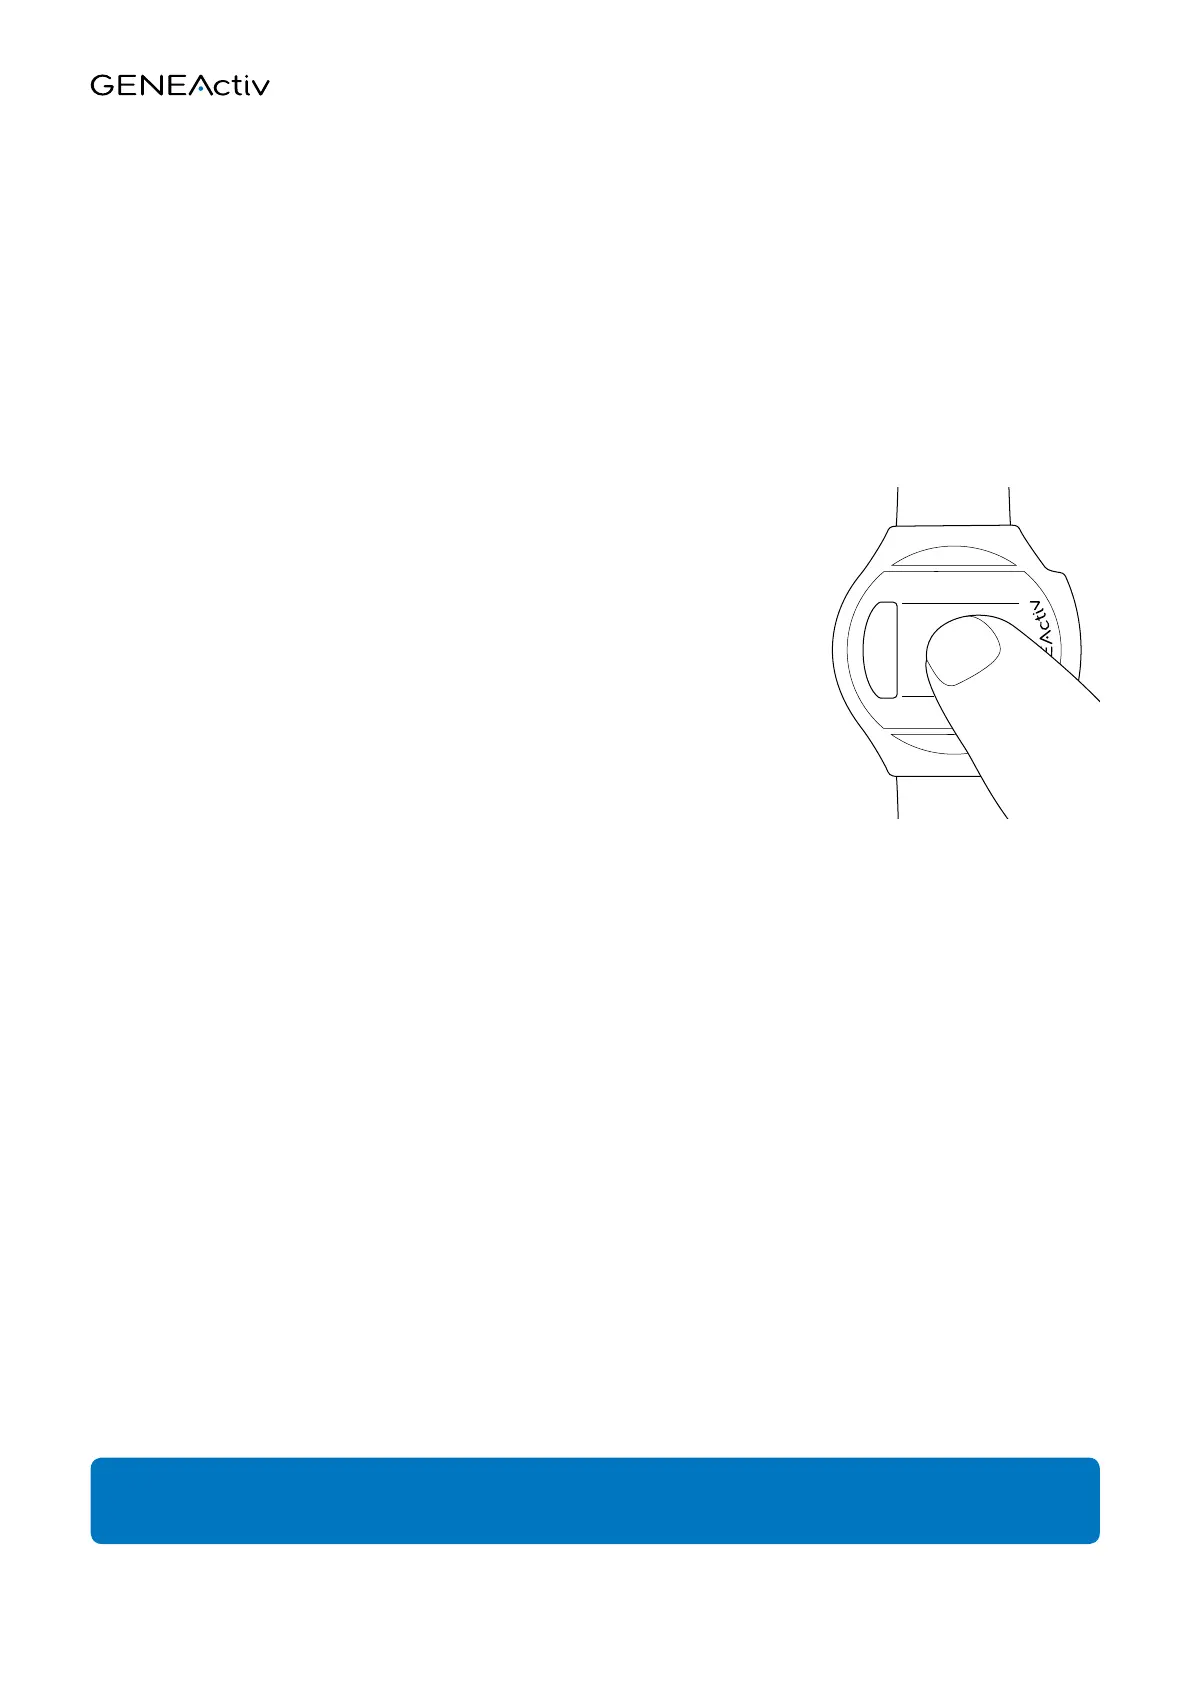
stopped by an accidental button press. The button is hidden under the serial
number and requires a firm press to avoid accidental activation.
– Enter any further information as required (note that some fields such as Age and BMI are
self-calculating).
4 To configure the GENEActiv and get it ready to record, select the serial number of the device in the Devices box
in the bottom right-hand corner of the screen (the serial number is printed on the front of the device).
5 Click Erase & Configure. Pop-up windows will advise you of any problems (such as mandatory information
missing or low battery charge), and warn that configuring will erase any existing data. The configuration will
take about 10 seconds and a pop-up will confirm that it has been completed successfully.
6 The GENEActiv device can now be disconnected and will either start recording immediately, or wait for a button
press, or wait for the selected time, depending on which option was chosen in step 3. If immediate start or
timed start were chosen, the button and lights are disabled. If button press mode was selected, when the
button is pressed the green light will give a long flash to show that recording has started (and if Allow Stop &
Restart has been selected, pressing the button again will stop recording and the red light will give a long flash).
7 Recording will stop either after the time selected, or if the button is used to stop it, or if the device is
reconnected to a USB port.
IMPORTANT : If the device is reconnected to the charge cradle, once it has started recording, it will stop
recording and require reconfiguring.
 Loading...
