8
Setup is Complete
The rain gauge will now synchronize with the display. It may take a few minutes
for synchronization to complete. Please refer to the troubleshooting section of this
manual if anything appears to be functioning improperly.
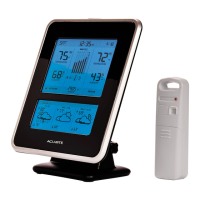
INSTALL 2 SCREWS USING
HAND TOOLS ONLY.
THEN RE-ATTACH UPPER CASING
SQUEEZE
SQUEEZE TABS TO OPEN
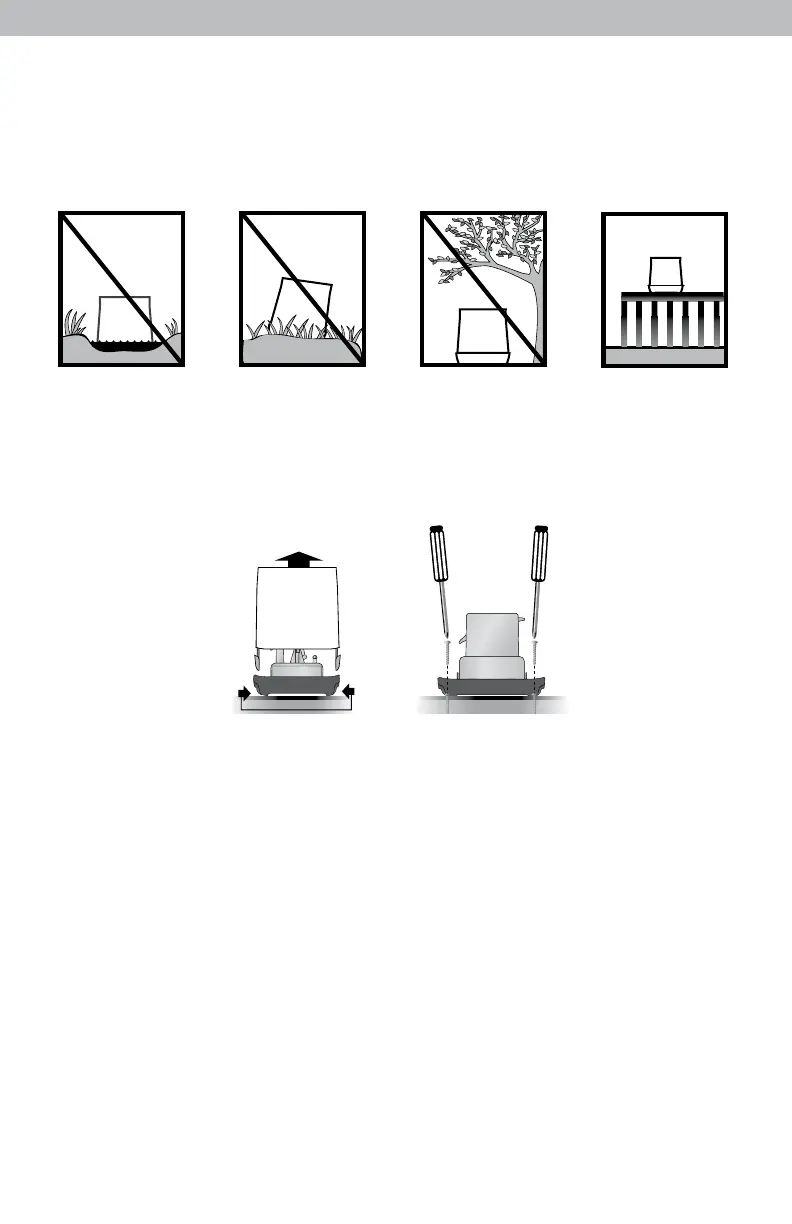
DO NOT
PLACE IN WATER OR
IN UNEVEN OR LOW
SPOTS THAT MAY
BECOME FLOODED.
DO
PLACE ON A LEVEL
SURFACE AT LEAST
3 FEET FROM THE
GROUND WITH NO
OBSTRUCTIONS ABOVE.
DO NOT
PLACE IN AREAS WHERE
PLANT GROWTH CAN
GROW INTO CASE AND
OBSTRUCT RAIN FLOW
THROUGH COLLECTOR
DO NOT
PLACE IN AN
AREA WITH
OBSTRUCTIONS ABOVE
OK
1. Separate the rain gauge cover from the rain gauge base.
2. Locate the two holes on the rain gauge base.
3. Fasten the rain gauge base to a sturdy surface, like a deck railing or a fence
post, with screws (included) using hand tools. (Power tools may slip during
installation, causing damage to the rain gauge.)
Rain Gauge Installation
• To ensure accurate rain measurement, the rain gauge MUST be
placed on a at, level surface.
• Ensure the rain gauge is not placed in a low spot that could become
ooded or in an area where there are obstructions above it.